Fuel Tank Replacement: Removal
- Relieve the fuel pressure (see FUEL PRESSURE RELIEVING
).
- Drain the fuel tank (see FUEL PRESSURE TEST
).
- Loosen the rear wheel nuts slightly, then raise the vehicle, and make sure it is securely supported. Remove the rear wheels.
- Release the parking brake.
- Remove the fuel tank covers (A).
 Courtesy of AMERICAN HONDA MOTOR CO., INC.
- Remove the exhaust muffler (see
EXHAUST PIPE AND MUFFLER REPLACEMENT
).
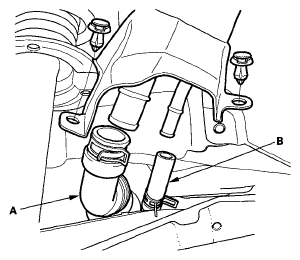
- Disconnect the fuel fill neck tube (A) and breather hose (B).
 Courtesy of AMERICAN HONDA MOTOR CO., INC.
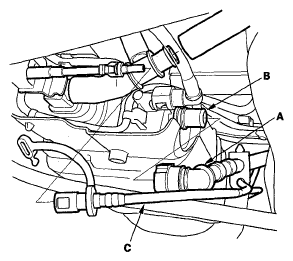
- Disconnect the vapor line (A) from the EVAP canister (B). Then disconnect the fuel line (C).
 Courtesy of AMERICAN HONDA MOTOR CO., INC.
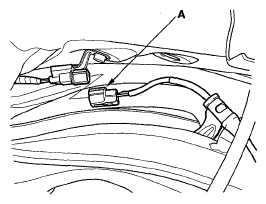
- Disconnect the wheel sensor 2P connector (A).
 Courtesy of AMERICAN HONDA MOTOR CO., INC.
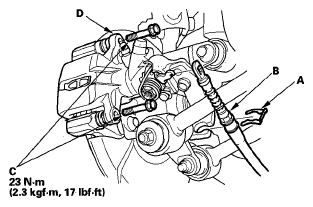
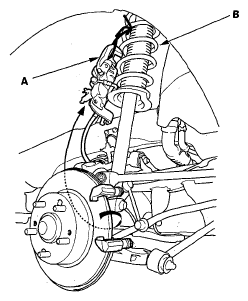
- Remove the clip (A), parking brake cable (B), two caliper bolts (C), and caliper body (D).
 Courtesy of AMERICAN HONDA MOTOR CO., INC.
- Remove the brake hose bracket (A).
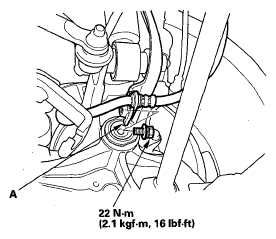 Courtesy of AMERICAN HONDA MOTOR CO., INC.
- Hook the caliper body (A) on the damper spring (B).
 Courtesy of AMERICAN HONDA MOTOR CO., INC.
- Remove the flange bolt (A).
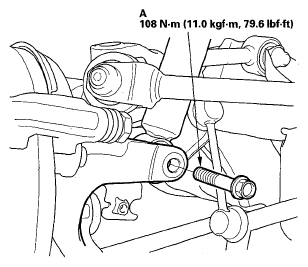 Courtesy of AMERICAN HONDA MOTOR CO., INC.
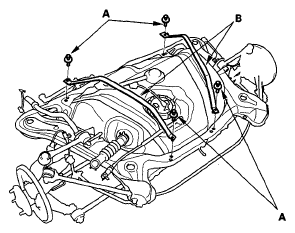
- Remove the parking brake cable bracket (A).
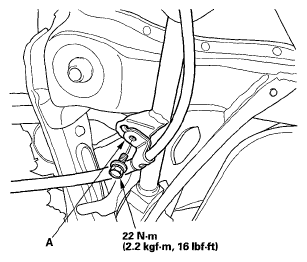 Courtesy of AMERICAN HONDA MOTOR CO., INC.
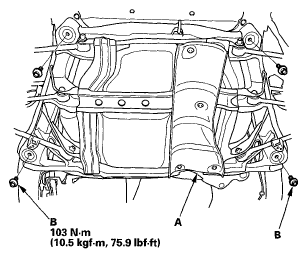
- Remove the heat shield (A). Place a jack or support under the suspension subframe. Remove the mounting bolts (B). Remove the rear suspension subframe.
 Courtesy of AMERICAN HONDA MOTOR CO., INC.
- Remove the bolts (A) and the fuel tank straps (B).
 Courtesy of AMERICAN HONDA MOTOR CO., INC.
- Lift the fuel tank out of the subframe.