Fuel Tank Replacement
- Drain the fuel tank (see
FUEL TANK DRAINING ).
- Reinstall the fuel tank unit without connecting quick-connect fittings and fuel tank unit 4P connector.
- Disconnect the secondary fuel gauge sending unit 4P connector (see step 5
).
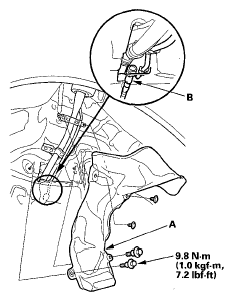
- Remove the fuel fill pipe cover (A).
 Courtesy of AMERICAN HONDA MOTOR CO., INC.
- Disconnect the quick-connect fitting (B).
- Lift the vehicle, and support it with jack stands.
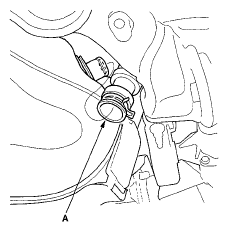
- Disconnect the fuel fill tube (A) from the fuel tank. Slide back the clamp, then twist the tube as you pull to avoid damage it.
 Courtesy of AMERICAN HONDA MOTOR CO., INC.
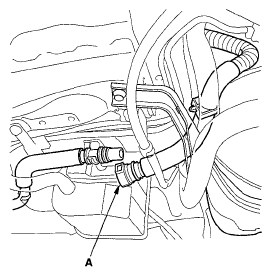
- Disconnect the fuel vent tube (A).
 Courtesy of AMERICAN HONDA MOTOR CO., INC.
- Remove the exhaust pipe (see
EXHAUST PIPE AND MUFFLER REPLACEMENT
).
- Remove the propeller shaft (see
PROPELLER SHAFT REMOVAL
).
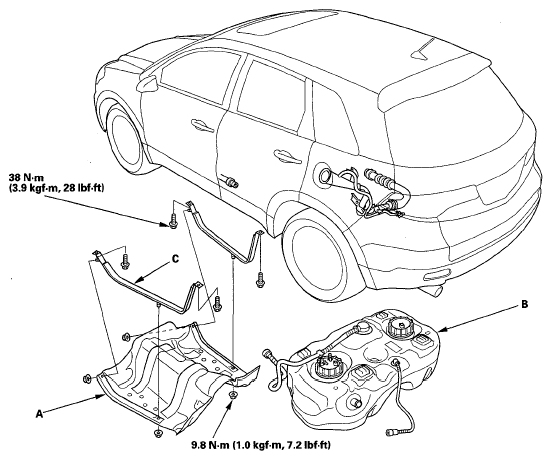
- Remove the fuel tank cover (A).
 Courtesy of AMERICAN HONDA MOTOR CO., INC.
- Place a jack or support under the fuel tank (B).
- Remove the strap bolts and straps (C).
- Remove the fuel tank.
- Install the parts in the reverse order of removal.