Alternator Disassembly
- Test the alternator and regulator before you remove them (see ALTERNATOR AND REGULATOR CIRCUIT TROUBLESHOOTING
).
- Remove the alternator (see ALTERNATOR REMOVAL AND INSTALLATION
).
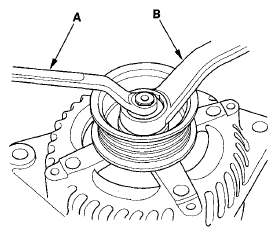
- If the front bearing needs replacing, remove the pulley locknut with a 10 mm wrench (A) and a 22 mm wrench (B). If necessary, use an impact wrench.
 Courtesy of AMERICAN HONDA MOTOR CO., INC.
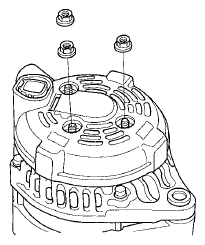
- Remove the three flange nuts.
 Courtesy of AMERICAN HONDA MOTOR CO., INC.
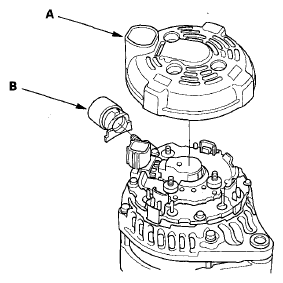
- Remove the end cover (A) and the insulator (B).
 Courtesy of AMERICAN HONDA MOTOR CO., INC.
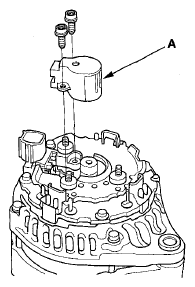
- Remove the brush holder (A).
 Courtesy of AMERICAN HONDA MOTOR CO., INC.
- Remove the four bolts, then remove the rear housing assembly (A) and washer (B).
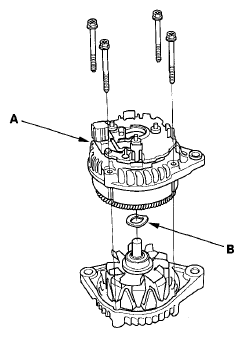 Courtesy of AMERICAN HONDA MOTOR CO., INC.
- If you are not replacing the front bearing, go to step 1. Remove the rotor from the drive-end housing.
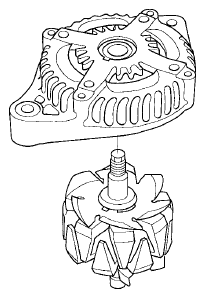 Courtesy of AMERICAN HONDA MOTOR CO., INC.
- Inspect the rotor shaft for scoring, and inspect the bearing journal surface in the drive-end housing for seizure marks.
- If the rotor is damaged, replace the rotor assembly.
- If the rotor is OK, go to step 10.
- Remove the front bearing retainer plate.
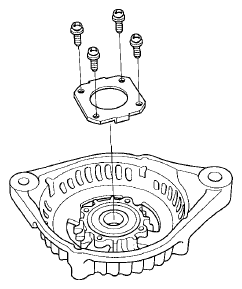 Courtesy of AMERICAN HONDA MOTOR CO., INC.
- Drive out the front bearing with a brass drift and hammer.
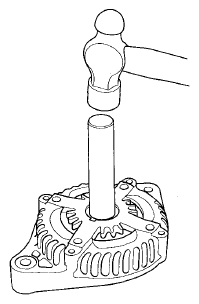 Courtesy of AMERICAN HONDA MOTOR CO., INC.
- Install a new front bearing in the drive-end housing with a hammer, the driver handle, and attachment (42 x 47 mm).
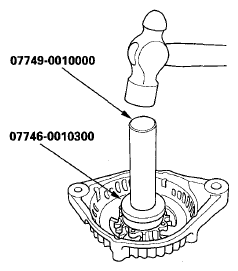 Courtesy of AMERICAN HONDA MOTOR CO., INC.