Oil Pan Removal
- If the engine is already out of the vehicle, go to step 6
- Raise the vehicle on the lift
- Drain the engine oil (see
ENGINE OIL REPLACEMENT
)
- Remove the splash shield (see
FRONT SPLASH SHIELD REPLACEMENT
)
- Remove exhaust pipe A (see step 35 on
ENGINE REMOVAL
)
- Remove the rear warm up three way catalytic converter (rear WU-TWC) bracket
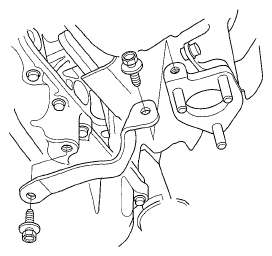 Courtesy of AMERICAN HONDA MOTOR CO., INC.
- Remove the crankshaft position (CKP) sensor cover (A) and the bolt (B), then disconnect the CKP sensor connector (C)
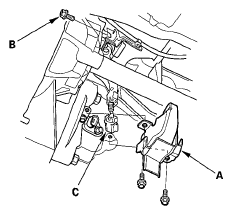 Courtesy of AMERICAN HONDA MOTOR CO., INC.
- Remove the torque converter cover (A) and the four bolts (B) securing the transmission
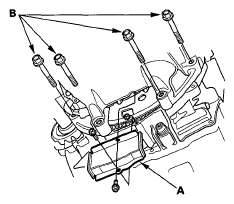 Courtesy of AMERICAN HONDA MOTOR CO., INC.
- Remove the bolts securing the oil pan
- Using a flat blade screwdriver, separate the oil pan from the engine block in the places shown
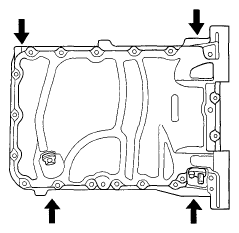 Courtesy of AMERICAN HONDA MOTOR CO., INC.
- Remove the oil pan