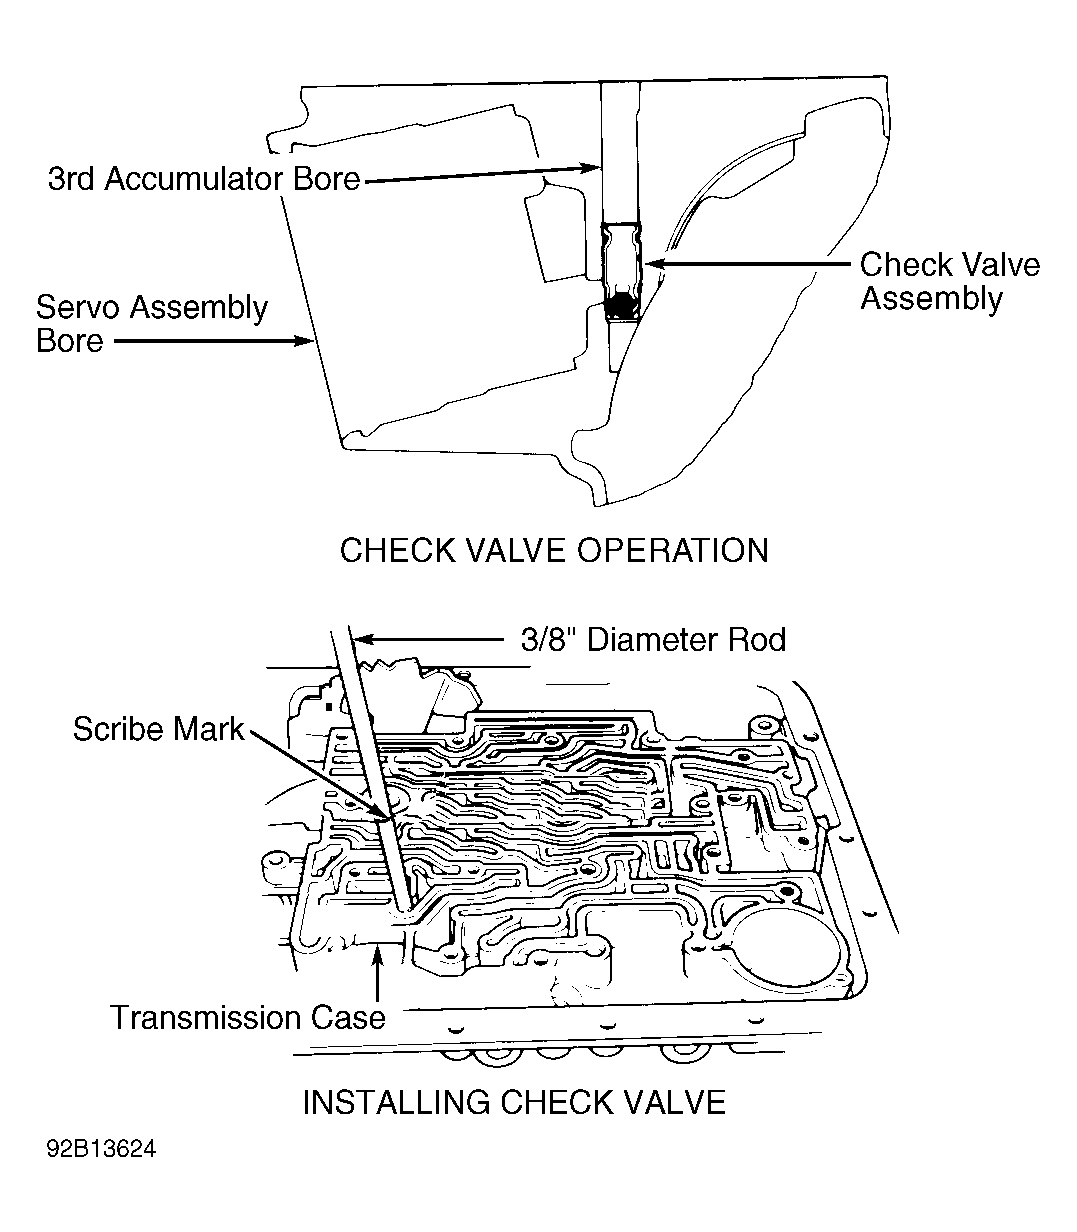
3RD Accumulator Check Valve
- Check 3rd accumulator check valve before removing it. DO NOT
remove check valve unless it is leaking. Install servo assembly in bore. Install servo cover and retaining ring. See Figure
. Pour clean solvent in bore. Inspect for leaks in transmission case. Replace check valve assembly if it leaks. See Fig 1
. Remove servo assembly.
- For check valve removal, install No. 4 screw extractor in check valve assembly. Remove check valve. Ensure bore is free of burrs. Installation tool must be made to ensure proper installation depth is obtained. Using a 3/8" O.D. rod, scribe indicator mark at 1.653" (41.98 mm) from end of rod. Install check valve until scribe mark on rod is flush with case. See Fig 1
.
 Courtesy of GENERAL MOTORS CORP.