Steering Linkage Inner Tie Rod Replacement
 Courtesy of GENERAL MOTORS COMPANY
 Steering Linkage Inner Tie Rod Replacement
| Callout |
Component Name |
|
Preliminary Procedures
- Raise and support the vehicle. Refer to Lifting and Jacking the Vehicle
.
- Remove the steering gear boot. Refer to Steering Gear Boot Replacement .
|
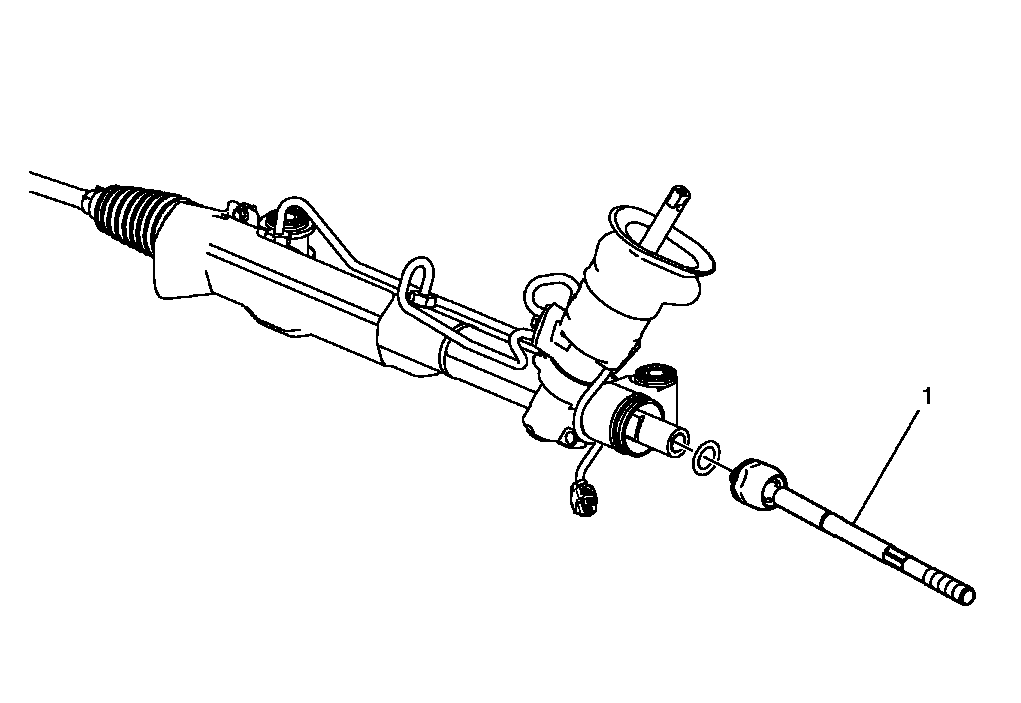
| 1 |
Steering Linkage Inner Tie Rod
Procedure
- Place a wrench on the flats of the steering linkage inner tie rod housing.
- Rotate the steering linkage inner tie rod housing counterclockwise in order to remove the steering linkage inner tie rod from the rack.
- Rotate the steering linkage inner tie rod housing clockwise in order to install the steering linkage inner tie rod to the rack. Use the CH-6321
wrench and a torque wrench in order to tighten the steering linkage inner tie rod to the specification.
- After the installation is complete, measure and adjust the front toe. Refer to Wheel Alignment - Steering Wheel Angle and/or Front Toe Adjustment
.
TIP:
A 2.5 mm shim is used for vehicles with wheels up to 18 inches and a 5.6 mm shim is used for vehicles with 19 inch and 20 inch wheels.
Tighten
100 N.m (74 lb ft)
Special Tools
CH-6321
Inner Tie Rod Wrench
For equivalent regional tools, refer to Special Tools . |