DTC B1805: Ignition Switch Problem: Testing
- If body control system diagnostic system check has been performed, go to next step. If body control system diagnostic system check has not been performed, go to BODY CONTROL SYSTEM DIAGNOSTIC SYSTEM CHECK
under SELF-DIAGNOSTIC SYSTEM.
- Connect scan tool to Data Link Connector. See Figure
. Turn ignition off. Using scan tool, select DASH INTEGRATION MODULE data list. Monitor IGNITION SWITCH parameters. If all IGNITION SWITCH parameters display INACTIVE, go to next step. If all IGNITION SWITCH parameters do not display INACTIVE, go to step 7
.
- Turn ignition on. With the scan tool observe the ignition switch parameters. Monitor IGNITION SWITCH parameters. If all IGNITION SWITCH parameters display ACTIVE, go to next step. If all IGNITION SWITCH parameters do not display ACTIVE, go to step 9
.
- Turn ignition to CRANK position. Monitor IGNITION SWITCH parameters. If only RUN/CRANK and IGN. UNLOCK parameters display ACTIVE, go to next step. If only RUN/CRANK and IGN. UNLOCK parameters do not display ACTIVE, go to step 7
.
- Turn ignition to UNLOCK position. If only IGN. UNLOCK parameter displays ACTIVE, go to next step. If only IGN. UNLOCK parameter does not display ACTIVE, go to step 7
.
- Turn ignition to ACCY. position. If only IGN. ACCESSORY parameter does not display ACTIVE, go to next step. If only IGN. ACCESSORY parameter displays ACTIVE, go to step 11
.
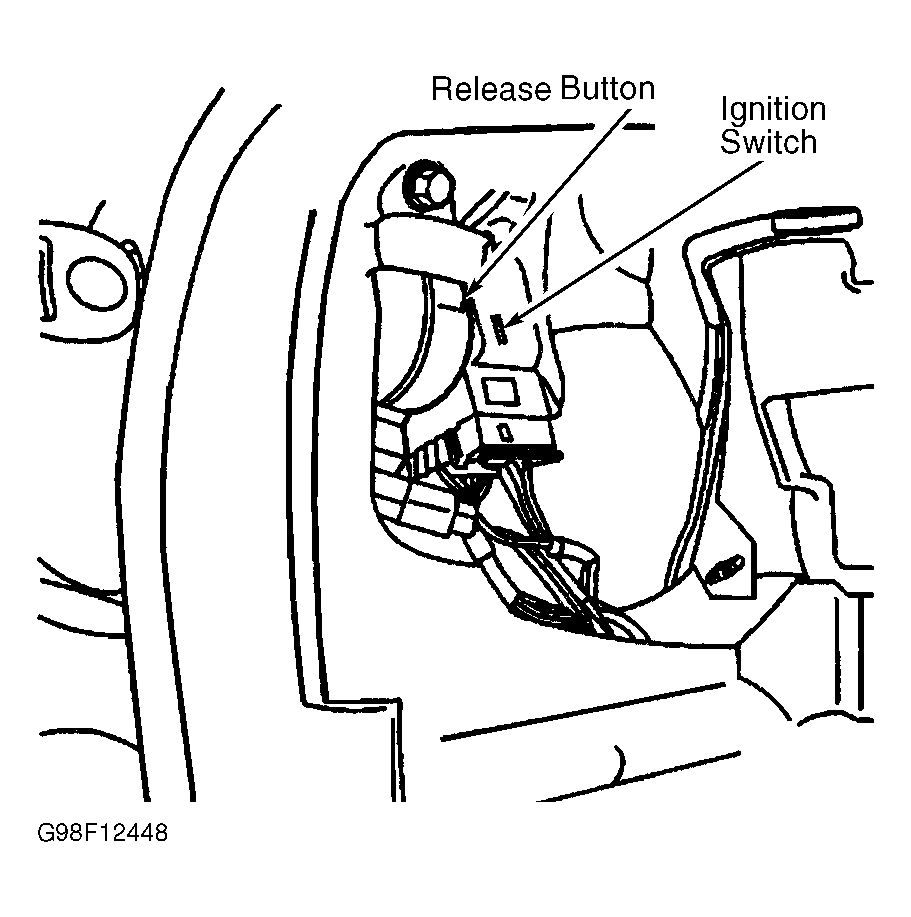
- Turn ignition off. Remove radio for access and disconnect ignition switch connectors. See Fig 1
. See RADIO
under REMOVAL & INSTALLATION. Monitor IGNITION SWITCH parameters. If previously ACTIVE parameters do not change to INACTIVE, go to next step. If previously ACTIVE parameters change to INACTIVE, go to step 10
.
- Check for short to voltage in Pink, Brown, Orange, Yellow or White wires between ignition switch connectors and DIM connector C2. See WIRING DIAGRAMS
. If circuits are okay, go to step 11
. If faulty circuit is found and repaired, go to step 14
.
- Check for open or high resistance in Pink, Brown, Orange, Yellow or White wires between ignition switch connectors and DIM connector C2. See WIRING DIAGRAMS
. If circuits are okay, go to step 11
. If faulty circuit is found and repaired, go to step 14
.
- Check for poor connections at ignition switch connector. If connections are okay, go to step 12
. If faulty connections are found and repaired, go to step 14
.
- Check for poor connections at DIM connector. If connections are okay, go to step 13
. If faulty connections are found and repaired, go to step 14
.
- Replace ignition switch. See IGNITION SWITCH under REMOVAL & INSTALLATION in ANALOG INSTRUMENT PANELS - SEVILLE article. After repairs, go to step 14
.
- Replace DIM. See DASH INTEGRATION MODULE (DIM)
under REMOVAL & INSTALLATION. After repairs, go to next step.
- Use scan tool to clear DTCs. Recheck system operation for module that set DTC. Recheck for DTC. If DTC B1805 resets, go to step 2
. If DTC does not reset, repair is complete.
 Courtesy of GENERAL MOTORS CORP.