Removal Procedure
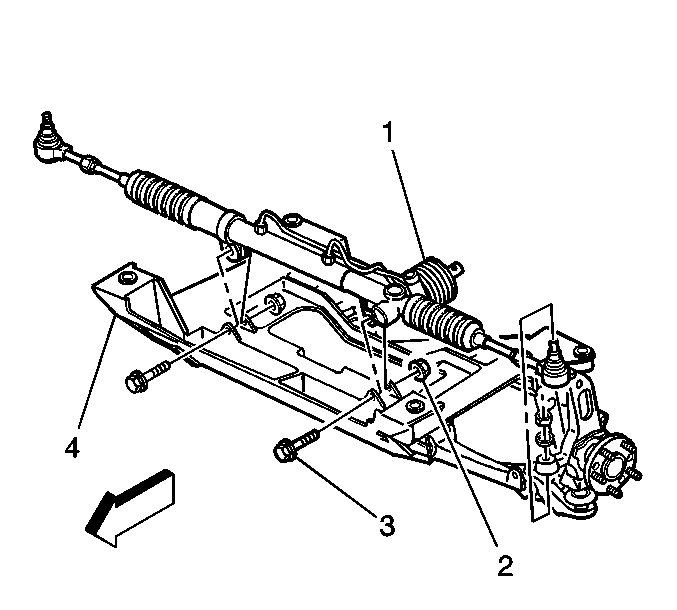 Courtesy of GENERAL MOTORS CORP.
- Raise and support the vehicle. Refer to Lifting and Jacking the Vehicle
.
- Remove the tires and wheels. Refer to Tire and Wheel Removal and Installation
.
- Disconnect the tie rod ends from the steering knuckles. Refer to Steering Linkage Outer Tie Rod Replacement .
- Disconnect the intermediate shaft from the power steering gear. Refer to Intermediate Steering Shaft Replacement
.
- Remove the stabilizer shaft. Refer to Stabilizer Shaft Replacement
.
- Remove the power steering pressure and return hoses from the power steering gear.
- Remove the power steering line hold-downs from the crossmember.
- Remove the brake pressure modulator valve (BPMV) bracket. Refer to Brake Pressure Modulator Valve Bracket Replacement
.
- Remove the two front crossmember mounting nuts.
- Using hand tools only, LOOSEN, Do Not Remove, the two rear crossmember mounting nuts 10 mm (0.394 inch).
- Disconnect the height sensor arm to the control arm.
- Use a utility stand to support the front of the crossmember.
- Using the J 33432-A
, by compressing the coil spring, it will allow the crossmember to lower enough to properly remove the gear.
- Remove the lower shock mounting bolts.
- Remove the brake pipe bracket for the left front brake caliper from the crossmember.
- Remove the plastic brake pipe hold-down for the right front brake pipe.
- Remove the power steering gear mounting bolts (3) and nuts (2).
- Maneuver the power steering gear around the brake lines (1) from the vehicle through the left wheelhouse opening.