STOPLAMP Switch
- Disconnect the negative battery cable. Remove the knee bolster. See KNEE BOLSTER
under REMOVAL & INSTALLATION.
- Remove the following components from the instrument panel carrier: left side air duct plastic retainer, the screw holding the left side air outlet duct, and the side air outlet duct.
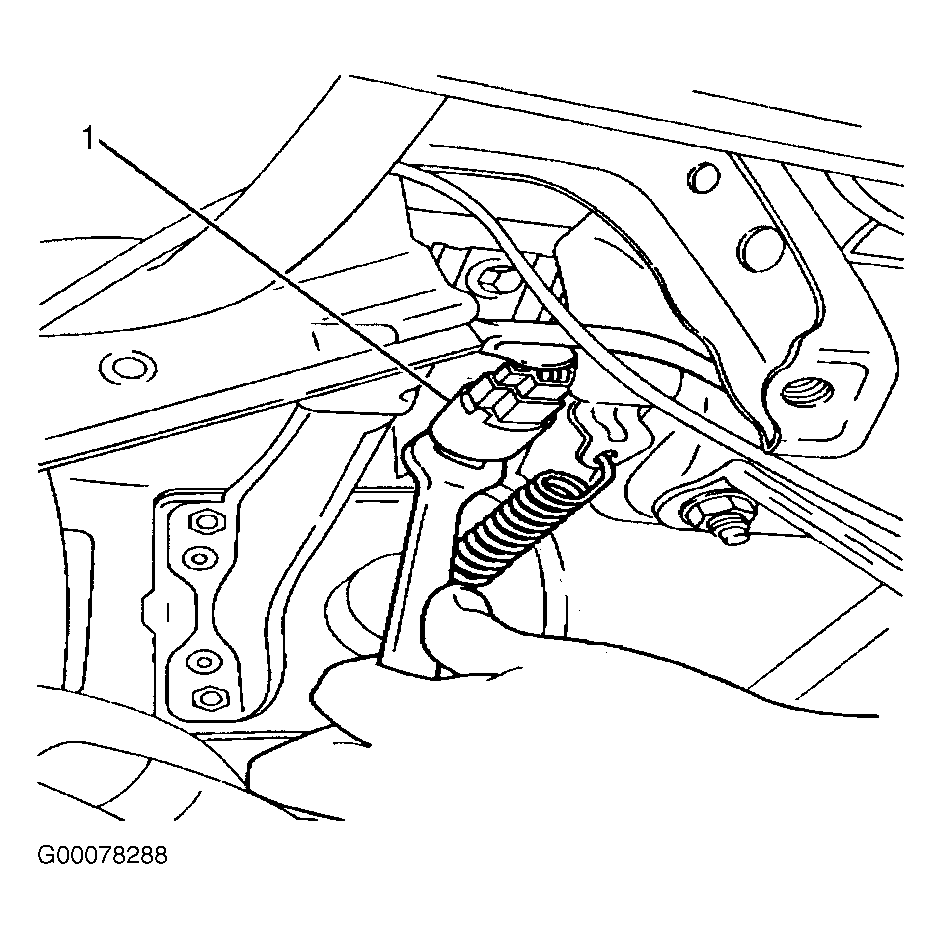
- Disconnect the stoplamp switch electrical connector. Loosen the lock nut for the stoplamp switch (1). See Fig 1
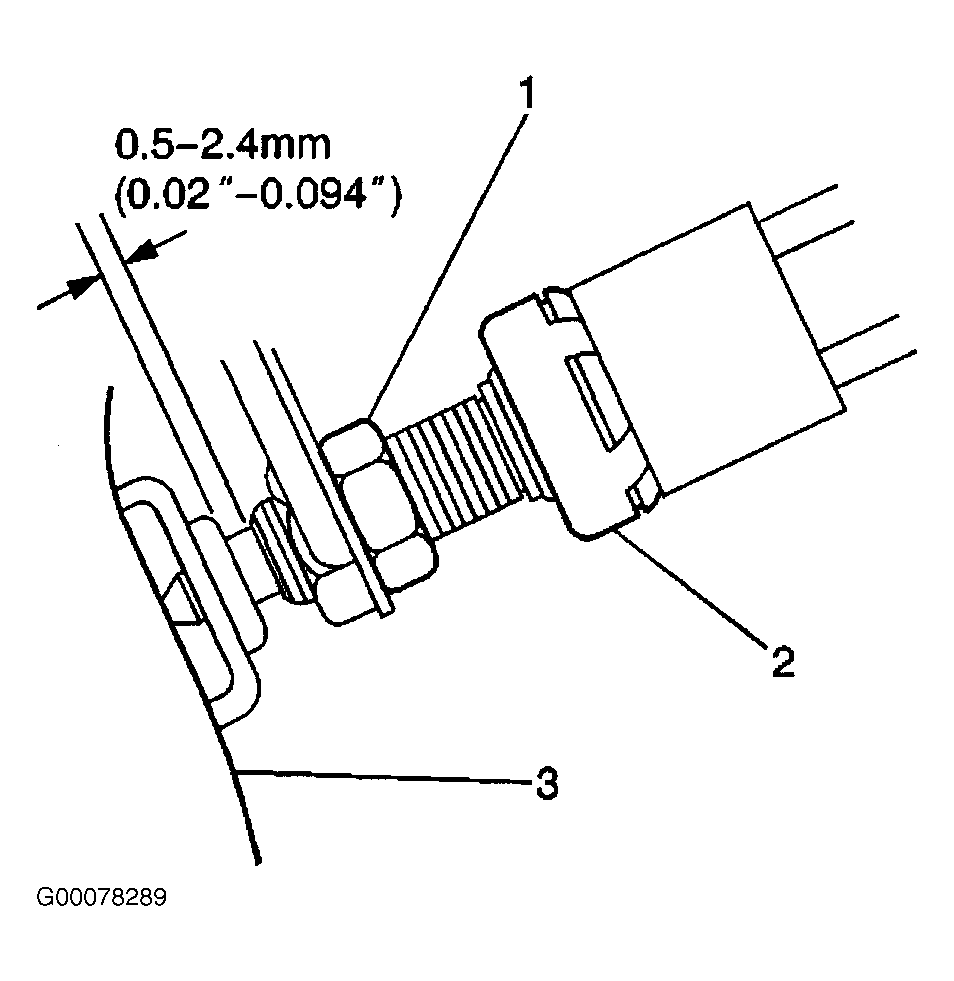
. Connect the stoplamp switch electrical connector. Connect the negative battery cable. Turn the stoplamp switch (2) until the switch lightly contacts the pedal stopper. See Fig 2
. Turn the stoplamp switch back one turn.
- Verify the distance between the end of the stoplamp switch plunger and the end of the threaded portion of the stoplamp switch is within 0.02-0.094" (0.5-2.4 mm). Tighten the lock nut for the stoplamp switch to 89 INCH lbs. (10 N.m).
- Inspect the operation of the stoplamps in order to verify the adjustment of the stoplamp switch. If the stoplamps illuminate when the brake pedal is depressed, the operation is normal. If the stoplamps do not illuminate when the brake pedal is released, the operation is normal.
- Install the left side air outlet duct to the instrument panel. Secure the outlet duct with the screw. Install the left side air outlet duct to the instrument panel. Install the air duct plastic retainer and the knee bolster. See KNEE BOLSTER
under REMOVAL & INSTALLATION.
 Courtesy of GENERAL MOTORS CORP.
 Courtesy of GENERAL MOTORS CORP.