Body Side Window Replacement
Body Side Window Replacement
Special Tools
J 34940 Rivet Gun
Removal Procedure
Note: Before cutting out a stationary window, apply a double layer of masking tape around the perimeter of the painted surfaces and inner trim of the window.
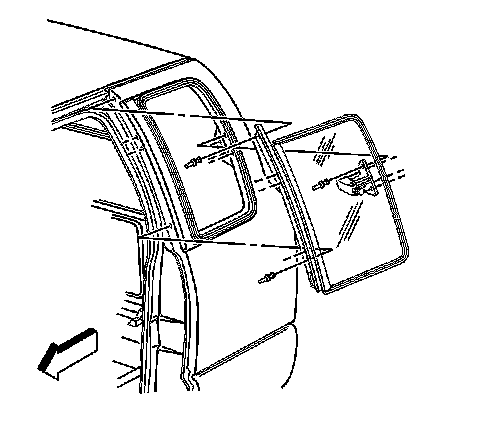
1. Carefully spread the handle retainer outward in order to release the latch pin from the latch.
2. Remove the latch pin from the latch.
3. Remove the seat belt retractor. Refer to Driver or Passenger Seat Belt Replacement (Crew Cab) Driver or Passenger Seat Belt Replacement (Crew Cab)Driver or Passenger Seat Belt Replacement (Regular and Extended Cab) Driver or Passenger Seat Belt Replacement (Regular and Extended Cab).
4. Open the door in order to access the rivets.
Warning
If broken glass falls into the defroster outlets, it can be blown into the passenger compartment and cause personal injury.
5. Cover to protect the following parts from broken glass:
* Upper dash pad
* Defroster outlets and A/C outlets
* Seats and carpeting
Warning: Refer to Glass and Sheet Metal Handling Warning Glass and Sheet Metal Handling Warning.
6. Drill out the rivets retaining the window assembly.
7. Thoroughly clean all metal particles that may have lodged inside the body panel.
8. Remove the window assembly from the vehicle.
Installation Procedure
1. Install the window assembly to the vehicle.
2. Using the J 34940 , or equivalent, install the rivets in order to retain the window assembly to the vehicle.
3. Install the seat belt retractor. Refer to Driver or Passenger Seat Belt Replacement (Crew Cab) Driver or Passenger Seat Belt Replacement (Crew Cab)Driver or Passenger Seat Belt Replacement (Regular and Extended Cab) Driver or Passenger Seat Belt Replacement (Regular and Extended Cab).
4. Install the latch pin.
Using a punch, carefully drive the pin into the latch.