Steering Column - Raider: Reassembly
- To reassemble, reverse disassembly procedure. Install upper boot on steering shaft "C" and lower boot and dust cover on steering shaft "D". Leave boots on shafts without assembling them to the universal joint.
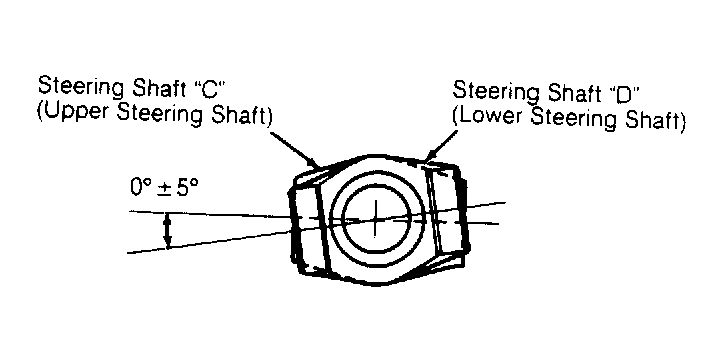
- Apply multipurpose grease to steering shafts "C" and "D" prior to installation. Install steering shaft "D" in steering shaft "C" so yoke of steering shaft "D" is properly positioned with yoke of steering shaft "C". See Fig 1.
- When installing upper and lower boots and dust cover, align arrow on boots with slit area on the yoke. During lever assembly and plate assembly installation, apply grease to cam area of lever assembly, plate clevis pin and the space between clevis pin and return spring.
- Apply grease to plate bolt hole areas of mounting plate and steering column "B". When installing mounting plate bolts, tighten bolts until bolt heads twist off.
- Apply grease to dust cover grommet, dust seal and steering shaft "A" prior to installation. Align steering lock with column boss. Ensure steering lock is operational. Tighten bolt until bolt head breaks off.
- When installing steering shaft "A" in steering column, ensure projected area on dust seal aligns with notch of steering column "A". Apply grease to steering shaft bushings prior to installation.
- Assemble steering column "A" with steering column "B" so that Yellow line on steering shaft "B" aligns with yoke groove in steering shaft "A". Apply thread sealant to bolts and nuts of steering column "B".
- Install NEW clevis pin until pin is even with steering column "B". Align White line on steering shaft "B" with yoke groove of steering shaft "C."
 Courtesy of MITSUBISHI MOTOR SALES OF AMERICA