Valve Clearance
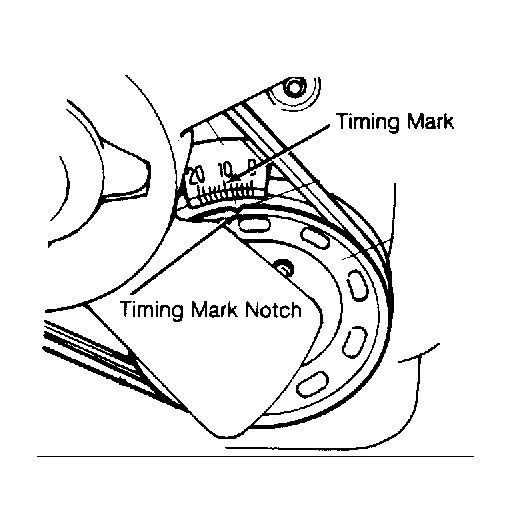
- Remove negative battery cable and valve cover. Rotate engine until zero degree mark on timing belt cover is aligned with timing mark groove on crankshaft pulley. See Fig 1
.
- Ensure cylinder No. 1 is at TDC by removing distributor cap and ensuring rotor is pointed at No. 1 spark plug wire terminal. If rotor does not point to No. 1 terminal, rotate crankshaft one revolution (360 degrees).
- Check intake valve clearances of cylinders No. 1 and 2, and exhaust valve clearances of cylinders No. 1 and 3. Turn crankshaft one complete revolution (360 degrees). Check intake valve clearances of cylinders No. 3 and 4, and exhaust valve clearances of cylinders No. 2 and 4.
- Adjust valves by loosening lock nut and turning adjustment screw until clearance is at specification. See VALVE CLEARANCE SPECIFICATIONS
table. Hold adjustment screw while tightening lock nut and recheck clearance.
 Courtesy of GENERAL MOTORS CORP.
 VALVE CLEARANCE SPECIFICATIONS
| Application |
Clearance In. (mm) |
| Intake |
.005-.006 (.13-.15) |
| Exhaust |
.007-.008 (.16-.20) |