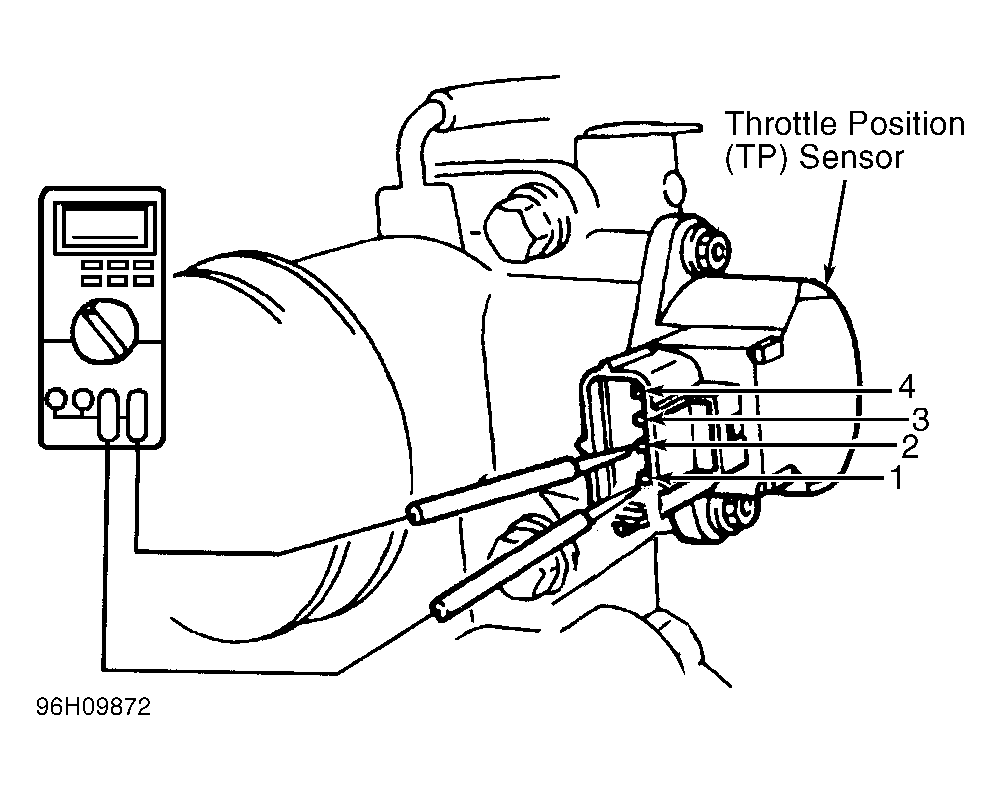
TP Sensor Adjustment
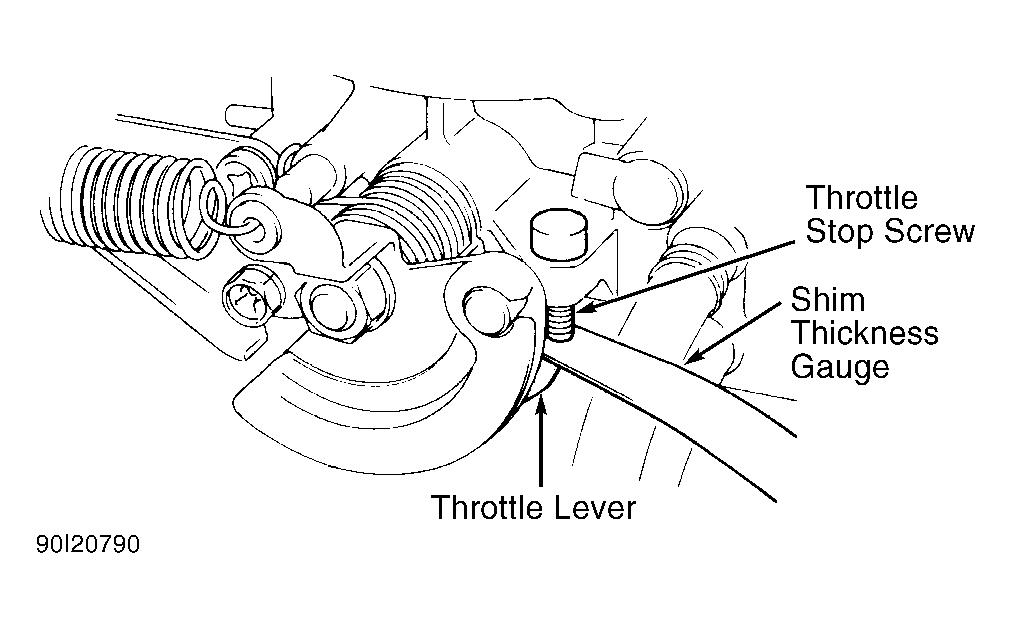
- Disconnect negative battery cable. Unplug TP sensor connector and insert 0.026" (0.65 mm) shim thickness gauge between throttle lever and throttle stop screw. Loosen TP sensor mounting screws. Using ohmmeter, check resistance between TP sensor terminals No. 1 and 2. See THROTTLE POSITION SENSOR RESISTANCE
table.
- Turn TP sensor fully counterclockwise and then turn it clockwise slowly to locate point where ohmmeter reading changes from zero to infinity. Holding TP sensor at that position, tighten TP sensor mounting screws snug.
- Ensure continuity does not exist between terminals No. 1 and 2 when 0.031" (0.8 mm) shim thickness gauge is inserted between throttle lever and throttle stop screw. See Fig 1
& Fig 2
.
- Ensure continuity exists between terminals No. 1 and 2 when 0.020" (0.5 mm) shim thickness gauge is inserted between throttle lever and throttle stop screw. Tighten TP sensor mounting screws to 22.8-38.4 INCH lbs. (2.5-4.5 N.m).
- If continuity is not as specified in steps 3) and 4), TP sensor zero adjustment is incorrect. Start adjustment sequence again. If results are the same after readjusting, replace TP sensor. After final adjustment is completed, reconnect TP sensor connector.
 Courtesy of GENERAL MOTORS CORP.
 Courtesy of SUZUKI OF AMERICA CORP.
 THROTTLE POSITION SENSOR RESISTANCE
| Application |
Ohms |
| Between Terminals No. 1 & 2 |
| With .020" (.51 mm) Clearance At Stop Screw |
0-500 |
| With .031" (.79 mm) Clearance At Stop Screw |
Infinity |
| Between Terminals No. 1 & 3 |
| At Idle |
300-2000 |
| At Wide Open Throttle |
2000-6500 |
| Between Terminals No. 1 & 4 |
3500-6500 |
NOTE:
See PIN VOLTAGE CHARTS
article and appropriate wiring diagrams in WIRING DIAGRAMS
article for PCM connector and wire terminal identification.