Piston, Pin, and Connecting Rod Replacement: Disassembly
- Remove the piston from the engine block.
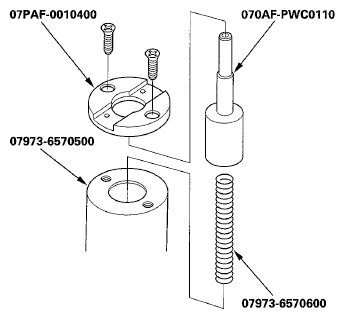
- Assemble the special tool as shown below.
 Courtesy of AMERICAN HONDA MOTOR CO., INC.
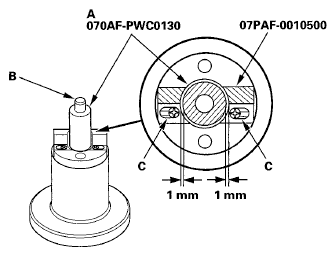
- Temporarily install the pilot collar, O.D. 18 mm (A) over the pilot pin (B), and adjust the piston base head (C) as shown, then tighten the screws (D). Remove the pilot collar.
 Courtesy of AMERICAN HONDA MOTOR CO., INC.
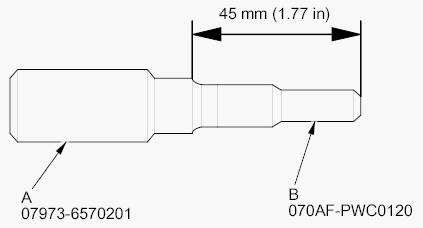
- Assemble and adjust the length of the adjustable piston pin driver head (A) and insert adjust (B) to 45 mm (1.77 in).
 Courtesy of AMERICAN HONDA MOTOR CO., INC.
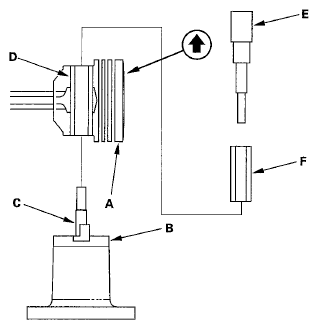
- With the arrow on top of the piston pointing up, place the piston/connecting rod assembly (A) on the piston base head (B). Be sure you position the recessed flat area of the piston against the area of the piston base head (C) as shown.
 Courtesy of AMERICAN HONDA MOTOR CO., INC.
- Press the piston pin (D) out with the adjustable piston pin driver head and insert adjust (E), the pilot collar (F), and a hydraulic press.