Fuel Tank Unit Removal and Installation: Removal
- Relieve the fuel pressure (see FUEL PRESSURE RELIEVING
).
- Remove the center console (see CENTER CONSOLE REMOVAL/INSTALLATION
).
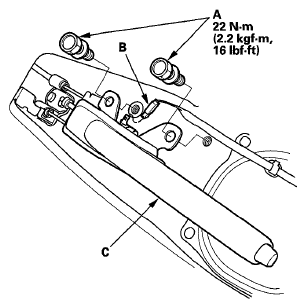
- Remove the bolts (A) and the wire harness (B), then remove the parking brake lever (C).
 Courtesy of AMERICAN HONDA MOTOR CO., INC.
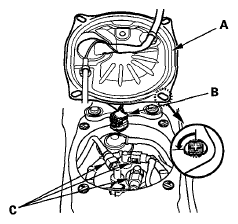
- Remove the access panel (A) from the floor.
 Courtesy of AMERICAN HONDA MOTOR CO., INC.
- Disconnect the fuel tank unit 4P connector (B).
- Disconnect the quick-connect fittings (C) from the fuel tank unit.
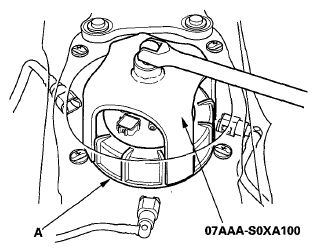
- Using the special tool, loosen the locknut (A).
 Courtesy of AMERICAN HONDA MOTOR CO., INC.
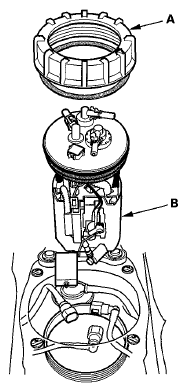
- Remove the locknut (A) and the fuel tank unit (B).
 Courtesy of AMERICAN HONDA MOTOR CO., INC.