Radiator Replacement
- Drain the engine coolant (see COOLANT CHECK
).
- Remove the air cleaner (see
AIR CLEANER REMOVAL/INSTALLATION
).
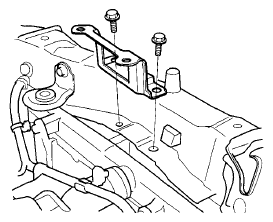
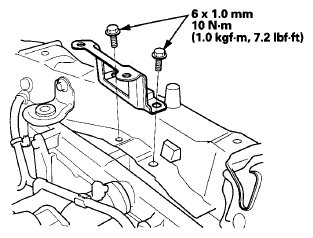
- Remove the air duct bracket.
 Courtesy of AMERICAN HONDA MOTOR CO., INC.
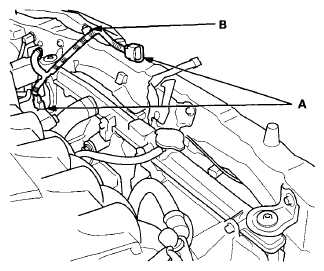
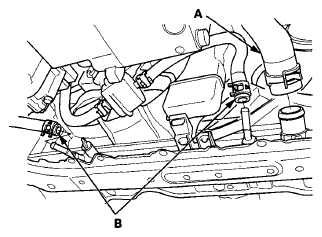
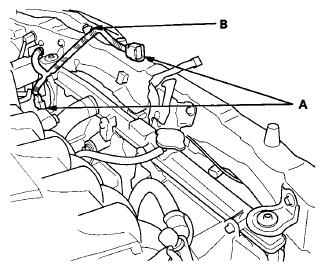
- Disconnect the fan motor connectors (A) and the harness clamp (B).
 Courtesy of AMERICAN HONDA MOTOR CO., INC.
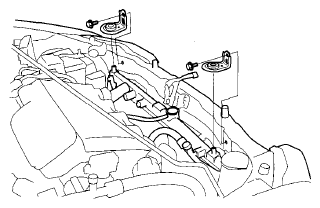
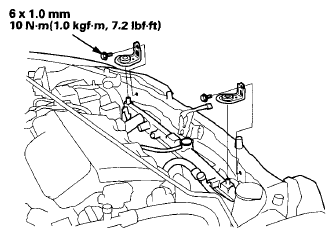
- Remove the radiator brackets.
 Courtesy of AMERICAN HONDA MOTOR CO., INC.
- Raise the vehicle on the lift.
- Remove the splash shield (see
SPLASH SHIELD REPLACEMENT
).
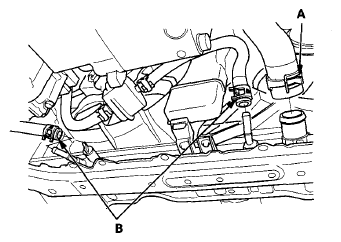
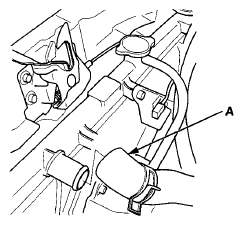
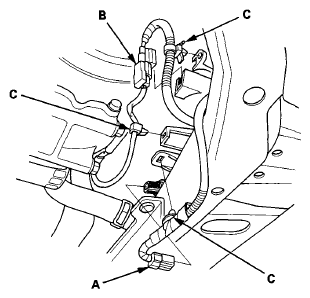
- Disconnect the ECT sensor 2 connector (A), and remove the A/C compressor clutch connector (B) from the clamp.
 Courtesy of AMERICAN HONDA MOTOR CO., INC.
- Remove the harness clamps (C).
- Disconnect the lower radiator hose (A).
 Courtesy of AMERICAN HONDA MOTOR CO., INC.
- Disconnect the CVTF cooler hoses (B), then plug the hose and line.
- Lower the vehicle on the lift.
- Disconnect the upper radiator hose (A).
 Courtesy of AMERICAN HONDA MOTOR CO., INC.
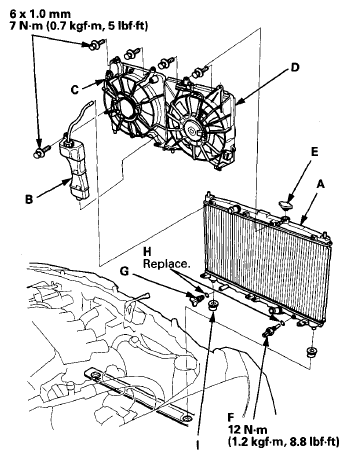
- Pull up the radiator (A), then remove the coolant reservoir (B), the radiator fan shroud assembly (C), the A/C condenser fan shroud assembly (D), the radiator cap (E), the ECT sensor 2 (F), and drain plug (G).
 Courtesy of AMERICAN HONDA MOTOR CO., INC.
- Reassemble the radiator with new O-rings (H).
- Install the radiator assembly. Make sure the lower cushions (I) are set securely.
- Connect the upper radiator hose (A).
 Courtesy of AMERICAN HONDA MOTOR CO., INC.
- Raise the vehicle on the lift.
- Connect the lower radiator hose (A).
 Courtesy of AMERICAN HONDA MOTOR CO., INC.
- Connect the CVTF cooler hoses (B).
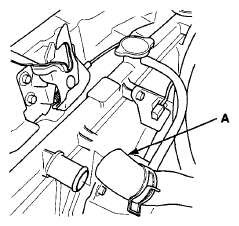
- Connect the ECT sensor 2 connector (A), and install the A/C compressor clutch connector (B) to the clamp.
 Courtesy of AMERICAN HONDA MOTOR CO., INC.
- Install the harness clamps (C).
- Install the splash shield (see
SPLASH SHIELD REPLACEMENT
).
- Lower the vehicle on the lift.
- Install the radiator brackets.
 Courtesy of AMERICAN HONDA MOTOR CO., INC.
- Connect the fan motor connectors (A) and the harness clamp (B).
 Courtesy of AMERICAN HONDA MOTOR CO., INC.
- Install the air duct bracket.
 Courtesy of AMERICAN HONDA MOTOR CO., INC.
- Install the air cleaner (see
AIR CLEANER REMOVAL/INSTALLATION
).
- Refill the radiator with engine coolant, and bleed the air from the cooling system (see COOLANT CHECK
).
- Clean up any spilled engine coolant.