Fuel Pump Control System
- On Quest, check inertia fuel shutoff switch located behind left kick panel. If switch has been triggered, push reset button. If switch has not been triggered, go to next step.
- On all models, turn ignition on. Pinch fuel hose with fingers. Pulsation should be felt on fuel hose for 5 seconds after ignition is turned on (one second on Maxima). If pulsation is felt, system is okay. If pulsation is not felt, go to next step.
- Turn ignition off. Disconnect fuel pump relay harness connector. For location, see ECCS, PCM & FUEL PUMP RELAY LOCATIONS table under RELAYS & SOLENOIDS. Turn ignition on. Measure voltage between ground and fuel pump relay harness connector power supply terminals. See FUEL PUMP RELAY CIRCUIT IDENTIFICATION table. If battery voltage exists, go to next step. If battery voltage does not exist, repair open or short circuit.
See appropriate wiring diagram in WIRING DIAGRAMS article.
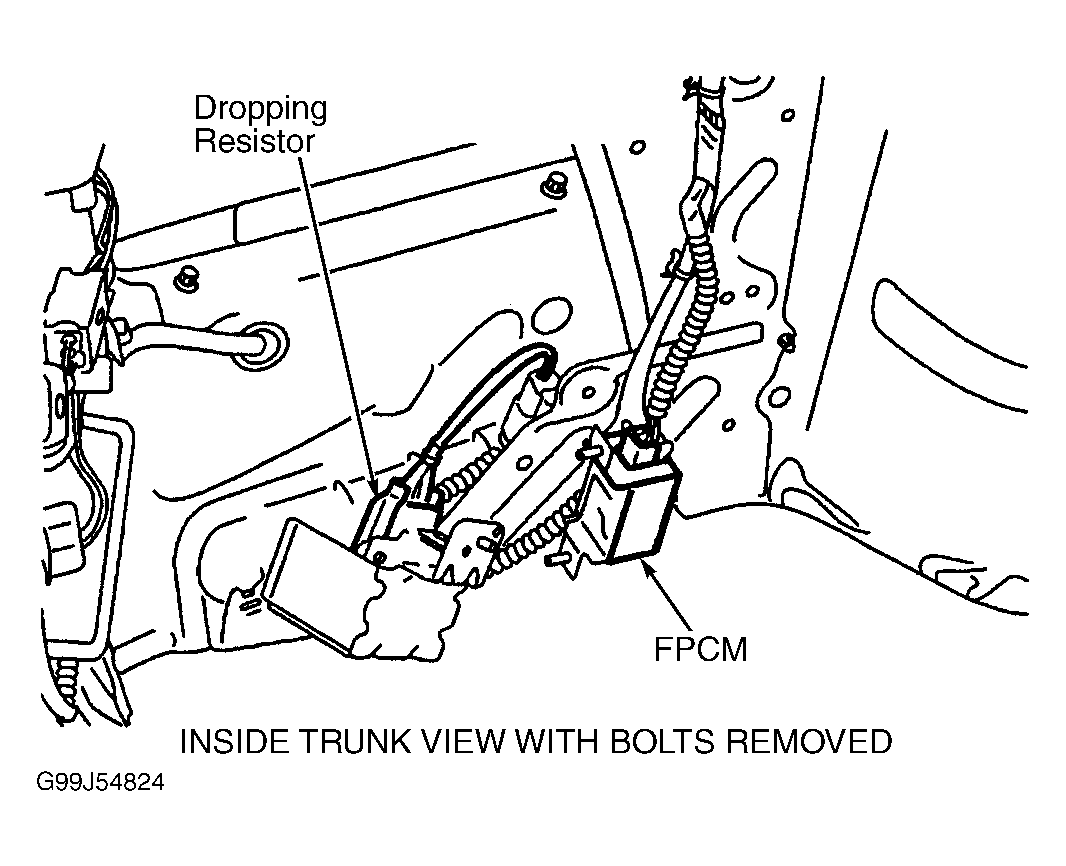
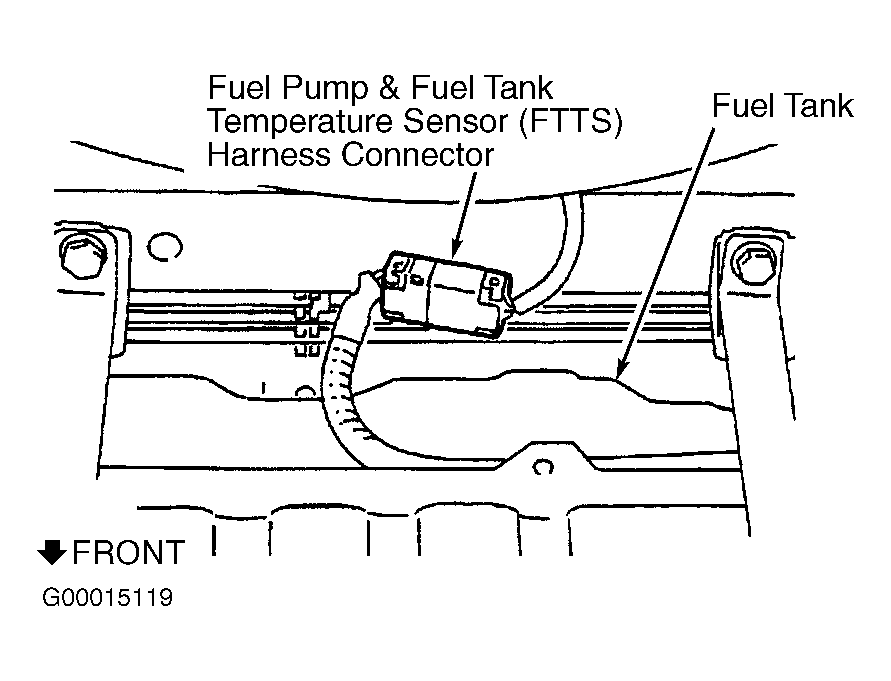
- Turn ignition off. Disconnect fuel pump harness connector. For location, see FUEL PUMP HARNESS CONNECTOR LOCATIONS table under FUEL PUMP. On Maxima, disconnect dropping resistor harness connector located in trunk. See Fig 1. On Quest, disconnect fuel pump and fuel temperature sensor harness connector located behind fuel tank. See Fig 2. On all models, check continuity of fuel pump ground circuit. See FUEL PUMP CIRCUIT IDENTIFICATION table. If continuity exists, go to next step. If continuity does not exist, repair open ground circuit.
 Courtesy of NISSAN MOTOR CO., U.S.A.
 Courtesy of NISSAN MOTOR CO., U.S.A.
- On Maxima, check continuity of fuel pump power supply wires between fuel pump harness connector terminal No. 2 and body ground, and between fuel pump harness connector terminal No. 1 and fuel pump relay harness connector terminal No. 3. On all other models, check continuity of fuel pump power supply wires between fuel pump harness connector and fuel pump relay harness connector. See FUEL PUMP RELAY CIRCUIT IDENTIFICATION and FUEL PUMP CIRCUIT IDENTIFICATION
tables. If continuity exists, go to next step. If continuity does not exist, repair open in appropriate wire.
- Disconnect PCM harness connector. Check continuity of specified wire between fuel pump relay harness connector and PCM harness connector terminal No. 6 (Altima), No. 11 (Frontier, Pathfinder, Quest and Xterra), No. 28 (Maxima), No. 20 (Sentra without engine immobilizer system) or No. 21 (Sentra with engine immobilizer system). See FUEL PUMP RELAY CIRCUIT IDENTIFICATION table. See Figure, Figure, Figure, Figure, Figure and Figure
. If continuity exists, go to next step. If continuity does not exist, repair open in appropriate wire.
- Check fuel pump relay. See RELAYS under RELAYS & SOLENOIDS. Replace, if necessary. If fuel pump relay is okay, check fuel pump. See FUEL PUMP . Replace, if necessary. If fuel pump is okay, go to next step.
- No problem is indicated at this time. Problem may be intermittent.
See TESTING PROCEDURE under SELF-DIAGNOSTIC SYSTEM in SELF-DIAGNOSTICS - INTRODUCTION article.
FUEL PUMP RELAY CIRCUIT IDENTIFICATION
| Application |
Circuit |
Terminal No. (Wire Color) |
| Altima |
Power Supply |
1 (Black/Blue) & 3 (Black/White) |
| To PCM |
2 (Black/Pink) |
| To Fuel Pump |
5 (Black/Yellow) |
| Frontier & Xterra |
Power Supply |
2 & 5 (Black/White) |
| To PCM |
1 (White/Red) |
| To Fuel Pump |
3 (White/Blue) |
| Maxima |
Power Supply |
1 (Black/Red) & 5 (Black/White) |
| To PCM |
2 (Black/Pink) |
| To Fuel Pump Control Module & Fuel Pump |
3 (Black/Yellow) |
| Pathfinder |
Power Supply |
2 & 3 (Black/Yellow) |
| To PCM |
1 (Red/Blue) |
| To Fuel Pump |
5 (White/Blue) |
| Quest |
Power Supply |
1 & 3 (Black/Red) |
| To PCM |
2 (Blue/Red) |
| To Fuel Pump |
5 (Light Green/Red) |
| Sentra |
Power Supply |
1 (Black/Red) & 5 (Black/White) |
| To PCM |
2 (Black/Pink) |
| To Fuel Pump |
3 (Black/Yellow) |
FUEL PUMP CIRCUIT IDENTIFICATION
| Application |
Circuit |
Terminal No. (Wire Color) |
| Altima |
Power Supply |
+ (Black/Yellow) |
| Ground |
- (Black) |
| Frontier & Xterra (4-Cylinder) |
Power Supply |
P1 (White/Blue) |
| Ground |
P2 (Black) |
| Frontier (V6), Pathfinder & Xterra (V6) |
Power Supply |
1 (White/Blue) |
| Ground |
2 (Black) |
| Maxima |
Power Supply |
1 (Black/Yellow) |
| Ground |
3 (Green/Red) |
| Quest |
Power Supply |
2 (Light Green/Red) |
| Ground |
3 (Black/White) |
| Sentra |
Power Supply |
1 (Black/Yellow) |
| Ground |
3 (Black) |