Testing Intake Air Control System (Prelude)
- Start engine and allow to idle. Disconnect No. 8 vacuum hose from upper port on intake control solenoid valve. See VACUUM DIAGRAMS
article. Check for vacuum at solenoid valve. If vacuum does not exist, go to next step. If vacuum exists, go to step 6).
- Disconnect No. 8 vacuum hose from intake control vacuum tank. See VACUUM DIAGRAMS
article. Check for vacuum at intake control vacuum tank. If vacuum exists, go to next step. If vacuum does not exist, repair blockage or vacuum leak between intake control vacuum tank and intake manifold.
- Turn ignition off. Disconnect intake control solenoid valve 2-pin connector. Turn ignition on. Measure voltage between intake control solenoid valve connector terminals No. 1 (White wire) and No. 2 (Black/Yellow wire). See WIRING DIAGRAMS
article. If battery voltage is not present, go to next step. If battery voltage is present, replace intake control solenoid valve.
- Measure voltage between ground and intake control solenoid valve 2-pin connector terminal No. 2 (Black/Yellow wire). If battery voltage is present, go to next step. If battery voltage is not present, repair open in Black/Yellow wire between intake control solenoid valve connector and fuse No. 14 (ECU CRUISE CONTROL) located in under-dash fuse/relay box. See WIRING DIAGRAMS
article.
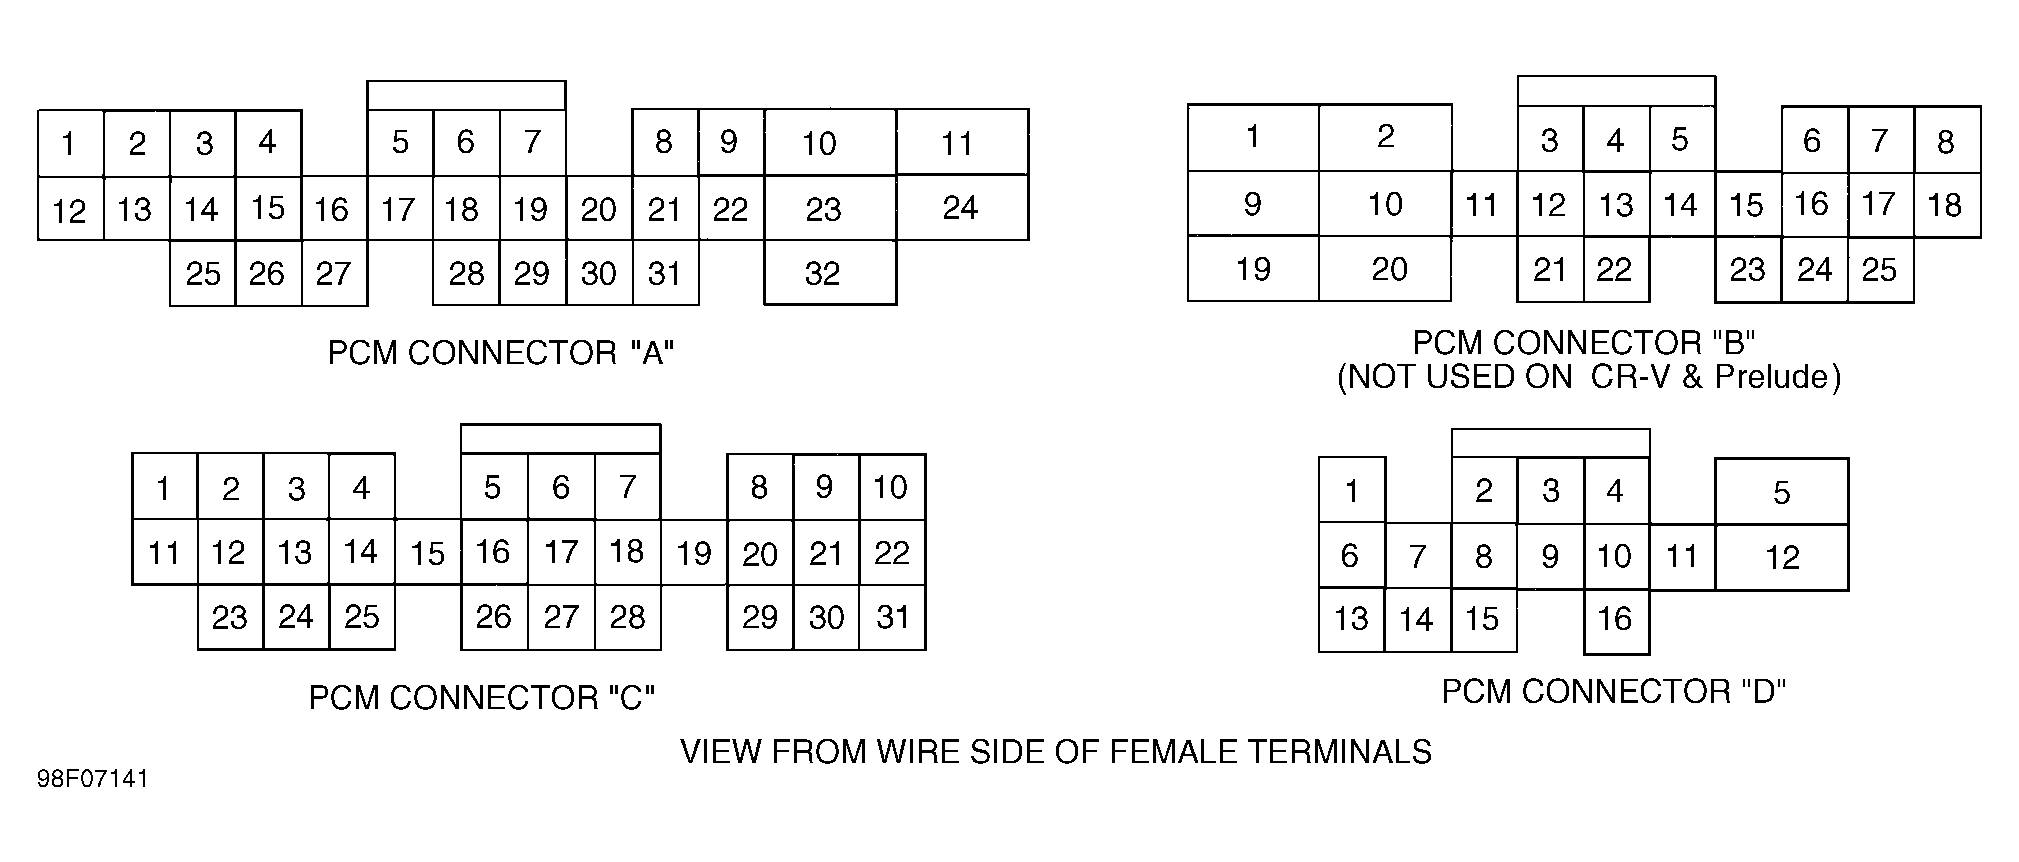
- Turn ignition off. Reconnect intake control solenoid valve 2-pin connector. Turn ignition on. Connect a fused jumper wire between PCM 32-pin connector "A" terminal A9 (Brown/Black wire) and terminal A25 (White wire). See Fig 1
. If intake control solenoid valve does not click when jumper wire is connected, repair open in White wire between intake control solenoid valve and PCM. See WIRING DIAGRAMS
article. If intake control solenoid valve clicks when jumper wire is connected, substitute a known-good PCM and recheck. If symptom or indication goes away, replace original PCM.
- Increase engine speed to more than 4200 RPM. Check for vacuum at solenoid valve upper port. See VACUUM DIAGRAMS
article. If vacuum does not exist, go to step 8). If vacuum exists, disconnect intake control solenoid valve 2-pin connector. Check for vacuum again. If vacuum does not exist, go to next step. If vacuum exists, replace intake control solenoid valve.
- Turn ignition off. Disconnect PCM 32-pin connector "A". See Fig 1
. Check for continuity between ground and intake control solenoid valve 2-pin connector terminal No. 1 (White wire). If continuity exists, repair short in White wire between PCM and intake control solenoid valve. See WIRING DIAGRAMS
article. If continuity does not exist, substitute a known-good PCM and recheck. If symptom or indication goes away, replace original PCM.
- Apply vacuum to No. 8 vacuum hose disconnected from intake control solenoid valve upper port. See VACUUM DIAGRAMS
article. If vacuum hose holds a vacuum, intake system is okay at this time. If vacuum hose does not hold a vacuum, check vacuum hoses for proper connections, disconnected hose and/or cracked or leaking hoses. If vacuum hoses are okay, replace intake control diaphragm.
 Courtesy of AMERICAN HONDA MOTOR CO., INC.