Cooler, EGR: Installation: Installation
 Courtesy of CHRYSLER GROUP, LLC
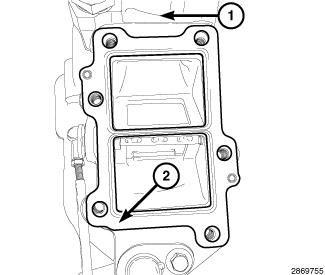
- Clean the gasket mating surfaces.
- Position a new gasket (2) onto the EGR cooler manifold (1).
 Courtesy of CHRYSLER GROUP, LLC
- Install the EGR cooler. Tighten bolts to 15 N.m (133 in lbs.).
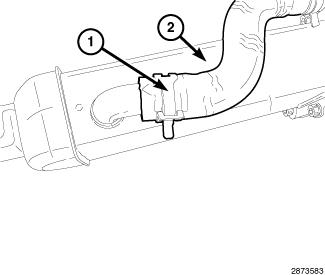
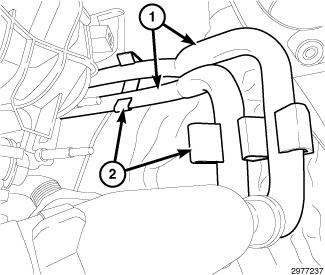
- Connect the upper coolant hose (1) from EGR cooler (2).
 Courtesy of CHRYSLER GROUP, LLC
- Install the EGR cooler and manifold assembly and tighten the upper nuts finger tight.
 Courtesy of CHRYSLER GROUP, LLC
- Install the left side EGR cooler support bracket bolt and tighten to 25 N.m (18 ft. lbs.).
 Courtesy of CHRYSLER GROUP, LLC
- Position the heater tubes (1) back into clips (2).
 Courtesy of CHRYSLER GROUP, LLC
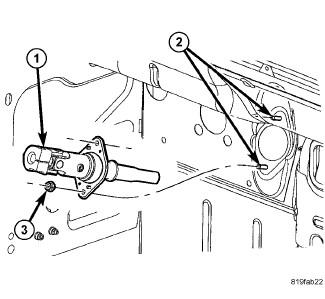
- Install the intermediate shaft (1) to studs (2) at cowl.
- Install the mounting nuts (3). Tighten to 13 N.m (115 in. lbs.).
Courtesy of CHRYSLER GROUP, LLC
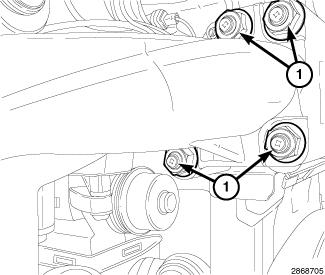
- Install the two upper EGR manifold nuts (1). Tighten the four nuts (1) to 25 N.m (18 ft. lbs.).
 Courtesy of CHRYSLER GROUP, LLC
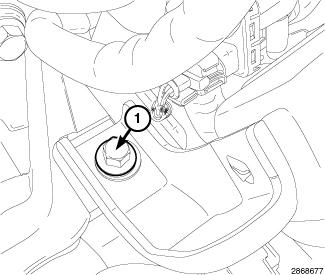
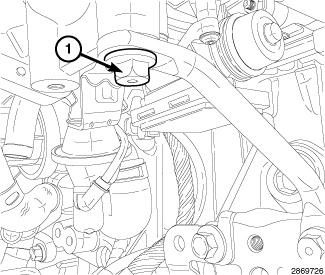
- Install the lower EGR cooler support bracket bolt (1). Tighten bolt (1) to 45 N.m (33 ft. lbs.).
 Courtesy of CHRYSLER GROUP, LLC
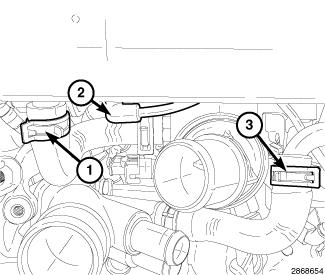
- Connect the EGR bypass vacuum line (2) to vacuum solenoid.
- Connect the heater hose at the thermostat housing.
- Connect the heater hose at the water pump inlet tube.
- Install the two lower coolant hoses (1 and 3) to EGR cooler.
- Install the upper radiator hose to thermostat housing.
- Connect the upper intermediate shaft-to-lower intermediate shaft. Tighten pinch bolt to 49 N.m (36 ft. lbs.).
- Connect the EGR valve harness connector.
- Install the EGR tube. Refer to TUBE, EXHAUST GAS RECIRCULATION (EGR), INSTALLATION
.
- Install the A/C Compressor. Tighten the bolts to 28 N.m (21 ft. lbs.).
- Install the generator. Refer to GENERATOR, INSTALLATION
.
- Install the serpentine belt.
- Install the air cleaner body. Refer to BODY, AIR CLEANER, INSTALLATION
- Connect the Charge Air Cooler (CAC) outlet hose to the EGR air flow control valve.
- Install the left wheel house splash shield. Refer to SHIELD, SPLASH, WHEELHOUSE, INSTALLATION
.
- Evacuate and charge the A/C system. Refer to PLUMBING, STANDARD PROCEDURE
.
- Fill cooling system. Refer to STANDARD PROCEDURE .
- Install the front lower splash shield.
- Install the engine cover and securely tighten nuts.
- Install the lower intermediate shaft coupler (3) to upper intermediate shaft (1).
- Install the pinch bolt (2). Tighten to 49 N.m (36 ft. lbs.).
- Remove the steering wheel lock.
- Connect the negative battery cable.