Fuel Injector Volume
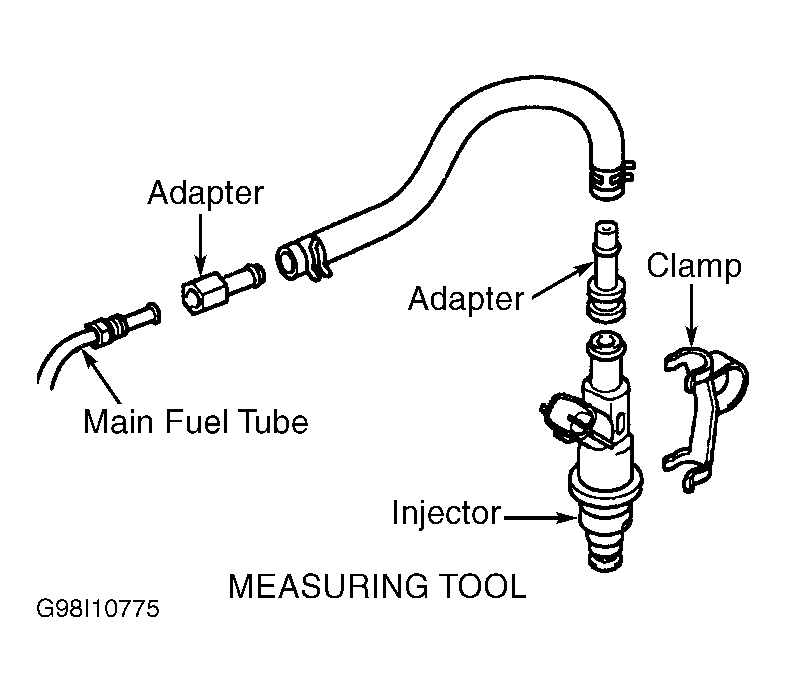
- Remove fuel injector. See FUEL SYSTEM under REMOVAL, OVERHAUL & INSTALLATION article. Disconnect fuel inlet hose from main fuel tube. Install Fuel Tube Adapter (09268-52011) to fuel main tube. Connect fuel hose from Injection Measuring Tool Set (09268-41047) to fuel tube adapter. See Fig 1.
- Ensure fuel injector "O" ring is installed. Connect fuel injector to fuel hose and install injector retainer clip. See Fig 1. Attach a piece of vinyl tubing to bottom of fuel injector to prevent fuel splash. Place vinyl tubing into a graduated measuring cylinder.
- If using a Lexus scan tool, connect scan tool to Data Link Connector (DLC) No. 3. See Figure. Turn ignition on. DO NOT start engine. Turn scan tool on. Select ACTIVE TEST mode on scan tool. Using scan tool manufacturer's instructions, activate electric fuel pump, and go to next step. If Lexus scan tool is not available, manually activate fuel pump. See FUEL PUMP OPERATION (USING BATTERY VOLTAGE) procedure under FUEL DELIVERY, and then go to next step.
- Connect EFI Inspection Wiring (09842-30070) between fuel injector and a 12-volt battery. Do not apply voltage to fuel injector for more than 15 seconds. Compare measured volume with specified volume. See FUEL INJECTOR VOLUME SPECIFICATIONS table. Test each injector 2-3 times. Replace fuel injector if fuel injector volume is not within specification.
- Ensure difference between fuel injector volume on all fuel injectors is within specification. See FUEL INJECTOR VOLUME SPECIFICATIONS table. Disconnect fuel injector tester. Ensure fuel leakage from end of fuel injector does not exceed one drop within 12 minutes (one minute on LS430). Replace fuel injector if leakage exceeds specification. Disconnect negative battery cable. Remove test equipment and reconnect all components.
FUEL INJECTOR VOLUME SPECIFICATIONS
| Application |
Cu. In. (cc) |
| Volume |
3.7-4.5 (60-73) |
| Difference Between Injectors |
0.8 (13) |
 Courtesy of © TOYOTA, LICENSE AGREEMENT TMS1002