ECM Power Source Circuit (Ignition Keyed): Es300
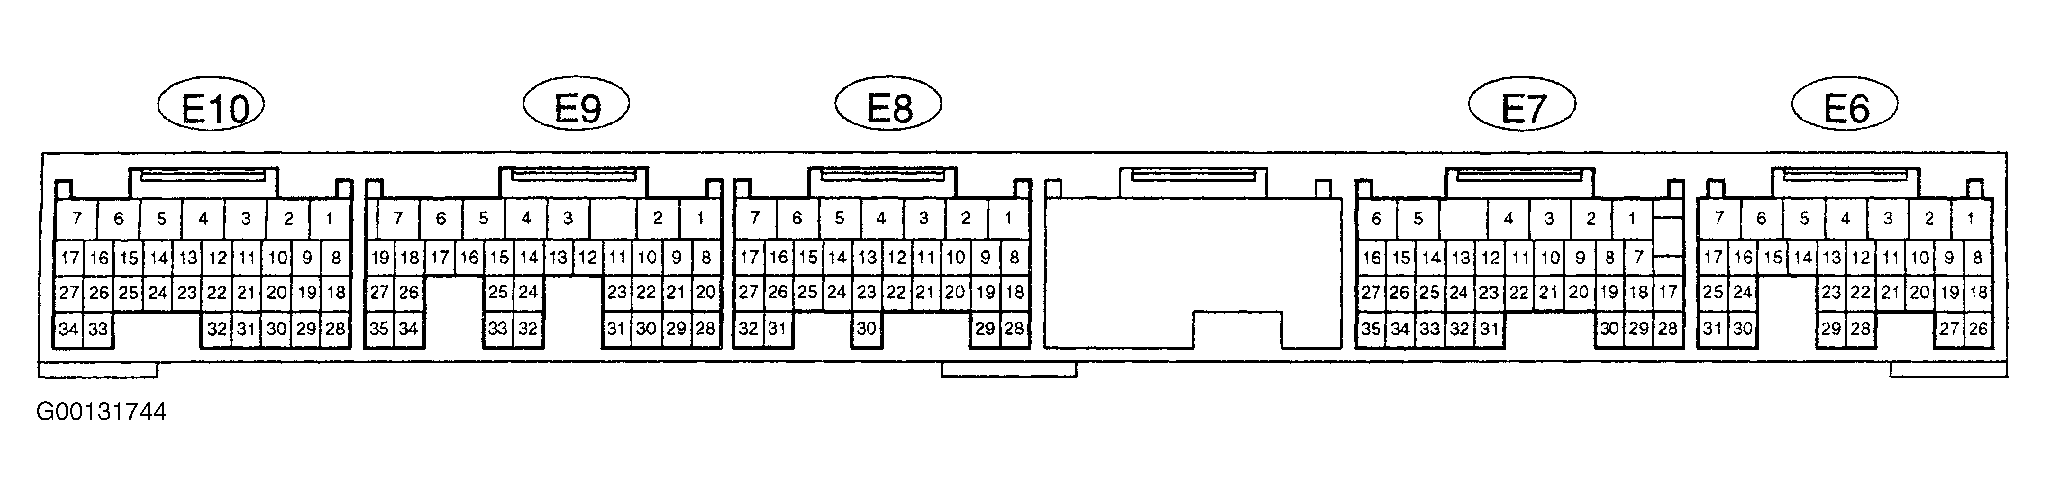
- Access ECM behind glove box. Turn ignition on. Backprobing connector, connect DVOM negative lead to terminal No. 28 (Brown wire) at ECM E10 connector and positive lead to terminal No. 1 (Black/Red wire) at ECM E6 connector. See Fig 1. If 9-14 volts are present, ECM power circuit is okay. Diagnose by symptom. See TROUBLE SHOOTING - NO CODES
article. If 9-14 volts are not present, go to next step.
- Check for an open circuit in Brown wire between ground and terminal No. 28 at ECM E10 connector. See WIRING DIAGRAMS
article. Repair as necessary. If wiring is okay, go to next step.
- Measure voltage between terminal No. 28 (Brown wire) at ECM E10 connector and terminal No. 9 (Black/Orange wire) at ECM E6 connector. If 9-14 volts is present, go to step 5. If 9-14 volts is not present, check AM2 fuse in engine compartment junction box.
- If fuse is blown, repair cause of blown fuse. If fuse is okay, check ignition switch. See STEERING COLUMN SWITCHES article in ACCESSORIES & EQUIPMENT. Replace ignition switch as necessary and retest. If ignition switch is okay, repair open circuit between battery and ignition switch, or between ignition switch and ECM.
- Turn ignition on. Measure voltage between terminal No. 28 (Brown wire) at ECM E10 connector and terminal No. 8 (Black/White wire) at ECM E6 connector. If 9-14 volts are not present, replace ECM. If 9-14 volts are present, check EFI fuse located in engine compartment fuse/relay box. If fuse is okay, go to next step. If EFI fuse is blown, repair cause of blown fuse.
- Check EFI main relay located in engine compartment fuse/relay box. See RELAYS under RELAYS & SOLENOIDS. If EFI main relay is okay, check circuit between terminal No. 28 (Brown wire) at ECM E10 connector and terminal No. 8 (Black/White wire) at ECM E6 connector. See WIRING DIAGRAMS
article. Repair as necessary. If circuit is okay, repair circuit between battery and EFI fuse.
 Courtesy of © TOYOTA, LICENSE AGREEMENT TMS1002