CMP Synchronizer - 4.0L: Installation
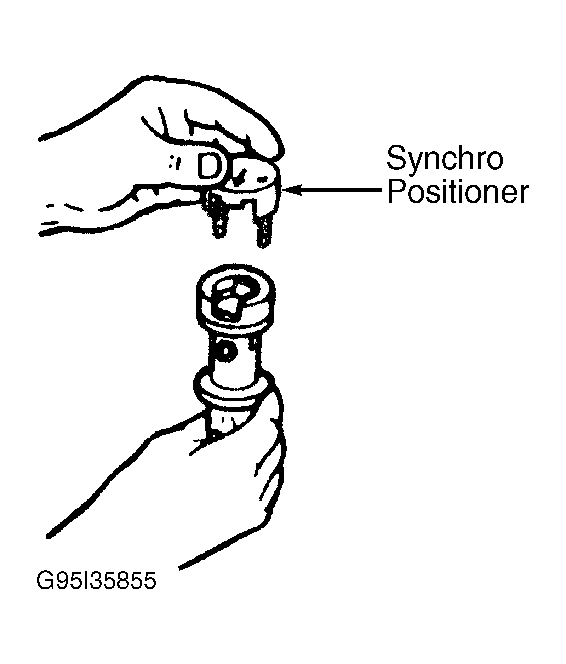
- Install Synchro Positioner (49 UN01 148) on synchronizer housing. See Fig 1
. Rotate synchronizer shaft until vane on shaft aligns with slot on synchro positioner. Rotate synchro positioner until engaged into notch in housing. Dip drive gear in engine oil.
 Courtesy of FORD MOTOR CO.
 Courtesy of FORD MOTOR CO.
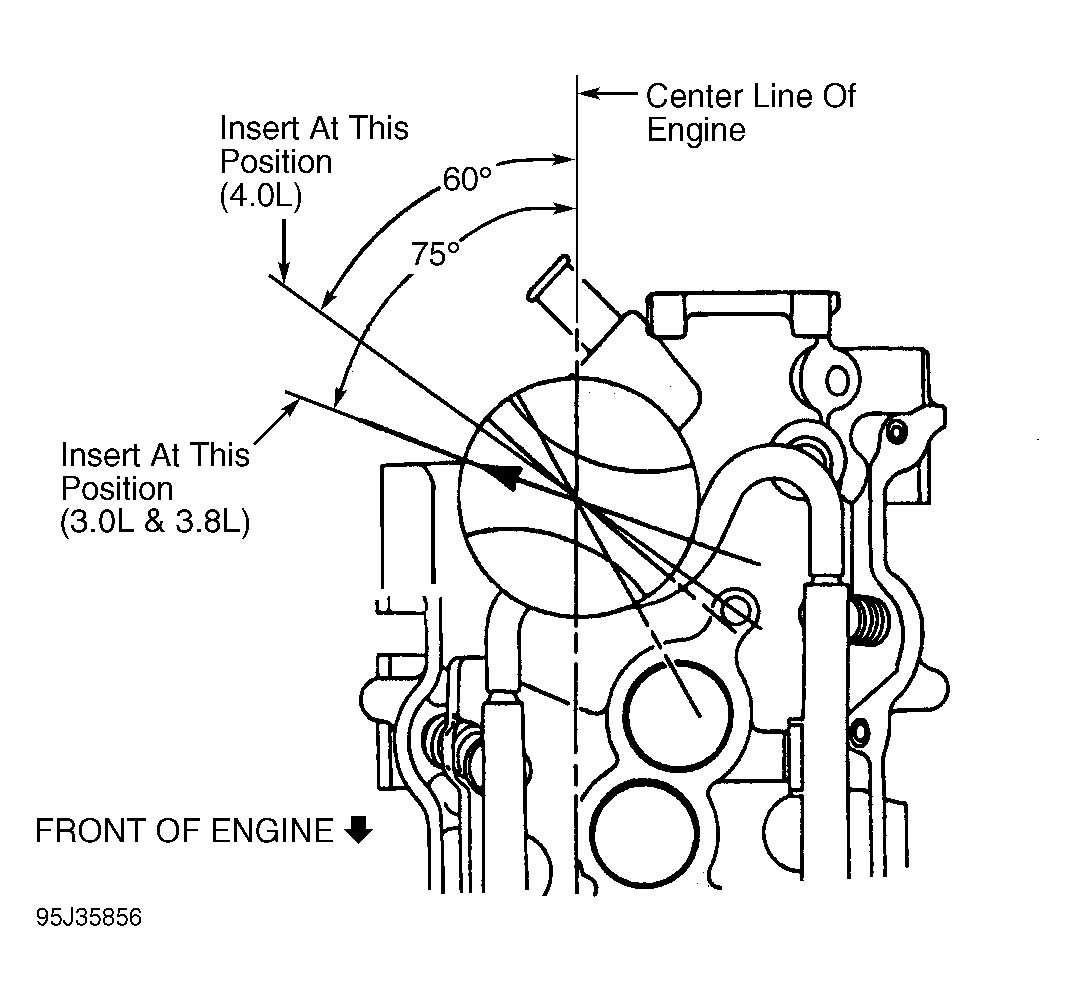
- Rotate sychronizer assembly so that synchro positioner is 60 degrees counterclockwise of crankshaft centerline before inserting synchronizer assembly into engine. See Fig 2
.
- As synchronizer is inserted into engine, synchronizer will rotate. When seated, synchronizer electrical connector should be located in original position.
CAUTION:
If CMP sensor electrical connector is not positioned correctly, DO NOT reposition connector by rotating synchronizer. This may cause fuel system to be out of time with the engine, causing possible engine damage or an engine misfire. Remove synchronizer and reinstall. See step 3
.
- Install hold-down clamp and tighten bolt to specification. See TORQUE SPECIFICATIONS
. Remove synchro positioner from synchronizer housing. Install CMP sensor to synchronizer and tighten to specification. Reconnect wiring to CMP sensor. Connect negative battery cable.