Fuel Tank Pressure Sensor
- Connect NGS scan tool to Data Link Connector (DLC). DLC is located under left side of instrument panel, right of steering column. Turn ignition on. Using scan tool, access DIAGNOSTIC DATA LINK menu, and select PCM. Highlight and select PID/DATA MONITOR AND RECORD. Select FTP V PID.
- With 2 psi (6.7 kPa) of pressure applied to sensor, voltage should be 4-5 volts. With 0 psi (0 kPa) of pressure applied to sensor, voltage should be 2.3-2.8 volts. With 2 in. Hg of vacuum applied to sensor, voltage should be .45-.55 volt. If all voltage readings are as specified, fuel tank pressure sensor is functioning properly. If any voltage reading is not as specified, go to next step.
- Turn ignition off. Check continuity of circuits between fuel tank pressure sensor wiring harness connector and PCM. See appropriate wiring diagram in
WIRING DIAGRAMS article. If continuity exists in all circuits, go to next step. If continuity does not exist in one or more circuits, repair wiring harness as necessary.
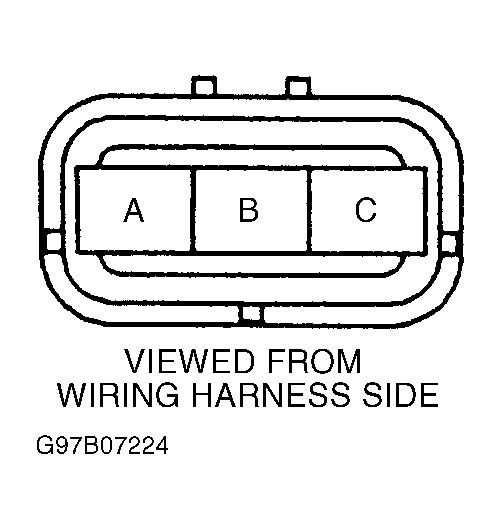
- Turn ignition on. Measure voltage at terminal "B" at fuel pressure sensor wiring harness connector. See Fig 1
. Voltage should be less than one volt. Measure voltage at terminal "C" at fuel tank pressure sensor wiring harness connector. Voltage should be 4.5-5.5 volts. If voltage is as specified, replace fuel tank pressure sensor. If voltage is not as specified, locate and repair short circuit in wiring harness. See appropriate wiring diagram in
WIRING DIAGRAMS article.
 Courtesy of MAZDA MOTORS CORP.