Fuel Charging Wiring Harness Removal / Installation - 4.0L
- With the vehicle in NEUTRAL, position it on a hoist. See
LIFTING
.
- Remove the intake manifold. See
INTAKE MANIFOLD REMOVAL / INSTALLATION - 4.0L
.
NOTE:
- One connector is shown, the other five are similar.
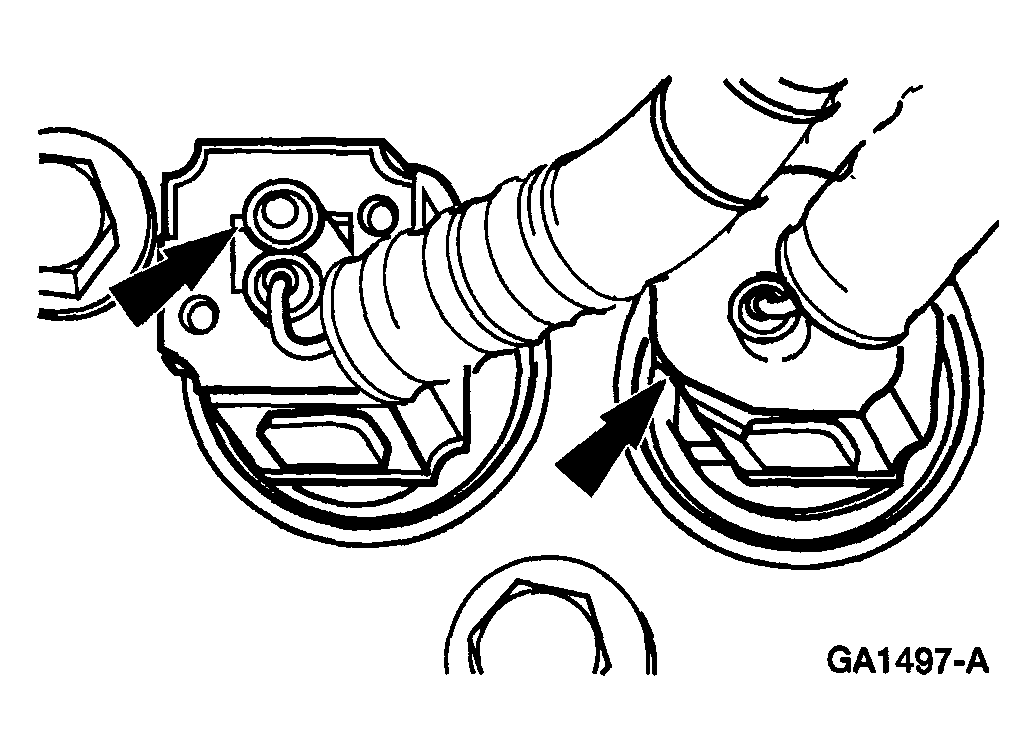
- Disconnect the six fuel injector electrical connectors.
 Courtesy of MAZDA MOTORS CORP.
- Remove the bolt.
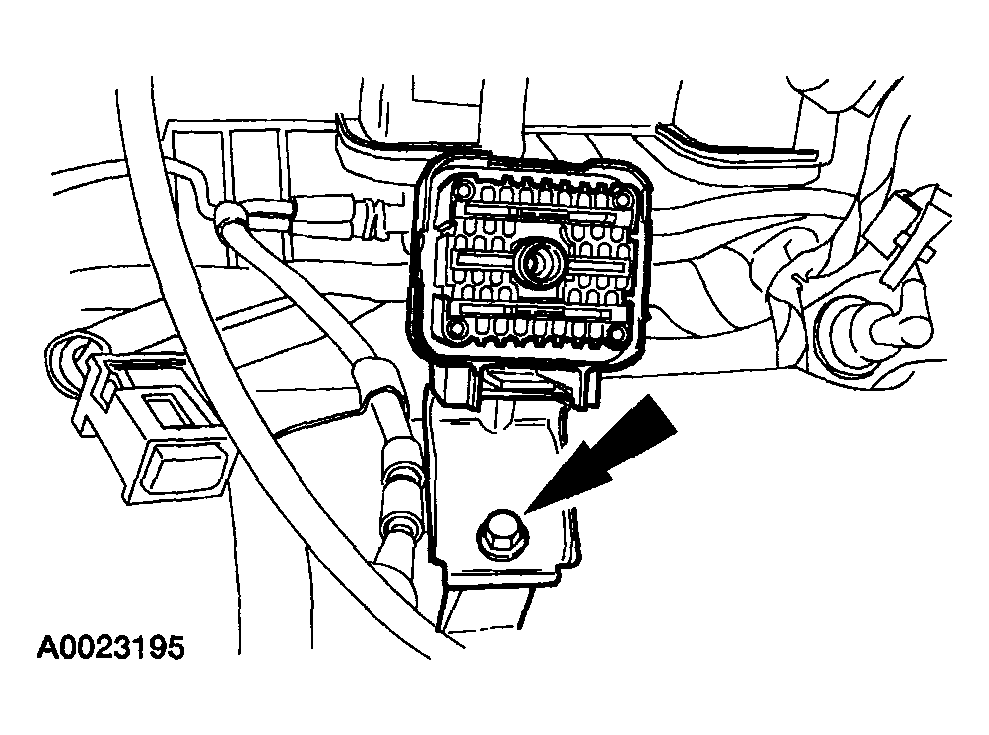 Courtesy of MAZDA MOTORS CORP.
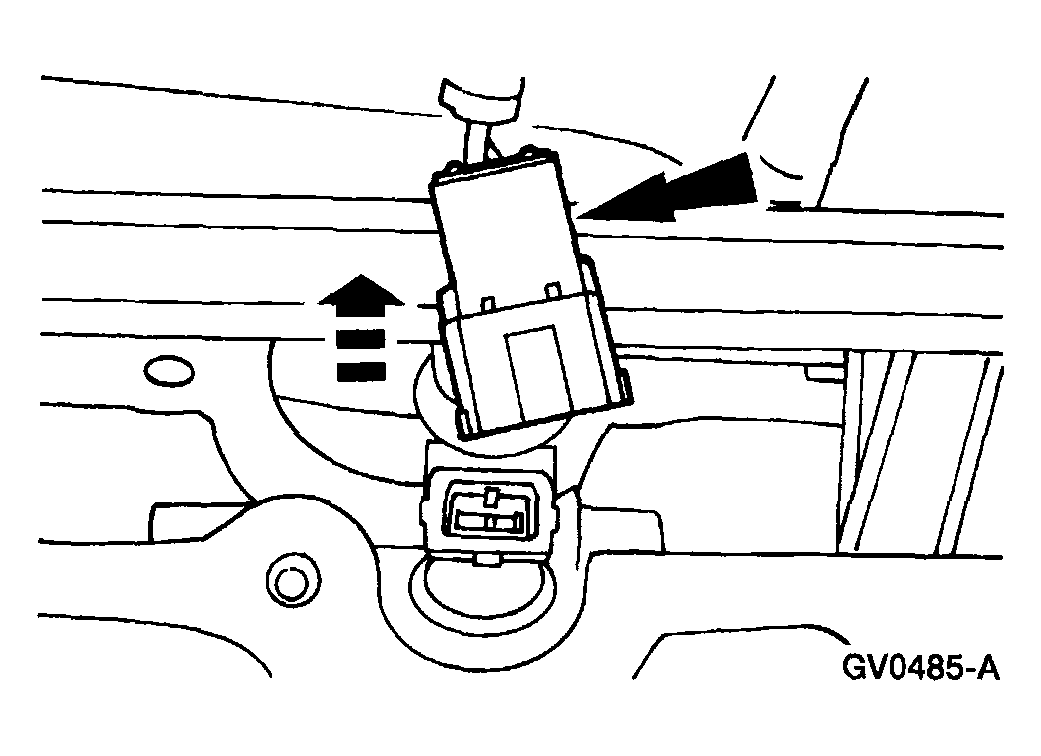
- Disconnect the ignition coil electrical connector.
 Courtesy of MAZDA MOTORS CORP.
- Disconnect the radio interference capacitor electrical connector.
 Courtesy of MAZDA MOTORS CORP.
- Disconnect the engine coolant temperature sensor (ECT) and the water temperature indicator sender unit electrical connectors.
 Courtesy of MAZDA MOTORS CORP.
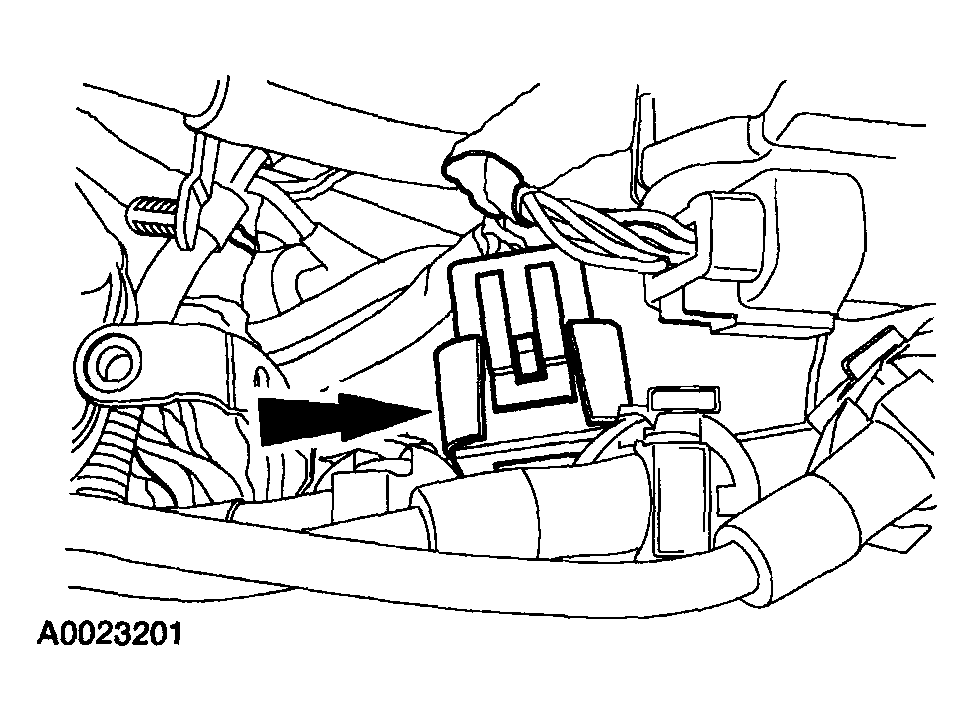
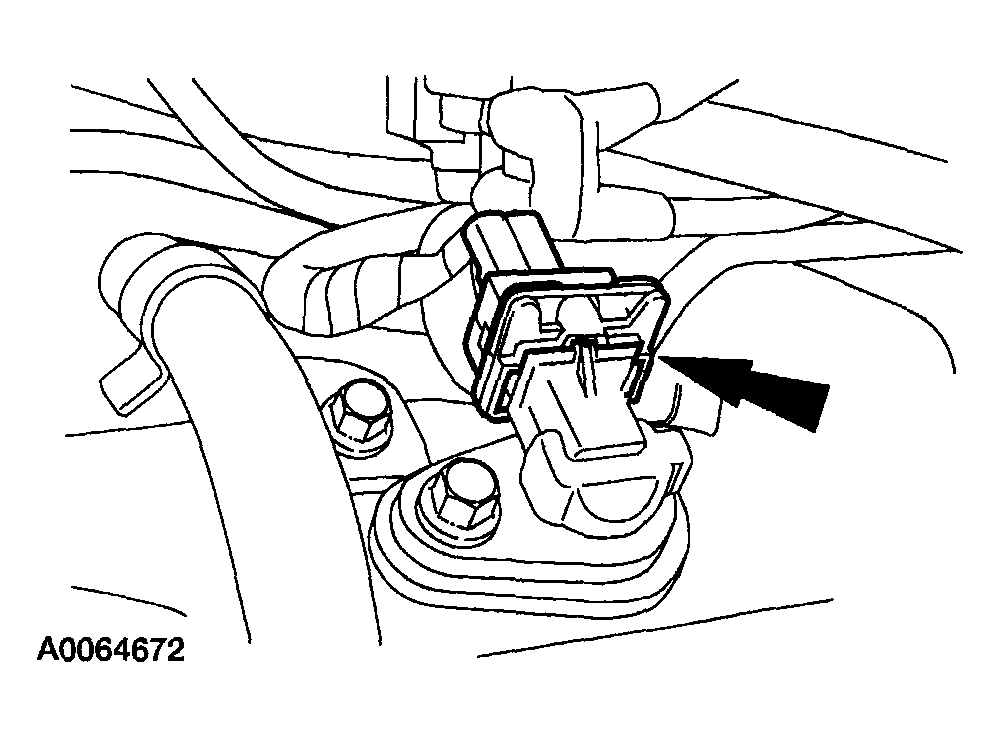
- Disconnect the camshaft position (CMP) sensor electrical connector.
 Courtesy of MAZDA MOTORS CORP.
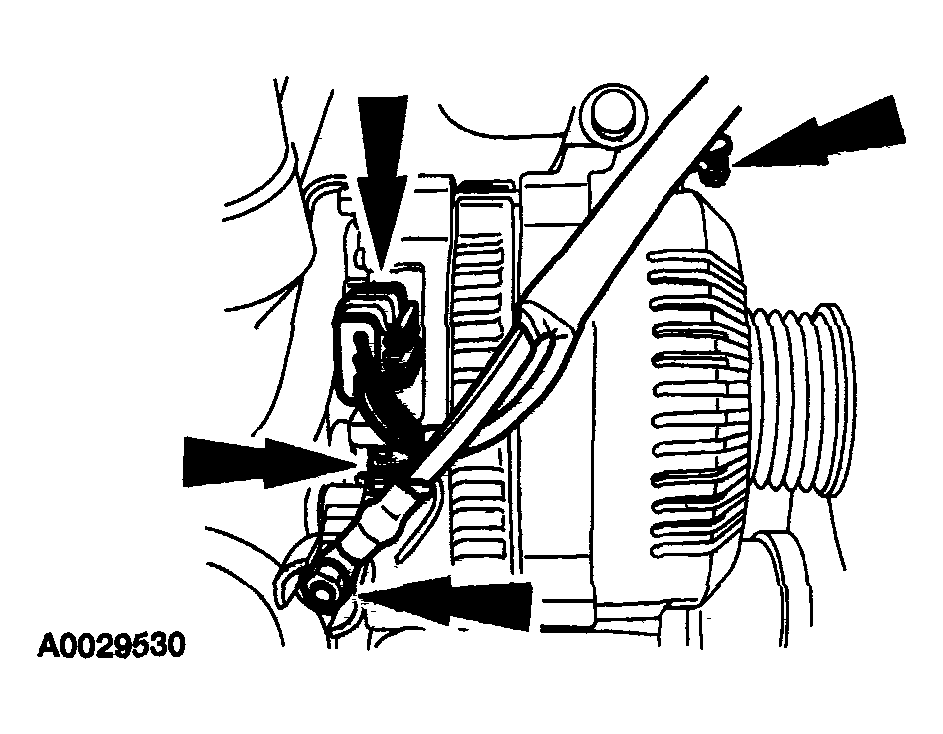
- Remove the drive belt tensioner.
- Disconnect the generator wiring and position the wiring aside.
 Courtesy of MAZDA MOTORS CORP.
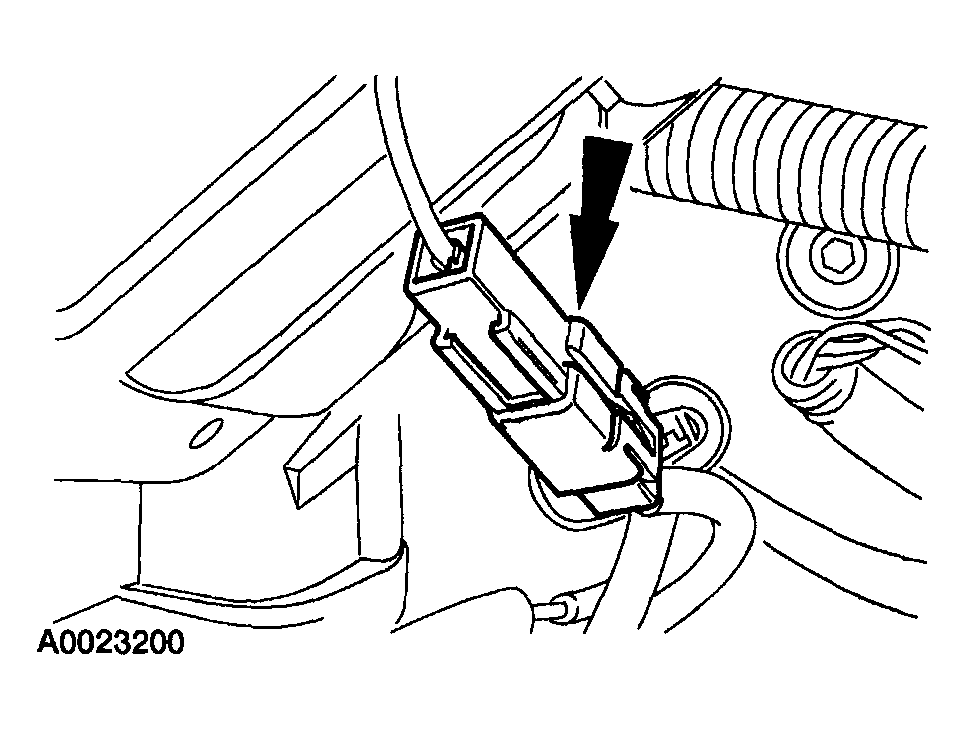
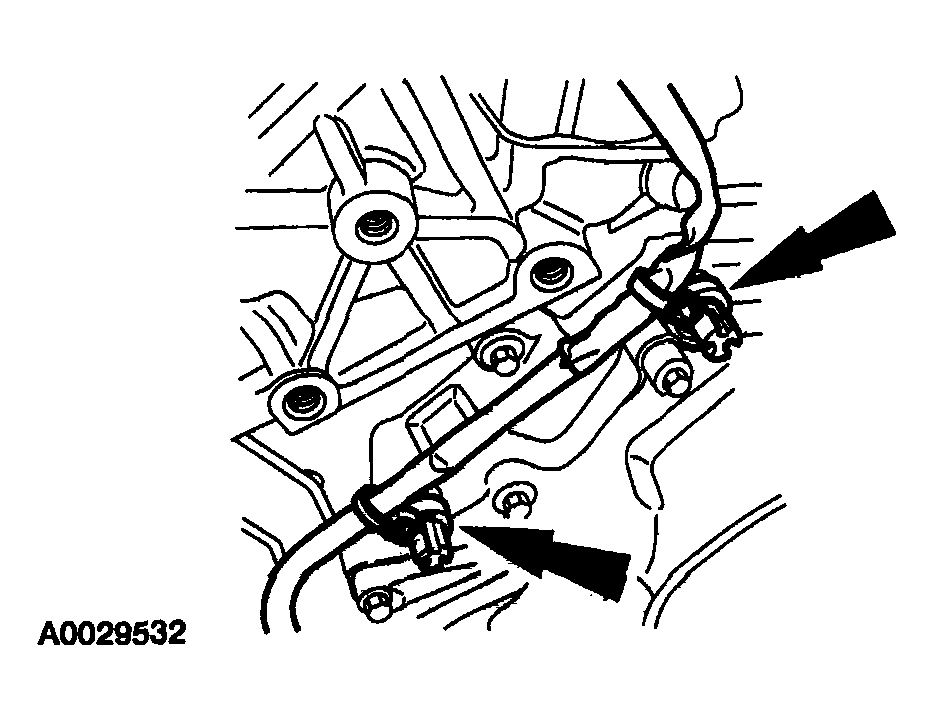
- Disconnect the crankshaft position (CKP) sensor electrical connector.
 Courtesy of MAZDA MOTORS CORP.
- Remove the wiring anchors and position the wiring aside.
 Courtesy of MAZDA MOTORS CORP.
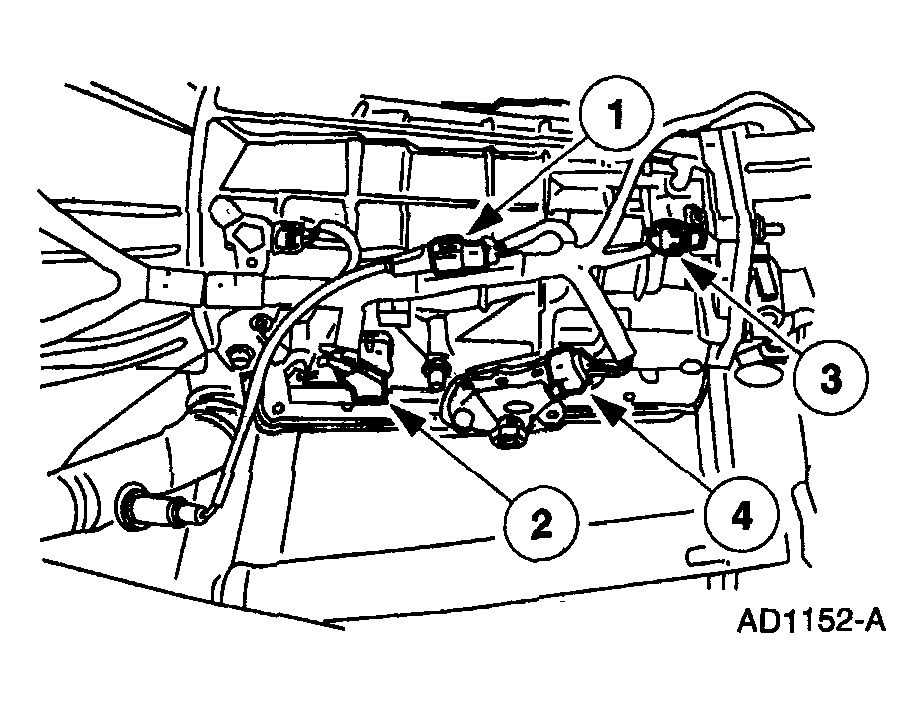
- Raise and support the vehicle.
- Disconnect the transmission portion of the wiring harness.
- Disconnect the RH and the LH heated oxygen sensor (HO2S) electrical connectors.
- Disconnect the transmission control connector.
- Disconnect the output shaft speed (OSS) sensor electrical connector.
- Disconnect the digital transmission range (TR) sensor electrical connector.
 Courtesy of MAZDA MOTORS CORP.
- Disconnect the catalyst monitor sensor electrical connector.
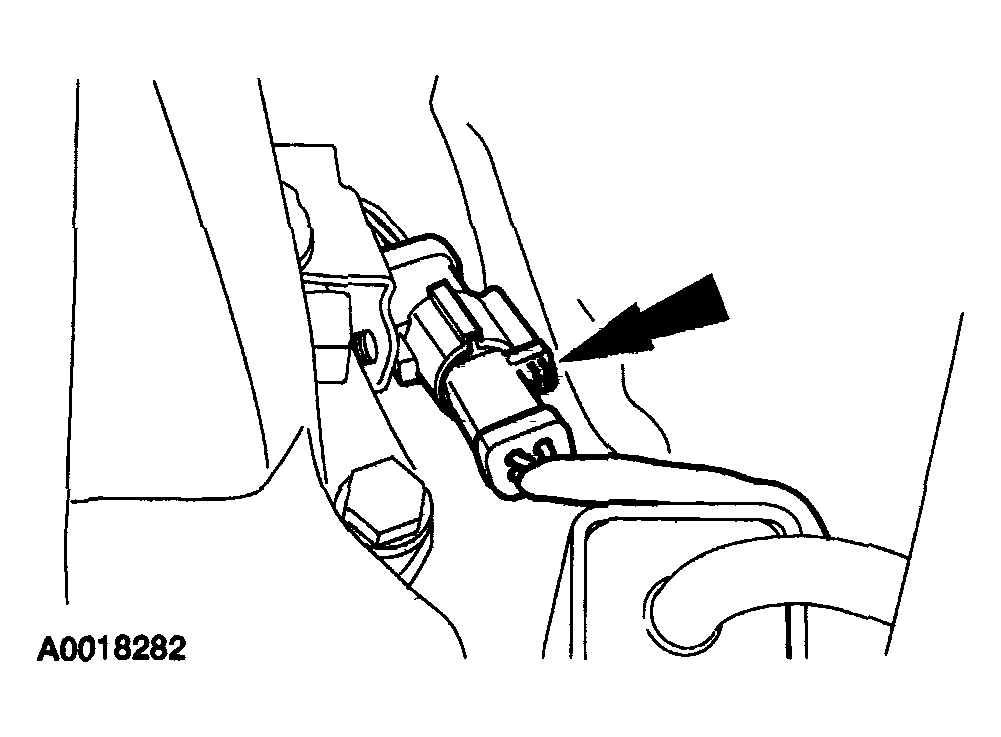 Courtesy of MAZDA MOTORS CORP.
- Release the transmission/transfer case portion of the wiring harness from any routing clips or pushpins.
- Route the transmission/transfer case portion of the wiring harness to the top of the engine.
- Lower the vehicle.
- Remove the wiring harness from the vehicle.
- To install, reverse the removal procedure.