Fuel Line Safety Procedure
- Turn the steering wheel to the right to a position allowing removal of the relay box (LH).
- Disconnect the negative battery terminal. (See NEGATIVE BATTERY TERMINAL DISCONNECTION/CONNECTION
.)
- Remove the fuel-filler cap to release the pressure inside the fuel tank.
- Remove the fasteners.
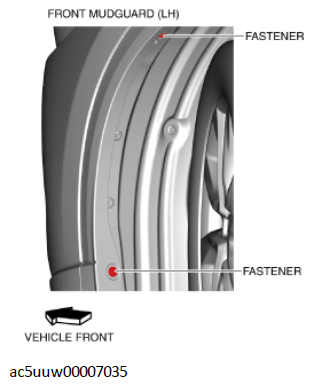 Courtesy of MAZDA MOTORS CORP.
- Remove the clips shown in the figure and detach the front over fender (LH) from the front bumper.
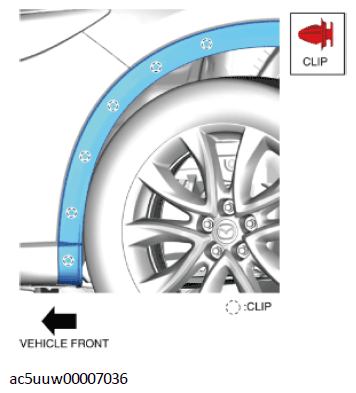 Courtesy of MAZDA MOTORS CORP.
- Remove the fasteners.
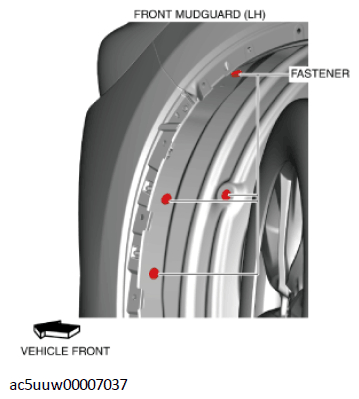 Courtesy of MAZDA MOTORS CORP.
- Partially peel back the front mud guard (LH) to a position allowing removal of the relay box (LH).
- Insert a tape-wrapped flathead screwdriver into the position shown in the figure.
 Courtesy of MAZDA MOTORS CORP.
- Move the tape-wrapped flathead screwdriver in the direction of arrow (1) shown in the figure and lift the relay box (LH) in the direction of arrow (2) to detach the tab of the relay box (LH) from the bracket.
- Remove the fuel pump relay.
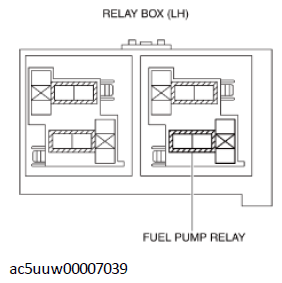 Courtesy of MAZDA MOTORS CORP.
- Disconnect the high pressure fuel pump connector.
- Connect the negative battery terminal. (See NEGATIVE BATTERY TERMINAL DISCONNECTION/CONNECTION
.)
- Start the engine.
- After the engine stalls, crank the engine 2-3 times.
- Switch the ignition to off.
- Disconnect the negative battery terminal. (See NEGATIVE BATTERY TERMINAL DISCONNECTION/CONNECTION
.)
- Install the fuel pump relay.
- Insert the front mudguard (LH). (See MUDGUARD REMOVAL/INSTALLATION
.)
- Install the clips shown in the figure and attach the front over fender (LH) to the front bumper.
Courtesy of MAZDA MOTORS CORP.
- Insert the fasteners.
Courtesy of MAZDA MOTORS CORP.
- Connect the high pressure fuel pump connector.