Rear Door Sunshade Removal/Installation: Notes
- Disconnect the negative battery terminal. (See NEGATIVE BATTERY TERMINAL DISCONNECTION/CONNECTION
.)
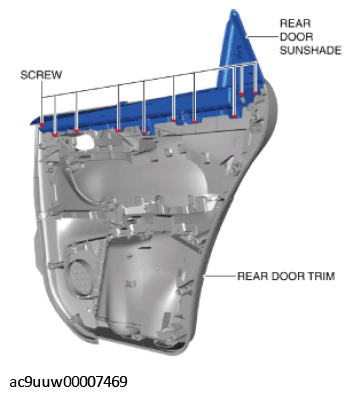
- Remove the rear door trim. (See REAR DOOR TRIM REMOVAL/INSTALLATION
.)
- Remove the screws.
 Courtesy of MAZDA MOTORS CORP.
- Remove the rear door sunshade.
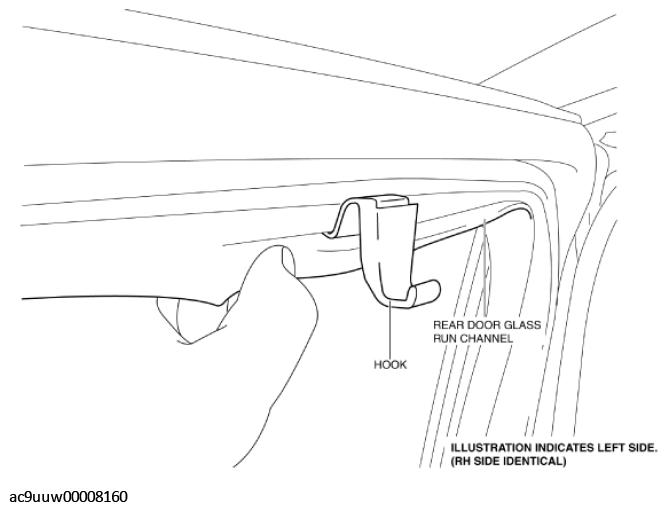
- Partially peel back the rear door glass run channel.
 Courtesy of MAZDA MOTORS CORP.
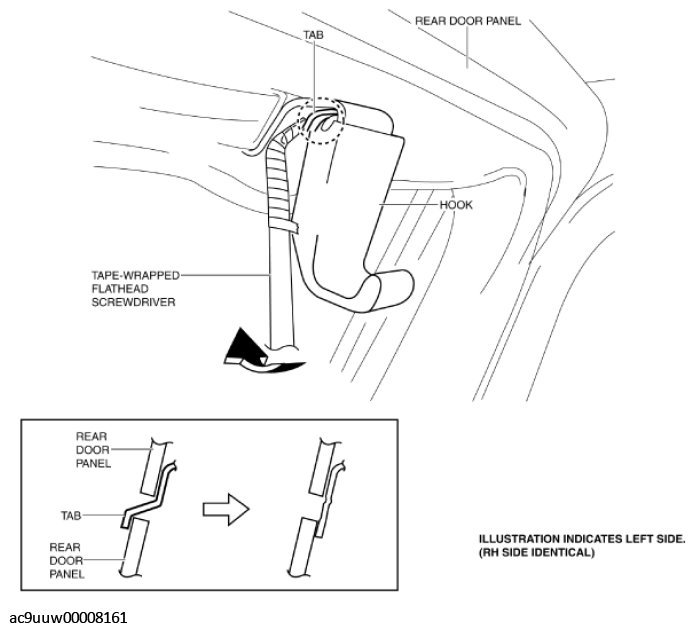
- Insert the tape-wrapped flathead screwdriver into the position shown in the figure.
 Courtesy of MAZDA MOTORS CORP.
- Move the tape-wrapped flathead screwdriver in the direction of the arrow shown in the figure and detach the tab from the rear door panel.
- Remove the hook.
- Install in the reverse order of removal. (See REAR DOOR SUNSHADE INSTALLATION NOTE .)