Backup Power Supply Removal/Installation
- Operate the door lock actuator using the following procedure and deplete the energy stored in the backup power supply.
NOTE:
- If the energy stored in the backup power supply has already been depleted, the door lock actuator does not operate. As this does not indicate an improper procedure, continue to perform the procedure as indicated.
- Remove the D. LOCK 25A fuse.
- Close the front door (driver's side)
- Repeat the lock/unlock operation of the door lock switch (driver's side) until all the door lock knobs do not move.
- Disconnect the negative battery terminal. (See NEGATIVE BATTERY TERMINAL DISCONNECTION/CONNECTION
.)
- Remove the following parts:
- Trunk board (See TRUNK BOARD REMOVAL/INSTALLATION
.)
- Bass-box (with Bose ®) (See BASS-BOX REMOVAL/INSTALLATION
.)
- Sub-trunk (See SUB-TRUNK REMOVAL/INSTALLATION
.)
- Trunk end trim (See TRUNK END TRIM REMOVAL/INSTALLATION
.)
- Pull back the trunk side trim (LH) to a position which allows for the removal of the backup power supply. (See TRUNK SIDE TRIM REMOVAL/INSTALLATION
.)
- Disconnect the connector.
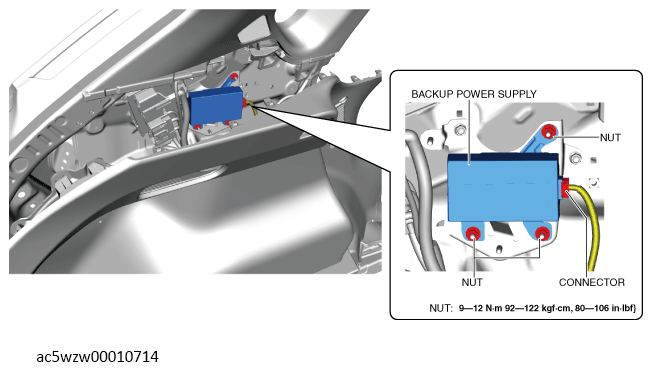 Courtesy of MAZDA MOTORS CORP.
- Remove the nuts.
- Remove the backup power supply.
- Install in the reverse order of removal.