- Remove the front seat assembly. Refer to
REMOVAL AND INSTALLATION .
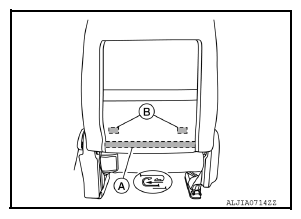
- Release the seatback lower center J-retainer (A).
- Release the seatback lower left and right J-retainers (B).
 Courtesy of NISSAN NORTH AMERICA, INC.
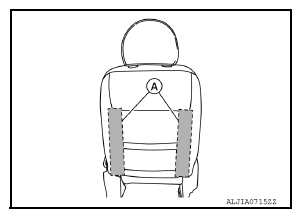
- Unzip the sliders of the seatback side zippers (A).
 Courtesy of NISSAN NORTH AMERICA, INC.
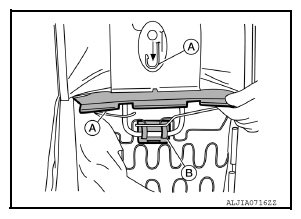
- Release the triple hooked upper J-retainer (A).
CAUTION:
Do not remove active headrest clip (B)
 Courtesy of NISSAN NORTH AMERICA, INC.
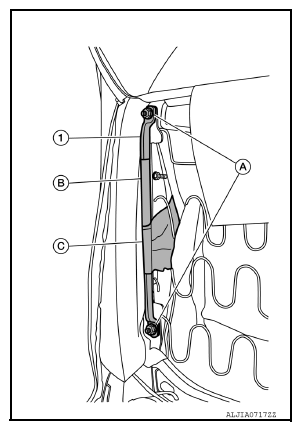
- Remove and discard the two chute rod nuts (A). Then remove the chute rod (1) by routing it through the loops in the outer chute (B) and the inner chute (C).
CAUTION:
Do not reuse the chute rod nuts.
 Courtesy of NISSAN NORTH AMERICA, INC.
- Press the headrest holder lock button in, then remove the headrest.
- Remove the headrest holders by pinching the hooks together at the bottom and pulling them upward and out of the seatback.
CAUTION:
Make sure to note the position of headrest holders for proper lock/free operation after assembly.
 Courtesy of NISSAN NORTH AMERICA, INC.
- Push the bottom of the seatback trim and pad toward front edge of seat, away from the seatback frame, then remove the seatback trim and pad by lifting them together as an assembly.
CAUTION:
Make sure to lift the seatback trim and pad from the seatback frame slowly, or it may get torn.
- Release the side air bag module harness clips.
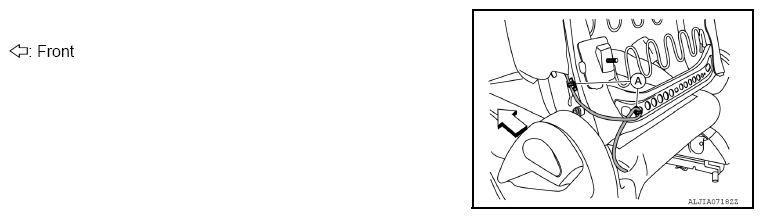
- Release the side air bag module harness upper clips (A) from the seatback frame assembly.
 Courtesy of NISSAN NORTH AMERICA, INC.
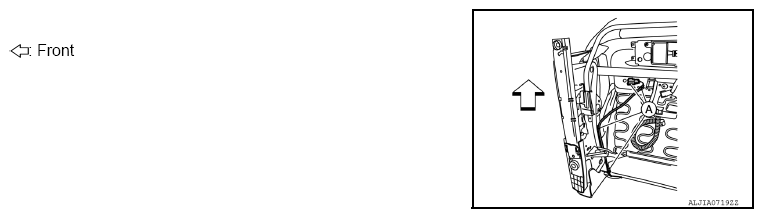
- For passenger seat, release the side air bag module harness lower clips (A) from the seat frame assembly.
 Courtesy of NISSAN NORTH AMERICA, INC.
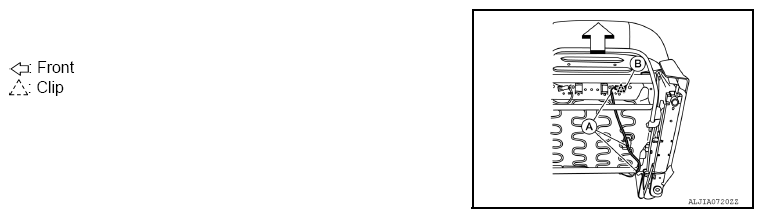
- For driver seat, release the side air bag module harness lower clips (A) and harness connector clip (B) from the seat frame assembly.
 Courtesy of NISSAN NORTH AMERICA, INC.
- Remove the side air bag module.
- Route the side air bag module harness and harness clips through the opening in the seat cushion trim.
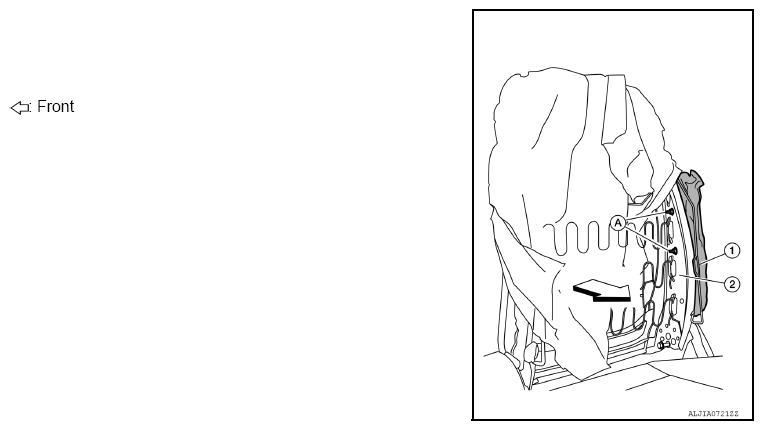
- Remove and discard the two side air bag module nuts (A).
CAUTION:
Do not reuse the side air bag module nuts.
- Remove the side air bag module (1) from the seatback frame (2).
 Courtesy of NISSAN NORTH AMERICA, INC.
- If necessary, separate the seatback trim from the seatback pad by cutting the center of hog rings and removing them.
NOTE:
Remove all pieces of hog rings and discard them.