Diagnostic Procedures
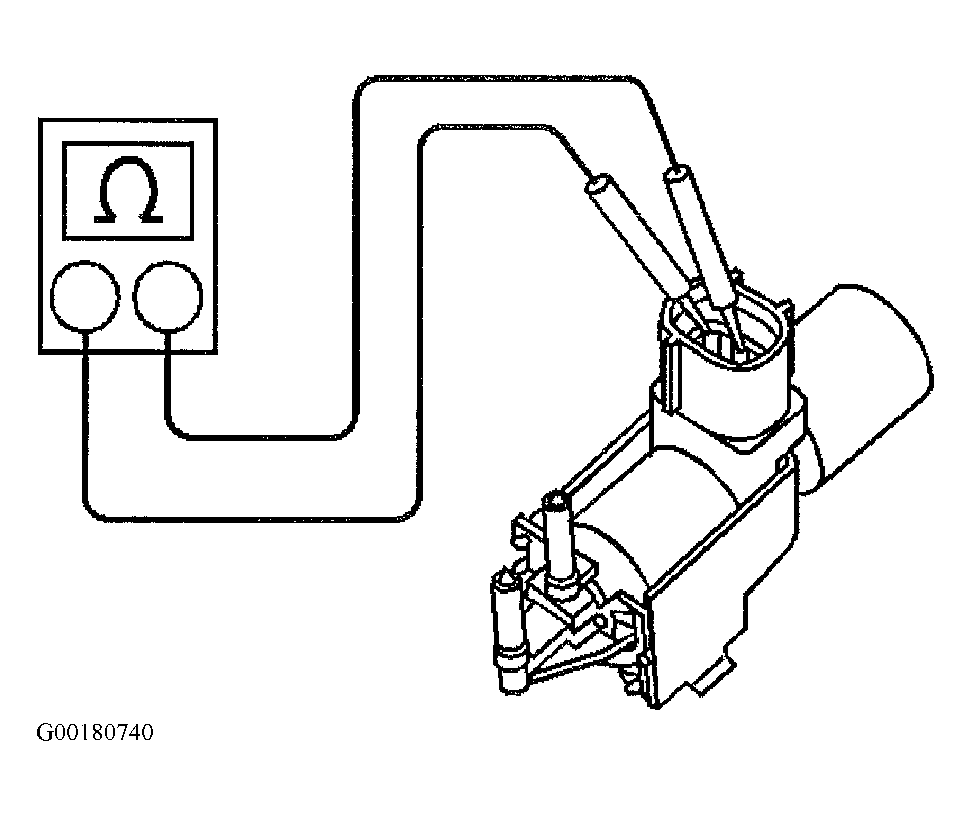
- Turn ignition switch to OFF position. Disconnect auxiliary intake air control solenoid harness connector. Measure resistance of the solenoid using a DMM. See Figure
. Is the resistance 37-44 ohms at 68°F (20°C)? If yes, go to next step. If no, go to step 10
.
- Disconnect the two vacuum hoses from the intake air control solenoid. Connect Hand Vacuum Pump (J 23738-A), or equivalent, to the inboard port of the intake air control solenoid. Plug outboard port of the intake air control solenoid. Observe the vacuum pump gauge while attempting to apply 15 in. Hg of vacuum. Did the vacuum indicated by the vacuum pump remain at zero? If yes, go to next step. If no, go to step 10
.
- Connect scan tool. Connect the solenoid harness connector. Turn ignition switch to RUN position, engine OFF. Command the intake air control solenoid ON with the scan tool. See SCAN TOOL OUTPUT CONTROLS - ENGINE CONTROLS
under SELF-DIAGNOSTIC SYSTEM in SELF-DIAGNOSTICS - 1.8L VIBE article. Observe the vacuum pump gauge while attempting to apply 15 in. Hg of vacuum. Did the vacuum indicated by the vacuum pump reach 15 in. Hg? If yes, go to next step. If no, go to step 5
.
- Command the intake air control solenoid OFF using the scan tool. Did vacuum indicated by the vacuum pump drop to zero? If yes, system is okay at this time. If no, go to step 9
.
- Disconnect the auxiliary intake air control solenoid harness connector. Turn ignition switch to RUN position, engine OFF. Using a test light connected to ground, probe the ignition positive voltage circuit at the solenoid harness connector. Does the test light illuminate? If yes, go to next step. If no, go to step 8
.
- Connect test light across the terminals of the solenoid harness connector. Using the scan tool, command the solenoid ON. Does the test light illuminate? If yes, go to step 10
. If no, go to next step.
- Test for an open or a short to voltage in the solenoid control circuit. Repair as necessary. Did you find and correct a condition? If yes, go to step 3
.
- Repair the open in the ignition positive voltage circuit. After repair, go to step 3
.
- Test for a short to ground in the solenoid control circuit. Repair as necessary. Did you find and correct a condition? If yes, go to step 3
. If no, go to step 11
.
- Replace the auxiliary intake air control solenoid. See AUXILIARY INTAKE AIR CONTROL SOLENOID
under MOTORS, RELAYS & SOLENOIDS in REMOVAL & INSTALLATION - VIBE article. After repair, go to step 2
.
- Replace the PCM. See POWERTRAIN CONTROL MODULE
under COMPUTERIZED ENGINE CONTROLS in REMOVAL & INSTALLATION - VIBE article. After repair, go to step 3
.
- Disconnect the intake air control solenoid harness connector.
- Using DMM, measure the solenoid resistance value. See Fig 1
. Resistance should be 37-44 ohms at 68°F (20°C).
- Replace the solenoid if the resistance is not as specified.
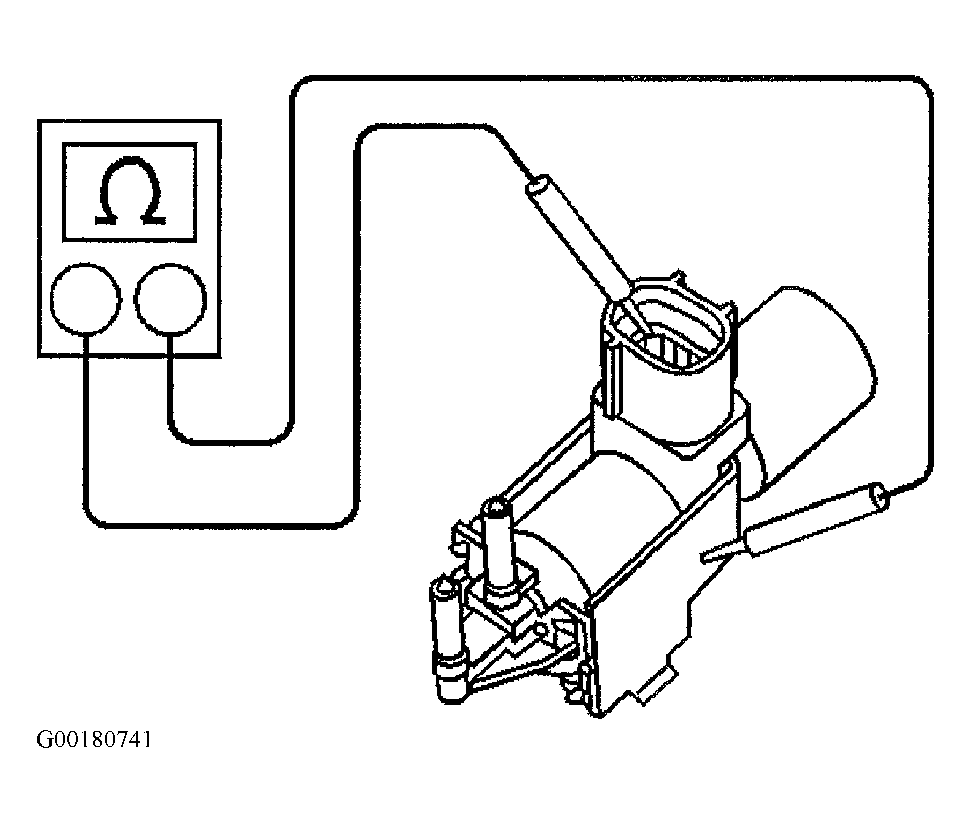
- Using DMM, check for continuity between each solenoid terminal and the solenoid housing. See Fig 2
. The DMM should read infinite (OL).
- Replace the intake air control solenoid if the resistance is not within specification. A shorted solenoid may cause damage to the PCM.
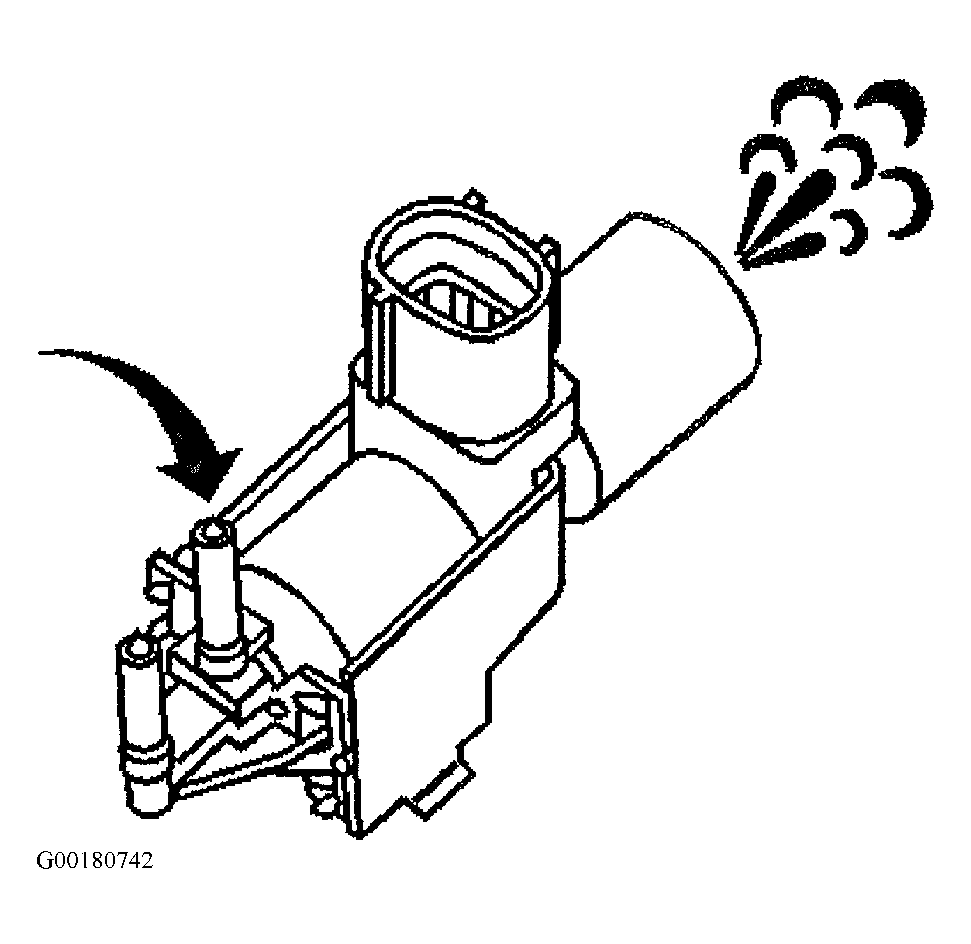
- Blow air through the inboard port of the intake air control solenoid. See Fig 3
. Air has to flow freely through the vent port and NOT out of the outboard port.
- Replace the solenoid if air flows from the inboard port out through the outboard port or air does not flow from the inboard port out through the vent port.
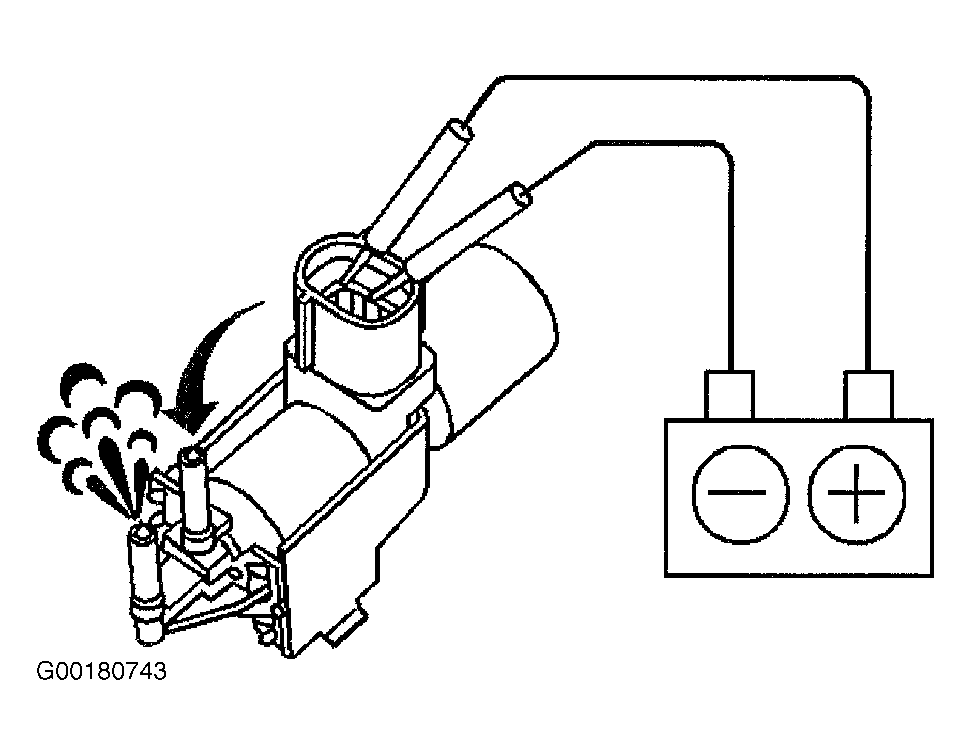
- Apply battery voltage across the solenoid terminals. See Fig 4
.
- Blow air through the inboard port of the solenoid. Air should flow through the solenoid and out of the outboard port. See Fig 4
.
- Replace the solenoid if the solenoid fails any of the tests.
- Connect the harness connector of the intake air control solenoid.
- Start the engine.
- Verify the intake air control solenoid is ON.
- If the solenoid is not energized, disconnect the solenoid harness connector and connect a test light across the terminals of the solenoid circuit.
- If the test light illuminated, replace the solenoid.
- If the test light did not illuminate, check for an open in the ignition positive voltage supply to the solenoid, or an open or a short to voltage in the solenoid control circuit.
- Repair any electrical circuit conditions as necessary.
- If you did not find and repair an electrical condition, replace the PCM. See POWERTRAIN CONTROL MODULE
under COMPUTERIZED ENGINE CONTROLS in REMOVAL & INSTALLATION - VIBE article.
 Courtesy of GENERAL MOTORS CORP.
 Courtesy of GENERAL MOTORS CORP.
 Courtesy of GENERAL MOTORS CORP.
 Courtesy of GENERAL MOTORS CORP.