Clutch Line Conversion
- A 15 mm hole -2- must be drilled in the left wheel housing due to the position of the lines!
 Courtesy of PORSCHE OF NORTH AMERICA, INC.
- The old clutch pipelines should be removed and replaced by the new current lines!
- The color of the clutch lines is blue.
- Remove front left wheel.
- Remove front left wheel housing liner.
- Remove Centre underside panel.
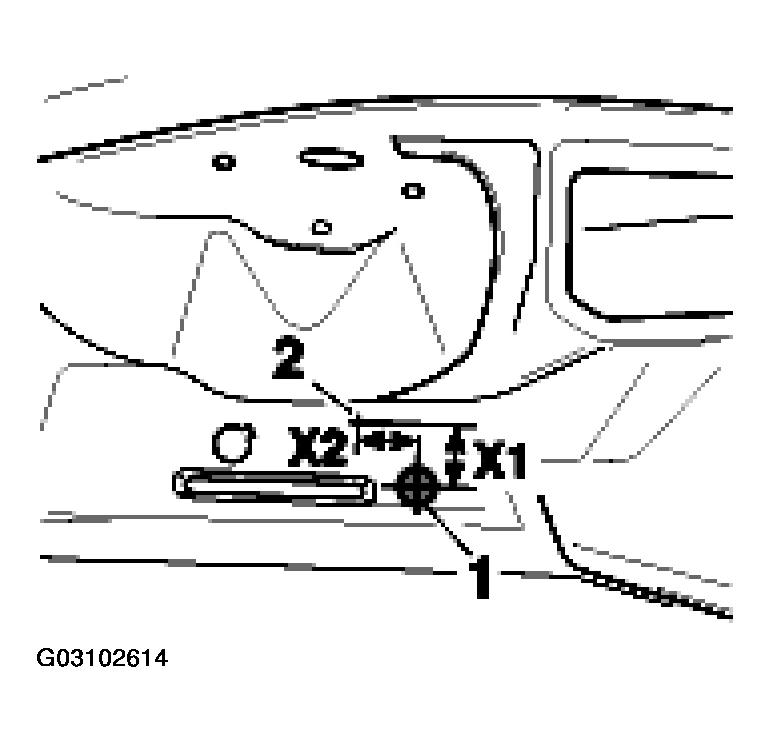
- Starting from the water drainage -1-
, measure the position of the hole -2-
to be drilled. Mark the dimension -X1 and X2-
. Dimension X1 = 47 mm / dimension X2 = 38 mm. See Fig 2
.
 Courtesy of PORSCHE OF NORTH AMERICA, INC.
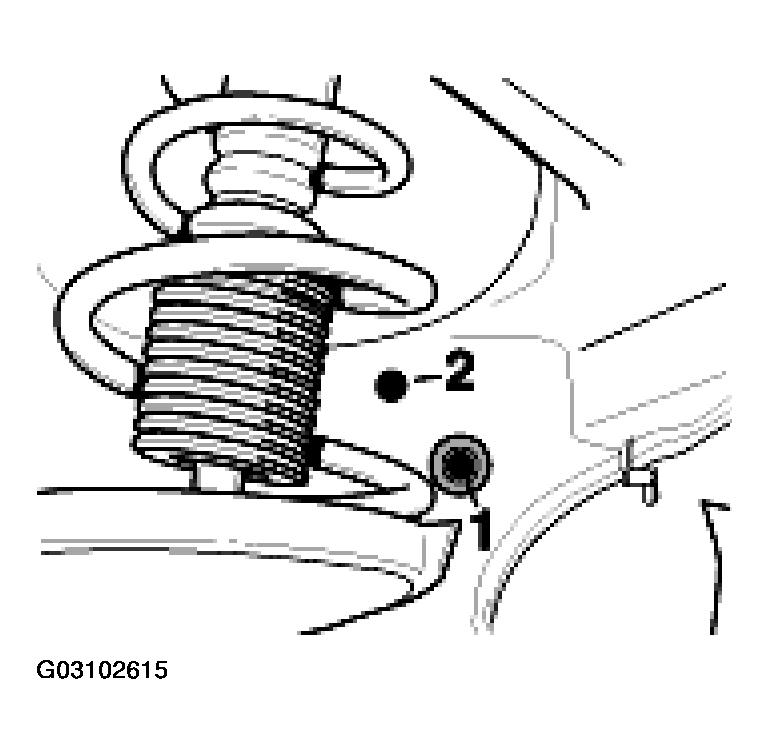
- Drill a hole -2-
in the marked position with a 15 mm diameter. To do this, move the wheel suspension (wheel alignment) into a favorable position (turn). Subsequently apply rust protection! Drill the hole -2-
in 3 stages as described in the following. See Fig 3
.
- Drill pilot hole.
- Then enlarge the bore to approx. 12 mm.
- Complete using slab milling cutter (15 mm diameter).
 Courtesy of PORSCHE OF NORTH AMERICA, INC.
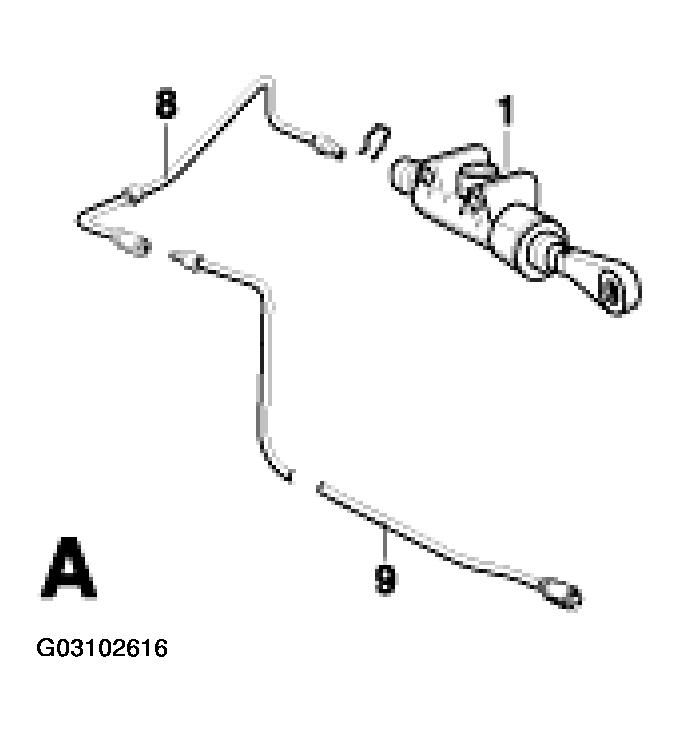
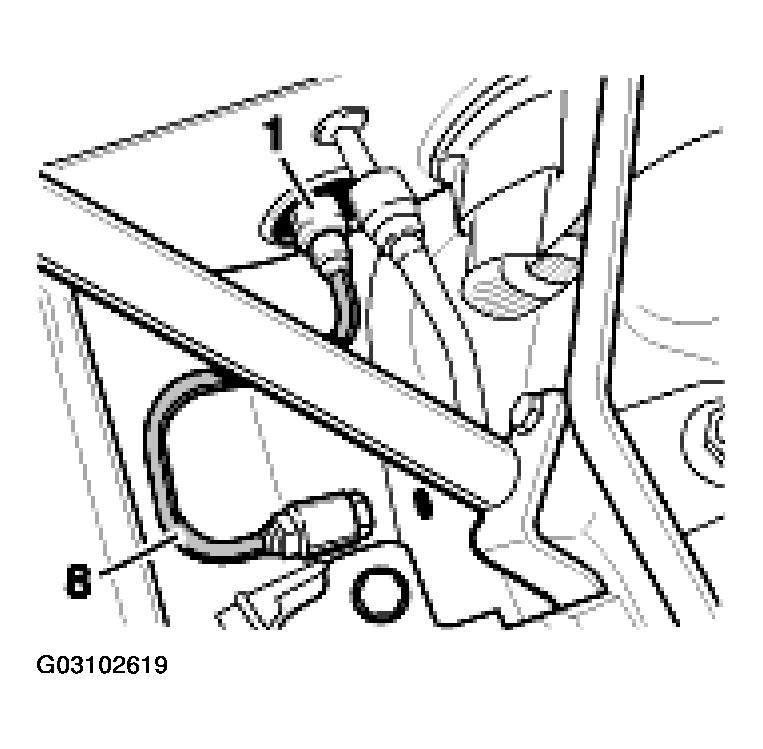
- Remove clutch pipelines -8 and 9-
of version -A-
. See Fig 4
 Courtesy of PORSCHE OF NORTH AMERICA, INC.
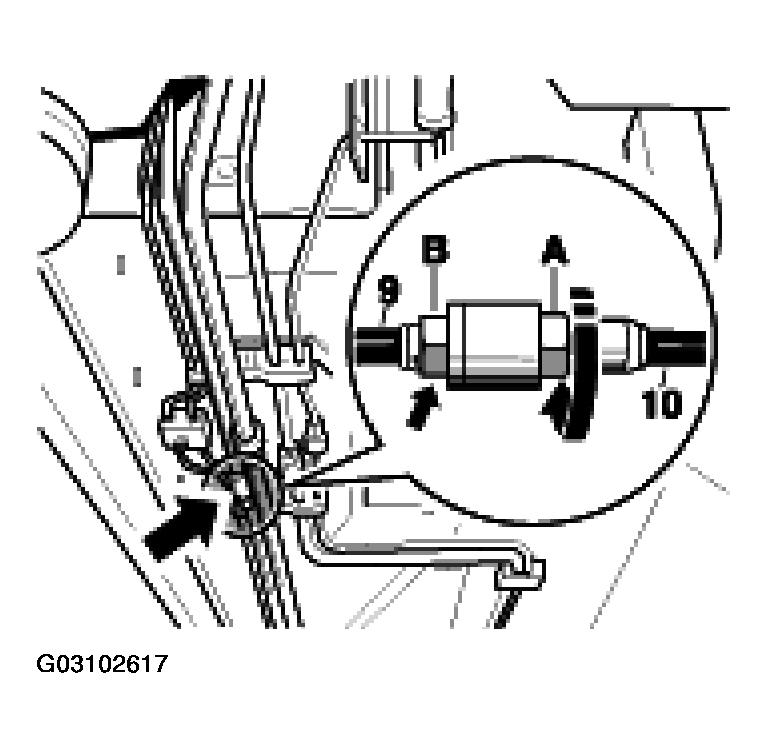
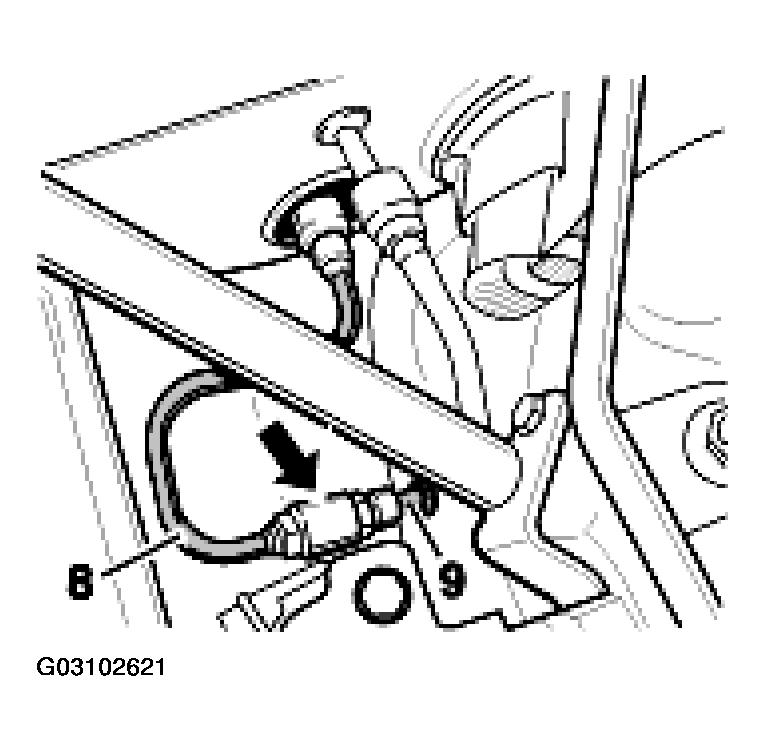
- Line -9-
on the underbody -arrow-
is separated from line -10-
by unscrewing! See Fig 5
. Turn at threaded part -A-
when loosening. When doing so, counter at plug-in coupling -B-
.
 Courtesy of PORSCHE OF NORTH AMERICA, INC.
NOTE:
The passage for version A is next to the washer fluid filler neck -arrow-. See Fig 5
. After removing the old lines, this small passage must not be sealed.
 Courtesy of PORSCHE OF NORTH AMERICA, INC.
- Mount new pressure line (version B) -8-
on clutch master cylinder -1-
. See Fig 7
.
 Courtesy of PORSCHE OF NORTH AMERICA, INC.
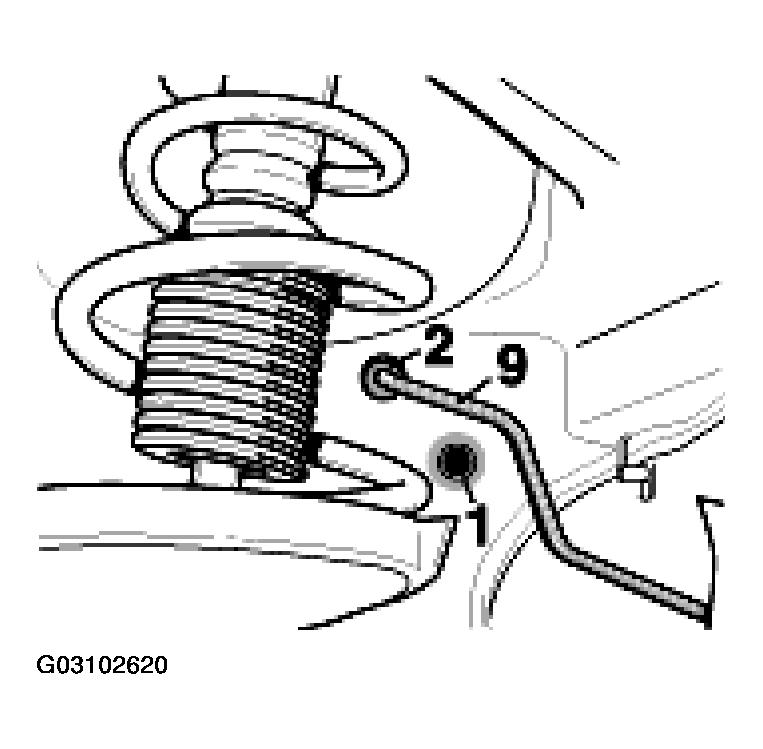
- Install the pressure line -9-
. Insert rubber grommet -2-
(spare part number 999.702.174.50). See Fig 8
.
 Courtesy of PORSCHE OF NORTH AMERICA, INC.
NOTE:
- The plug-in coupling -arrow-, including the holder, is already screwed together. Line -9- is only inserted onto line -8- in a straight line (engaged). See Fig 9
.
 Courtesy of PORSCHE OF NORTH AMERICA, INC.
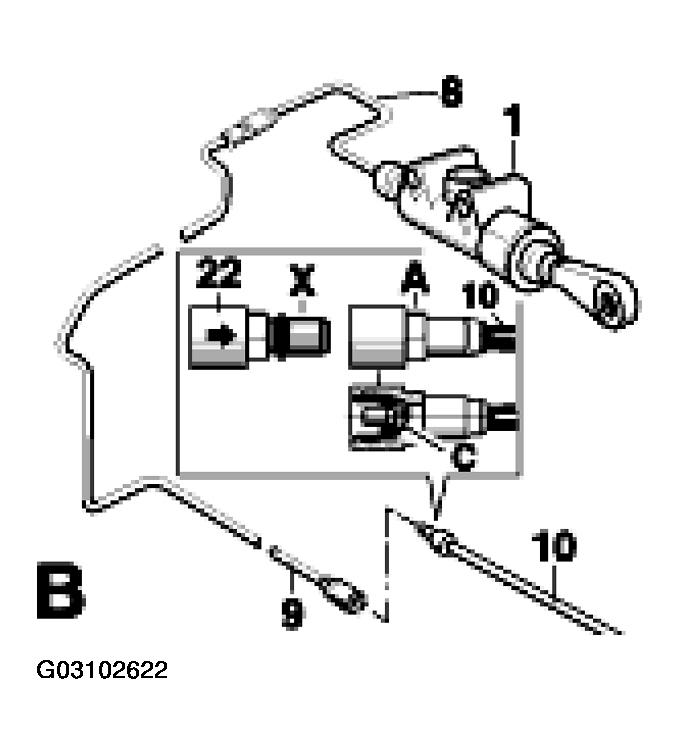
- Line -9- is also joined together (engaged) with line -10- at the plug-in coupling (screw connection)! Before doing this, holder -C- and screw connection -A- must be removed from line -10-! To do this, use a new screw connection -22- with the mounting plug already fitted (auxiliary tool) -X-! Assembly/disassembly instructions are enclosed for each new screw connection -22-. The enclosed instructions can be referred to for the procedure! See Fig 10
.
 Courtesy of PORSCHE OF NORTH AMERICA, INC.
- Clip pressure lines into the holder on the body.
- Install the wheel housing liner and the Centre trim.
- Bleed the clutch. See BLEEDING THE CLUTCH SYSTEM
.