Removal Procedure
 Courtesy of GENERAL MOTORS CORP.
- Relieve the fuel system pressure. Refer to Fuel Pressure Relief (CH 48027-100) or Fuel Pressure Relief (Without CH 48027-100) .
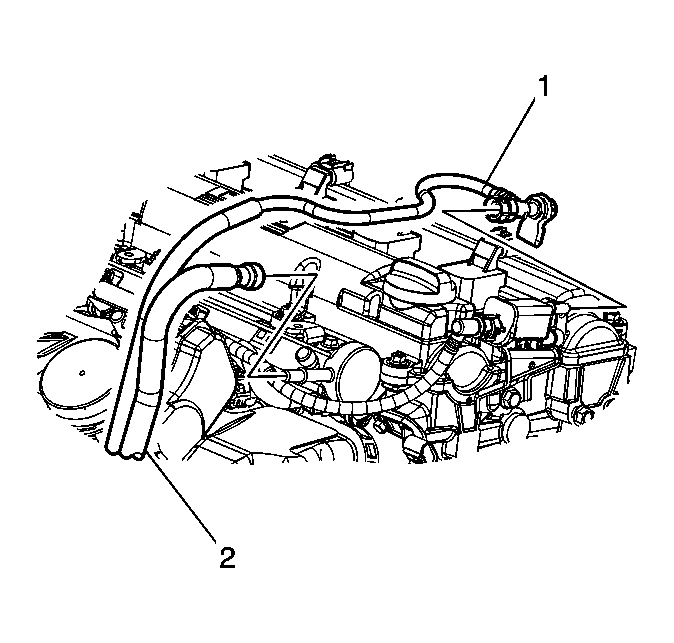
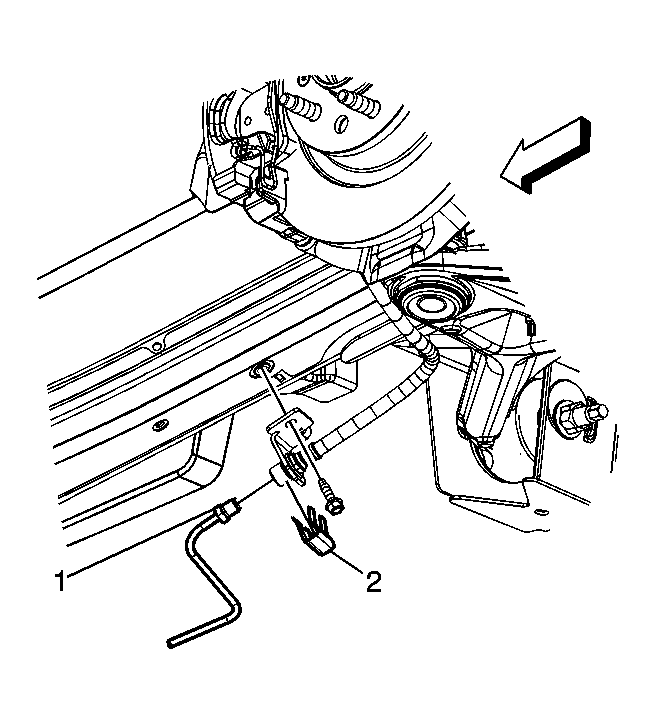
- Disconnect the evaporative emission (EVAP) pipe (1) quick connect fitting from the purge solenoid. Refer to Plastic Collar Quick Connect Fitting Service .
- Disconnect the fuel feed pipe (2) from the fuel rail. Refer to Metal Collar Quick Connect Fitting Service .
- Cap or plug the fuel feed pipe, fuel rail and EVAP line in order to prevent system contamination.
 Courtesy of GENERAL MOTORS CORP.
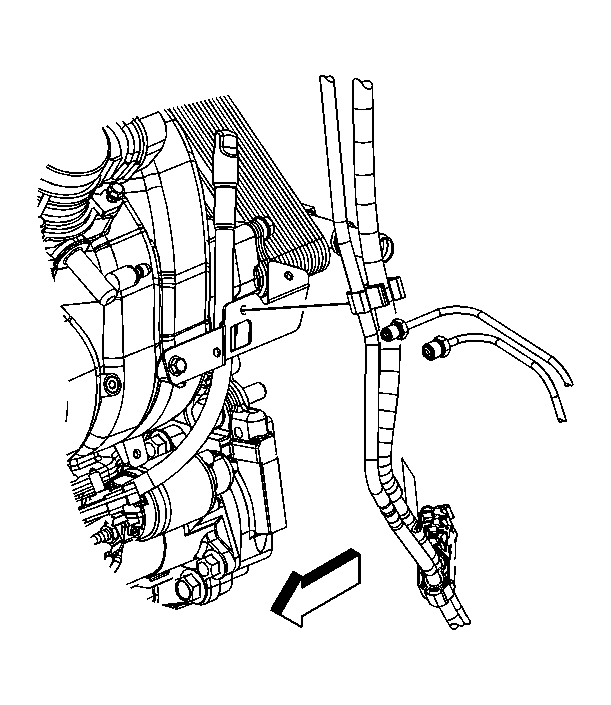
- Remove the fuel feed and evaporative emission (EVAP) pipe clip from the oil level indicator tube bracket.
 Courtesy of GENERAL MOTORS CORP.
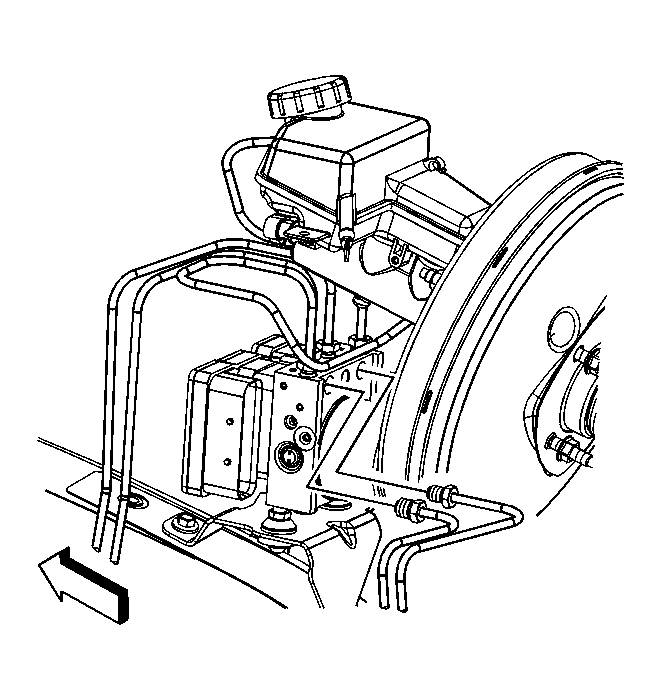
- Ensure that the area around the brake pipe connections is free of dirt and/or debris.
- Remove the brake pipes from the brake pressure modulator valve (BPMV), if equipped.
 Courtesy of GENERAL MOTORS CORP.
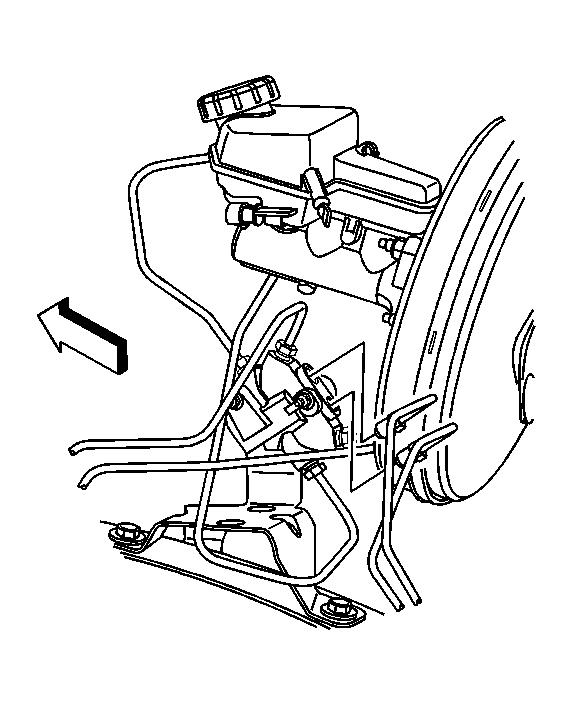
- Remove the brake pipes from the proportioning valve, if equipped.
- Cap or plug the BMPV or the proportioning valve in order to prevent system contamination.
- Remove the fuel tank. Refer to Fuel Tank Replacement .
 Courtesy of GENERAL MOTORS CORP.
- Remove the brake hose clips (2) from both the right and left brake hose brackets.
- Remove the right and left brake pipes (1) from the brake hoses.
 Courtesy of GENERAL MOTORS CORP.
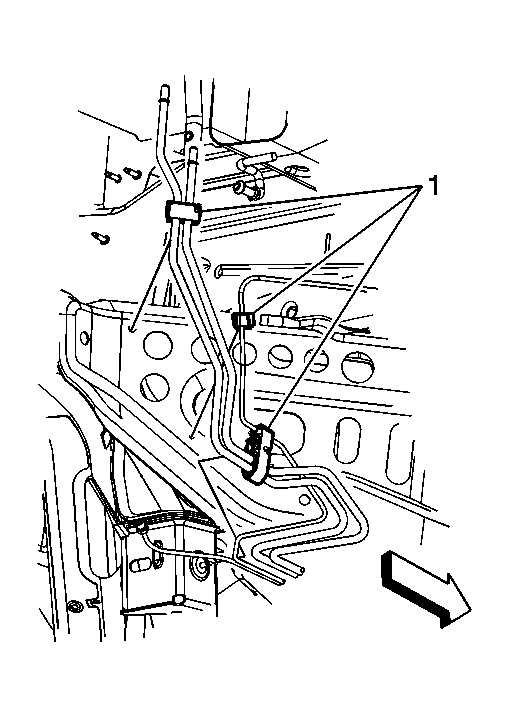
- Remove the pipe clips (1) from the following:
- Rear suspension lower control arm bracket
- Left hand brace floor panel tunnel
 Courtesy of GENERAL MOTORS CORP.
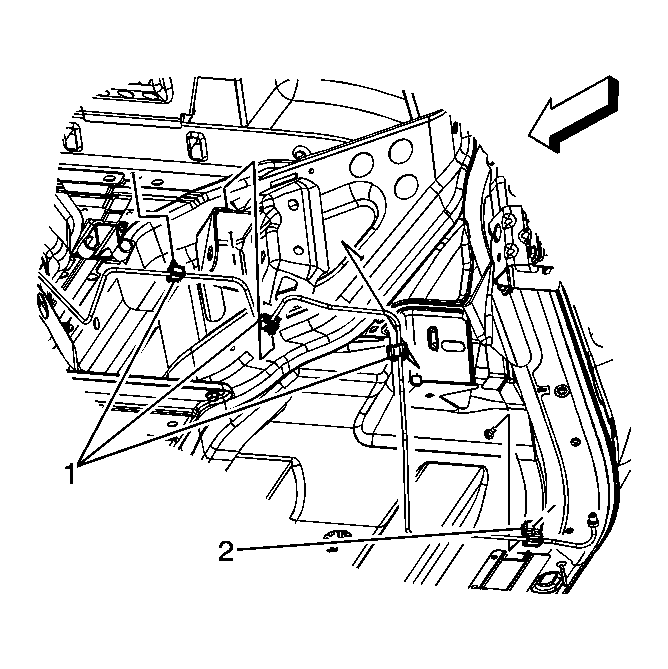
- Remove the pipe clips (1) from the following:
- Floor panel number 4 cross bar
- Rear carrier bracket
- Right hand brace floor panel tunnel
- Remove the pipe clip (2) from the floor panel rear reinforcement.
- Have an assistant support the fuel feed, EVAP, and brake pipe assembly.
 Courtesy of GENERAL MOTORS CORP.
- Remove the pipe clip (1) from the underbody side rail.
- Remove the pipe clip (2) from the floor panel tunnel brace stud.
- Remove the pipe clip (3) from the floor panel tunnel brace stud.
- Remove the pipe clips (4) from the floor panel studs.
- Remove the fuel feed, EVAP, and brake pipe assembly from the vehicle and place on a suitable work surface.
 Courtesy of GENERAL MOTORS CORP.
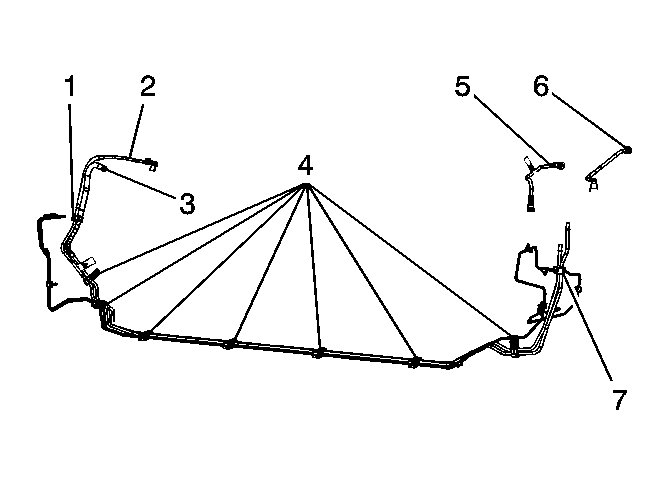
- Disconnect the fuel pump fuel feed line (5) from the fuel feed line. Refer to Plastic Collar Quick Connect Fitting Service .
- Remove the retaining clip (1) from the lines.
- Open the clips (4 and 7), and remove the fuel feed line (2) from the clips.
- Inspect and replace and damaged clips.