Removal Procedure
- Disconnect the negative battery cable. Refer to Battery Negative Cable Disconnection and Connection
.
 Courtesy of GENERAL MOTORS CORP.
- Relieve the fuel system pressure. Refer to Fuel Pressure Relief (Low Pressure without Special Tool) or Fuel Pressure Relief (Low Pressure with CH 48027) or Fuel Pressure Relief (Low Pressure Side with CH 48027-100) or Fuel Pressure Relief (High Pressure Side) .
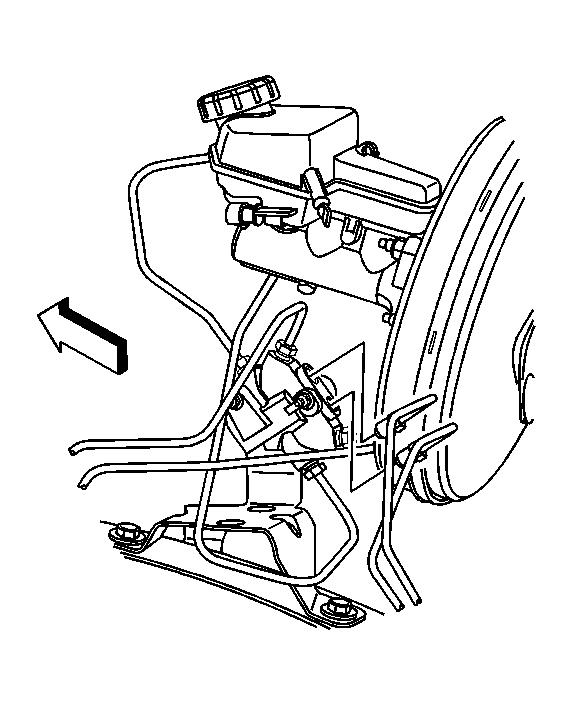
- Disconnect the evaporative emission (EVAP) pipe (2) quick connect fitting from the purge solenoid. Refer to Plastic Collar Quick Connect Fitting Service .
- Disconnect the fuel feed pipe (1) from the fuel rail. Refer to Metal Collar Quick Connect Fitting Service .
- Cap or plug the fuel feed pipe, fuel rail and EVAP line to in order to system prevent contamination.
- Remove the fuel feed and evaporative emission (EVAP) pipe clip from the coolant tube bracket.
 Courtesy of GENERAL MOTORS CORP.
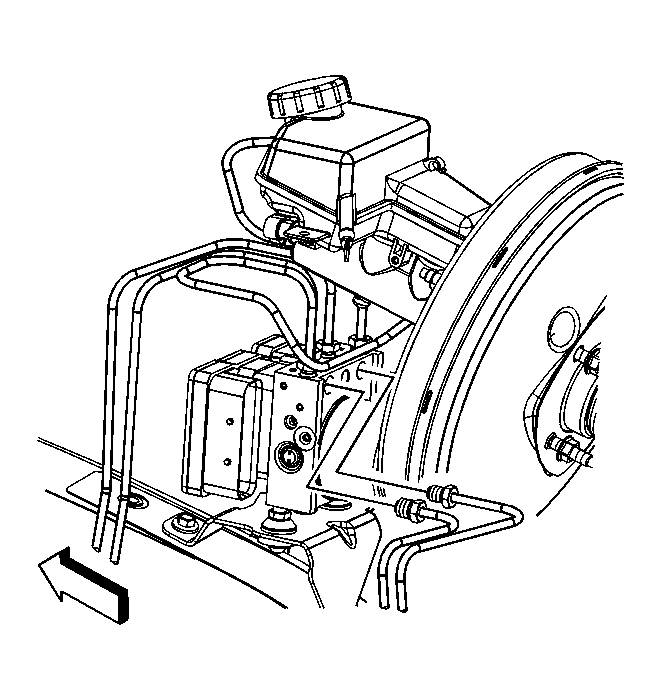
- Ensure that the area around the brake pipe connections is free of dirt and/or debris.
- Remove the brake pipes from the brake pressure modulator valve (BPMV), if equipped.
 Courtesy of GENERAL MOTORS CORP.
- Remove the brake pipes from the proportioning valve, if equipped.
- Cap or plug the BPMV or the proportioning valve in order to prevent system contamination.
- Remove the fuel tank. Refer to Fuel Tank Replacement .
 Courtesy of GENERAL MOTORS CORP.
- Remove the brake hose clips (2) from both the right and left brake hose brackets.
- Remove the right and left brake pipes (1) from the brake hoses.
 Courtesy of GENERAL MOTORS CORP.
- Remove the pipe clips (1) from the following:
- Rear suspension lower control arm bracket
- Left side brace floor panel tunnel
 Courtesy of GENERAL MOTORS CORP.
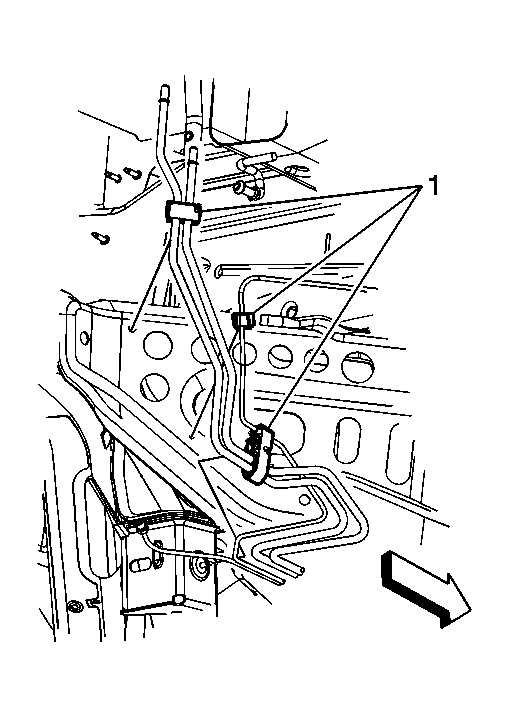
- Remove the pipe clips (1) from the following:
- Floor panel number 4 cross bar
- Rear carrier bracket
- Right side brace floor panel tunnel
- Remove the pipe clip (2) from the floor panel rear reinforcement.
- Have an assistant support the fuel feed, EVAP, and brake pipe assembly.
 Courtesy of GENERAL MOTORS CORP.
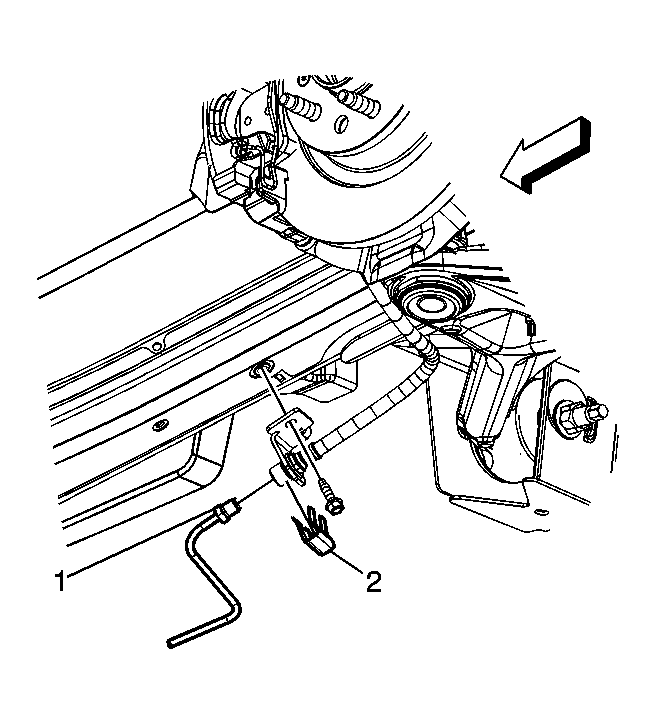
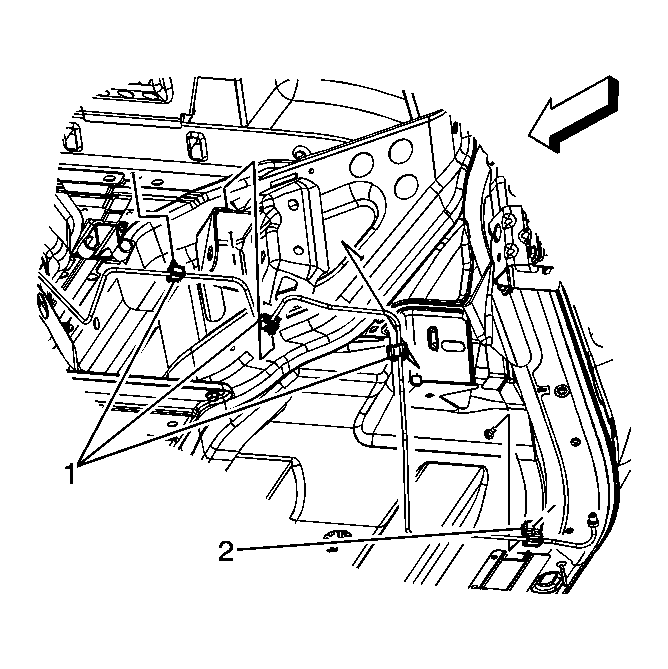
- Remove the pipe clip (1) from the underbody side rail.
- Remove the pipe clip (2) from the floor panel tunnel brace stud.
- Remove the pipe clip (3) from the floor panel tunnel brace stud.
- Remove the pipe clips (4) from the floor panel studs.
- Remove the fuel feed, EVAP, and brake pipe assembly from the vehicle and place on a suitable work surface.
 Courtesy of GENERAL MOTORS CORP.
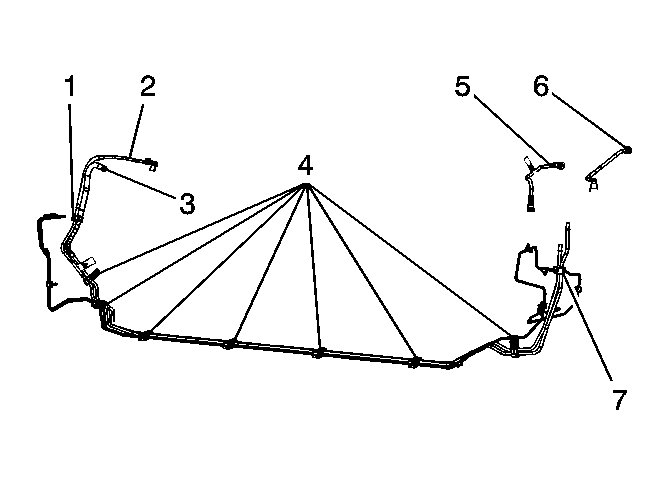
- Disconnect the fuel pump fuel feed line (5) from the fuel feed line. Refer to Plastic Collar Quick Connect Fitting Service .
- Remove the retaining clip (1) from the lines.
- Open the clips (4 and 7), and remove the fuel feed line (2) from the clips.
- Inspect and replace and damaged clips.