Generators & Regulators: Overhaul: Generator: Disassembly
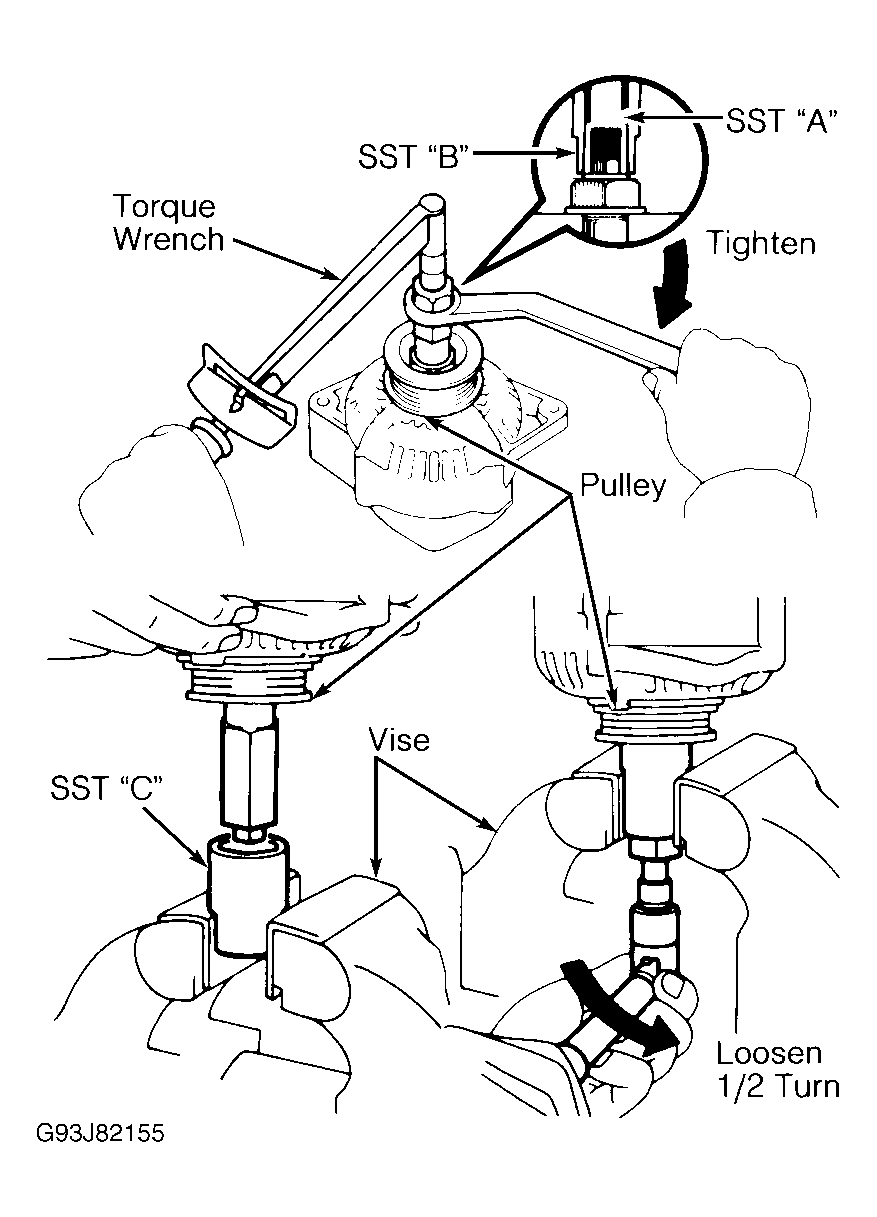
- Use generator Pulley Set Nut Wrench Set (SST 09820-63010) to remove generator pulley. To remove pulley, install SST "A" and "B" to rotor shaft and tighten SST "B" clockwise to 29 ft. lbs. (39 N.m). See Fig 2. Place SST "C" securely into a vise. Verify that SST "A" is secured to rotor shaft and install SST "A" and "B" and generator into SST "C". Turn SST "A" in correct direction to loosen pulley nut. To prevent damage to rotor shaft, DO NOT loosen pulley nut more than 1/2 turn. Remove generator from SST "C". Turn SST "A" and "B", remove pulley nut and pulley.
- Remove nut and terminal insulator. Remove 3 nuts, one bolt, plated terminal and end cover. See Fig 1.
- Remove brush cover. Remove 2 screws and brush holder. Remove 3 screws and voltage regulator.
- Remove 4 screws and diode (rectifier) holder.
- Remove 4 rubber insulators from rectifier end frame. Remove generator seal plate from rotor. Remove 4 nuts and clip code. Using Bearing Puller (SST 09286-46011), remove rectifier end frame.
- Remove generator washer from rotor. Remove rotor from drive end frame.
 Courtesy of © TOYOTA, LICENSE AGREEMENT TMS1002
 Courtesy of © TOYOTA, LICENSE AGREEMENT TMS1002