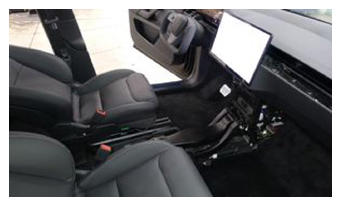
- Open all four doors
- Lower LH front window
- Move LH front seat forward
- Move RH front seat forward
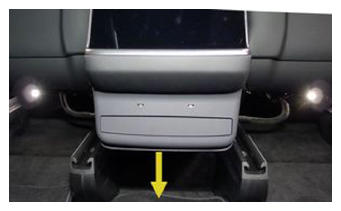
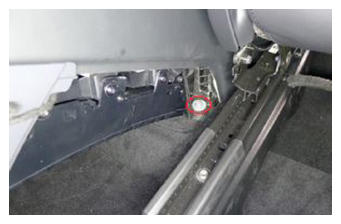
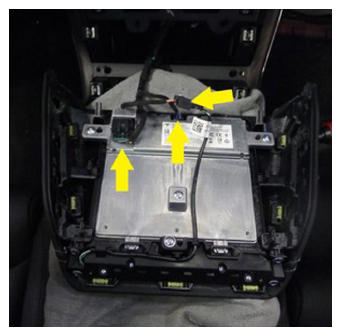
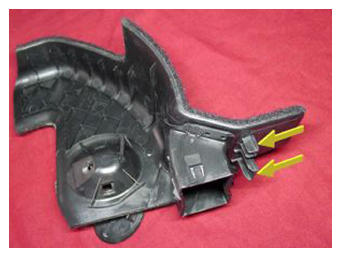
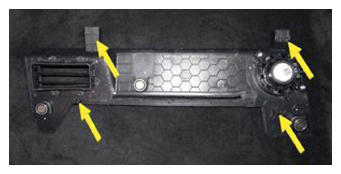
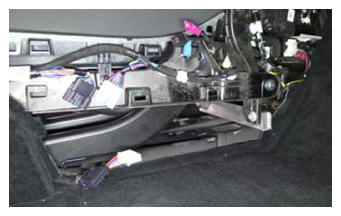
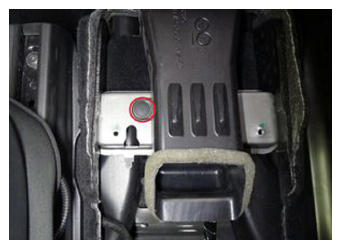
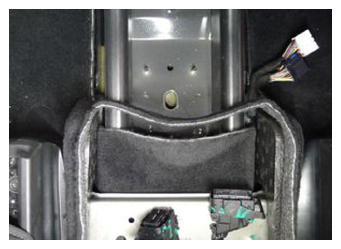
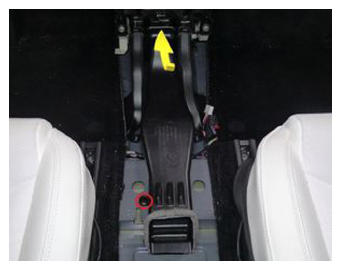
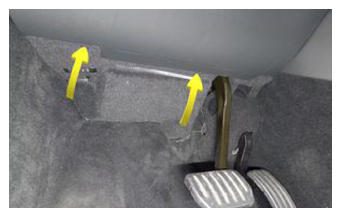
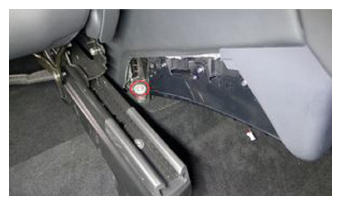
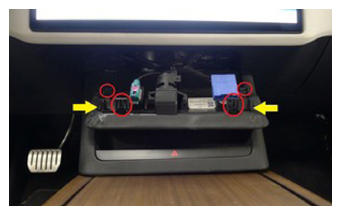
- Release console back panel assembly
NOTE:
6x clips, 7x datums, Disengage bottom clips last and pull rearward due to alignment
 Courtesy of TESLA, INC. Courtesy of TESLA, INC.
|
 Courtesy of TESLA, INC. Courtesy of TESLA, INC.
|
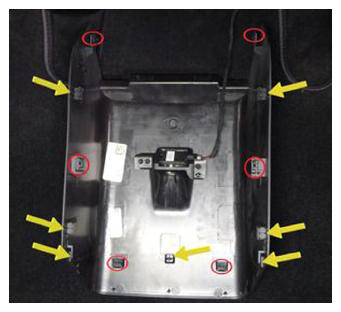
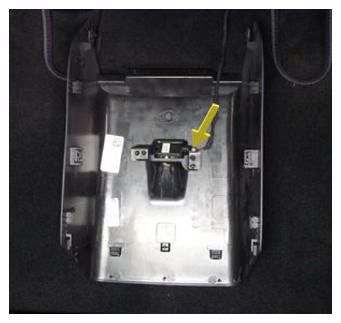
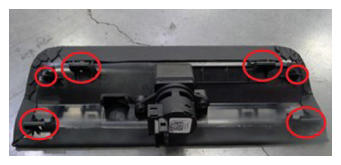
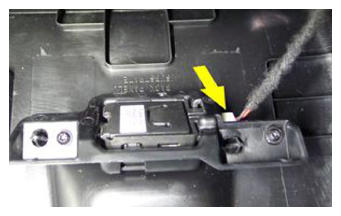
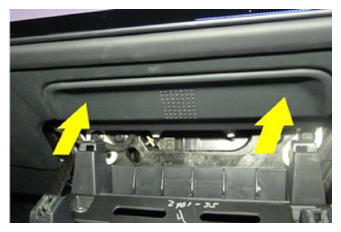
- Remove console back panel assembly
NOTE:
1x connector, Connector lock for lamp located underneath bracket
 Courtesy of TESLA, INC. Courtesy of TESLA, INC.
|
 Courtesy of TESLA, INC. Courtesy of TESLA, INC.
|
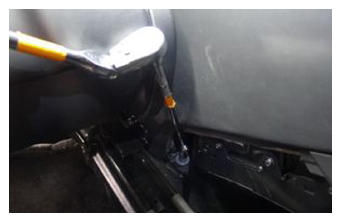
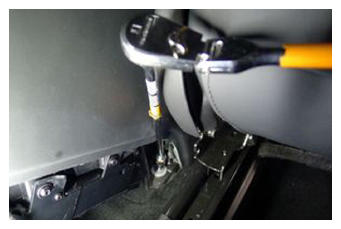
- Release LH and RH rear console carrier
NOTE:
2x bolts, 10 mm, 12 N.m
 Courtesy of TESLA, INC. Courtesy of TESLA, INC.
|
 Courtesy of TESLA, INC. Courtesy of TESLA, INC.
|
 Courtesy of TESLA, INC. Courtesy of TESLA, INC.
|
 Courtesy of TESLA, INC. Courtesy of TESLA, INC.
|
- Move RH front seat backward
- Move LH front seat backward
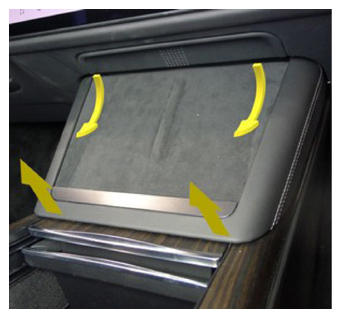
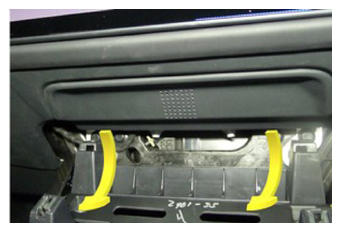
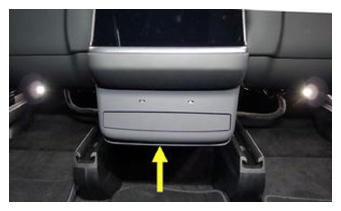
- Release phone dock
NOTE:
4x clips, 2x datums, Pull up at bottom and swing out from under instrument panel
 Courtesy of TESLA, INC. Courtesy of TESLA, INC.
|
 Courtesy of TESLA, INC. Courtesy of TESLA, INC.
|
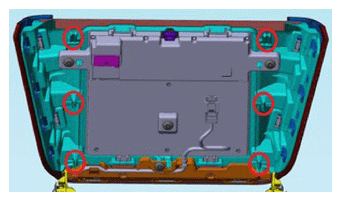
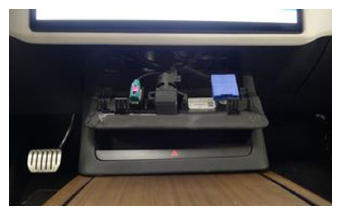
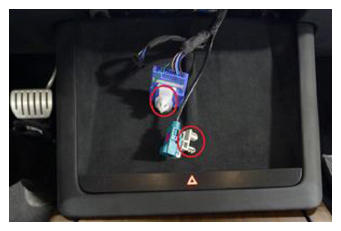
- Remove phone dock
NOTE:
3x connectors, 1x clip, Take caution to release connector locks before pulling straight out of each socket to avoid damage
 Courtesy of TESLA, INC. Courtesy of TESLA, INC.
|
 Courtesy of TESLA, INC. Courtesy of TESLA, INC.
|
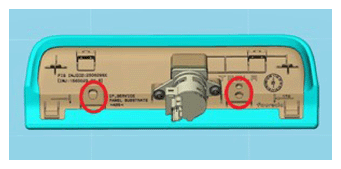
- Release IP service panel
NOTE:
4x tabs, 2x datums
 Courtesy of TESLA, INC. Courtesy of TESLA, INC.
|
 Courtesy of TESLA, INC. Courtesy of TESLA, INC.
|
 Courtesy of TESLA, INC. Courtesy of TESLA, INC.
|
- Release diagnostic and CAN harnesses from IP service panel
NOTE:
2x clips
 Courtesy of TESLA, INC. Courtesy of TESLA, INC.
|
 Courtesy of TESLA, INC. Courtesy of TESLA, INC.
|
- Remove IP service panel
NOTE:
1x connector
 Courtesy of TESLA, INC. Courtesy of TESLA, INC.
|
 Courtesy of TESLA, INC. Courtesy of TESLA, INC.
|
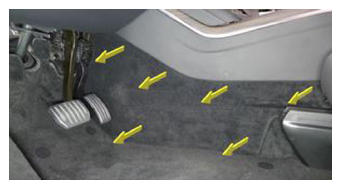
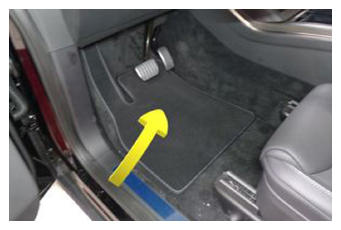
- Remove LH front floor mat
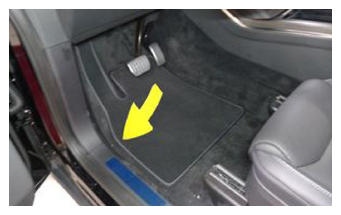 Courtesy of TESLA, INC. Courtesy of TESLA, INC.
|
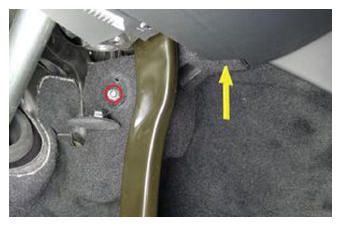
- Remove LH outboard footwell cover
NOTE:
2x magnets, 2x datums
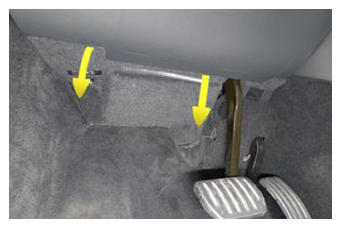 Courtesy of TESLA, INC. Courtesy of TESLA, INC.
|
 Courtesy of TESLA, INC. Courtesy of TESLA, INC.
|
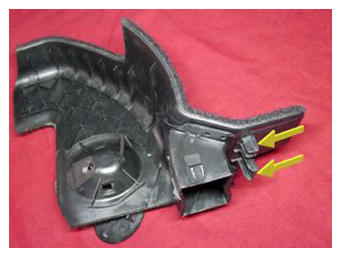
- Remove LH inboard footwell cover
NOTE:
1x cover, 1x clip, 1x datum, 1x screw, 8 mm, 1 N.m
 Courtesy of TESLA, INC. Courtesy of TESLA, INC.
|
 Courtesy of TESLA, INC. Courtesy of TESLA, INC.
|
 Courtesy of TESLA, INC. Courtesy of TESLA, INC.
|
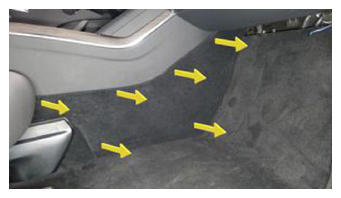
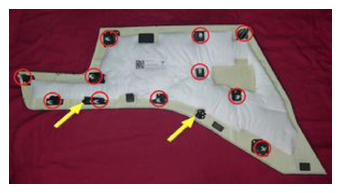
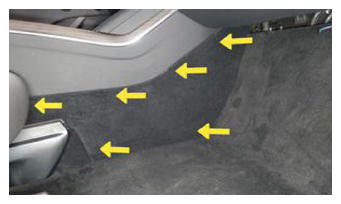
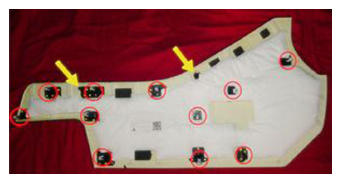
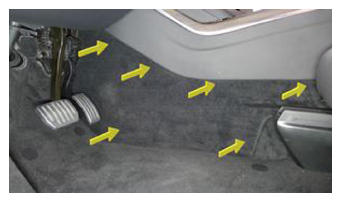
- Remove LH console side carpet
NOTE:
11x clips, 2x datums
 Courtesy of TESLA, INC. Courtesy of TESLA, INC.
|
 Courtesy of TESLA, INC. Courtesy of TESLA, INC.
|
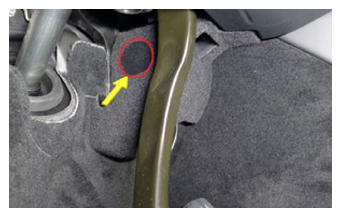
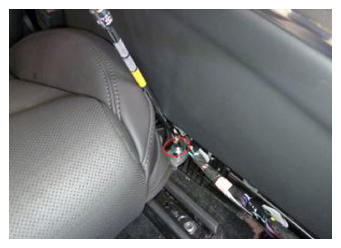
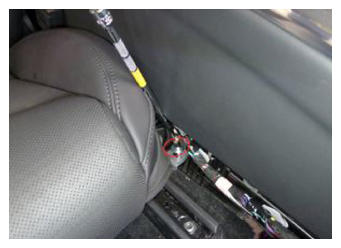
- Release LH center console lower bracket from IP carrier
NOTE:
1x bolt, 10 mm, 10 N.m
 Courtesy of TESLA, INC. Courtesy of TESLA, INC.
|
- Remove RH front floor mat
 Courtesy of TESLA, INC. Courtesy of TESLA, INC.
|
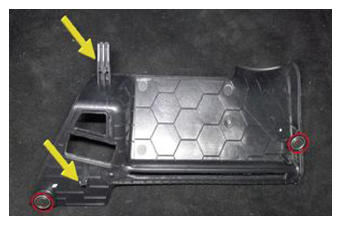
- Remove RH footwell cover
NOTE:
3x magnets, 1x connector, 4x datums
 Courtesy of TESLA, INC. Courtesy of TESLA, INC.
|
 Courtesy of TESLA, INC. Courtesy of TESLA, INC.
|
- Remove RH console side carpet
NOTE:
11x clips, 2x datums
 Courtesy of TESLA, INC. Courtesy of TESLA, INC.
|
 Courtesy of TESLA, INC. Courtesy of TESLA, INC.
|
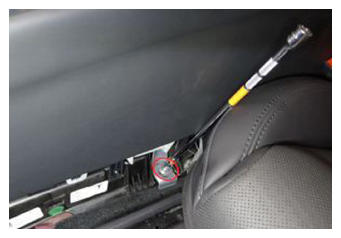
- Release RH center console lower bracket from IP carrier
NOTE:
1x bolt, 10 mm, 10 N.m
 Courtesy of TESLA, INC. Courtesy of TESLA, INC.
|
- Release center console connectors to body harness
NOTE:
4x connectors
 Courtesy of TESLA, INC. Courtesy of TESLA, INC.
|
 Courtesy of TESLA, INC. Courtesy of TESLA, INC.
|
- Release console carrier center bracket
NOTE:
2x bolts, 10 mm, 12 N.m
 Courtesy of TESLA, INC. Courtesy of TESLA, INC.
|
 Courtesy of TESLA, INC. Courtesy of TESLA, INC.
|
- Recline LH front seat backrest
- Recline RH front seat backrest
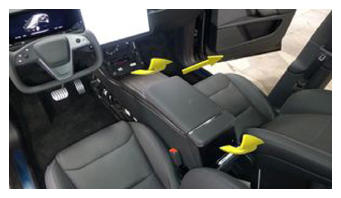
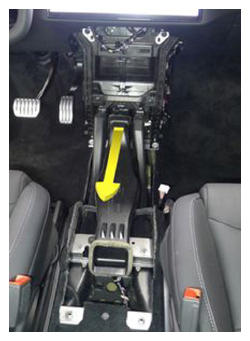
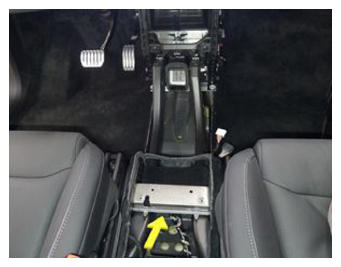
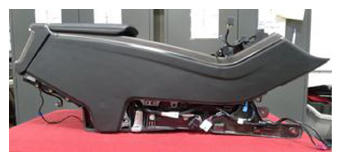
- Remove console assembly
NOTE:
Lift at rear, rotate front from under IP and out passenger door, Take care not to scratch seats, IP or inner door panel, Recommend assistance if needed
 Courtesy of TESLA, INC. Courtesy of TESLA, INC.
|
 Courtesy of TESLA, INC. Courtesy of TESLA, INC.
|
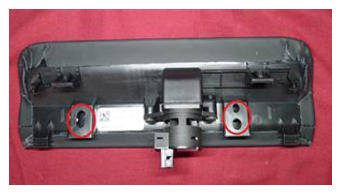
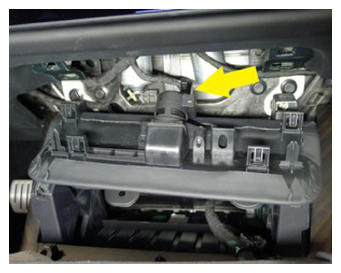
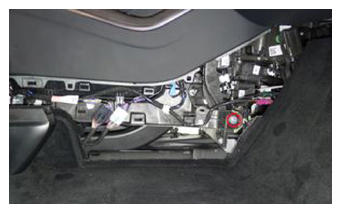
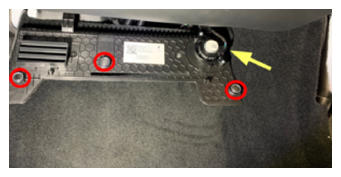
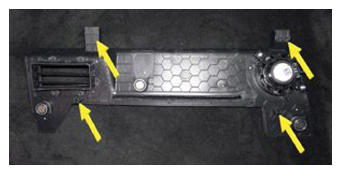
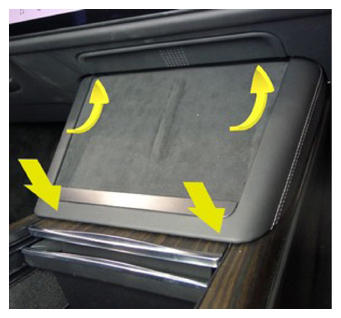
- Remove center console HVAC duct
NOTE:
1x brush clip
 Courtesy of TESLA, INC. Courtesy of TESLA, INC.
|
 Courtesy of TESLA, INC. Courtesy of TESLA, INC.
|
 Courtesy of TESLA, INC. Courtesy of TESLA, INC.
|
- Open hood
NOTE:
Via center display > Controls > Frunk Open
- Power off vehicle via center display
NOTE:
Controls > Safety & Security > Power Off
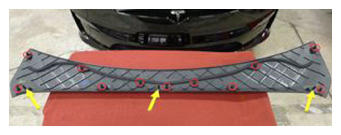
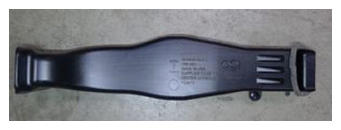
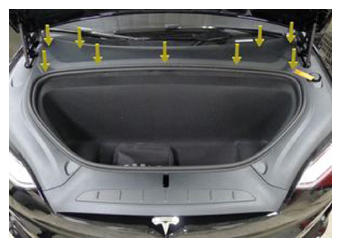
- Remove rear underhood apron
NOTE:
11x clips, 2x datums
 Courtesy of TESLA, INC. Courtesy of TESLA, INC.
|
 Courtesy of TESLA, INC. Courtesy of TESLA, INC.
|
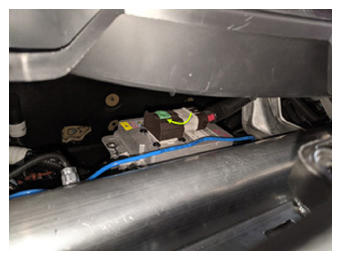
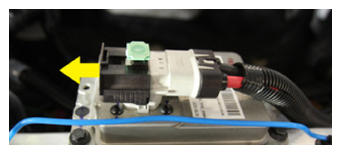
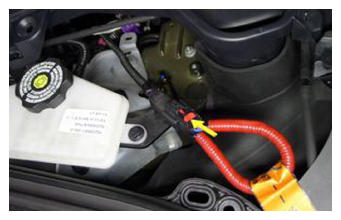
- Disconnect LV battery connector and First Responder Loop
NOTE:
2x connectors, Lift up and release green locking tab, Pull black connector lock outwards to release connection, Release red lock tab on FRL
 Courtesy of TESLA, INC. Courtesy of TESLA, INC.
|
 Courtesy of TESLA, INC. Courtesy of TESLA, INC.
|
 Courtesy of TESLA, INC. Courtesy of TESLA, INC.
|
WARNING:
Make sure LV is disconnected before continuing to the next step.
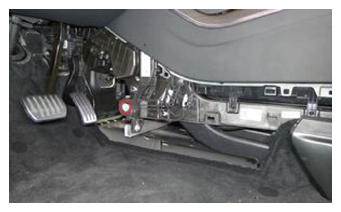
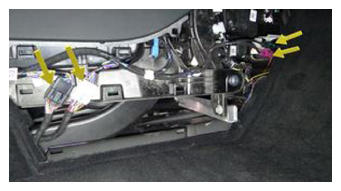
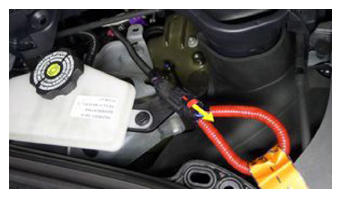
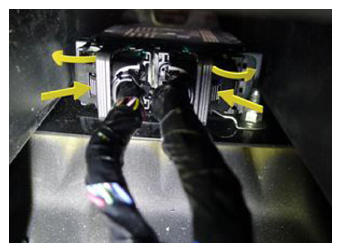
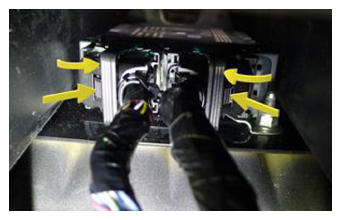
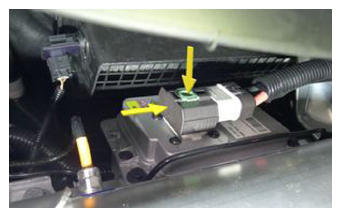
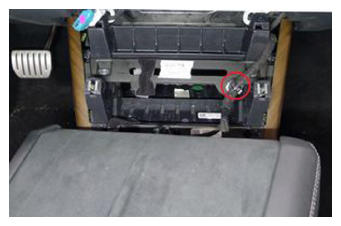
- Disconnect RCM connectors
NOTE:
2x connectors, Reach underneath center console support bracket to access RCM connectors, Depress connector locks and swing release arms out to disengage
 Courtesy of TESLA, INC. Courtesy of TESLA, INC.
|
 Courtesy of TESLA, INC. Courtesy of TESLA, INC.
|
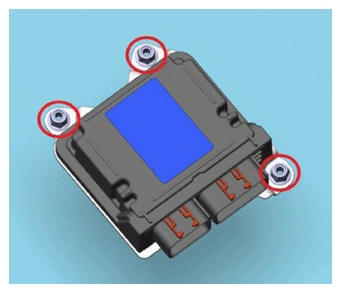
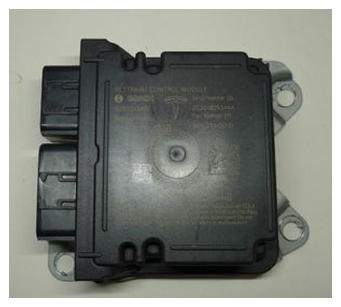
- Remove RCM fasteners
NOTE:
3x nuts, 10 mm, 10 N.m, Discard after removal
 Courtesy of TESLA, INC. Courtesy of TESLA, INC.
|
 Courtesy of TESLA, INC. Courtesy of TESLA, INC.
|
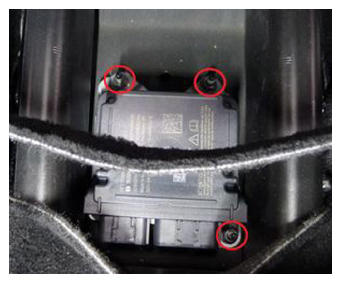
- Remove RCM
 Courtesy of TESLA, INC. Courtesy of TESLA, INC.
|
 Courtesy of TESLA, INC. Courtesy of TESLA, INC.
|
- Install new RCM
NOTE:
3x nuts, 10 mm, 10 N.m, Install new nuts
 Courtesy of TESLA, INC. Courtesy of TESLA, INC.
|
 Courtesy of TESLA, INC. Courtesy of TESLA, INC.
|
 Courtesy of TESLA, INC. Courtesy of TESLA, INC.
|
- Connect RCM connectors
NOTE:
2x connectors, Reach underneath center console support bracket to engage RCM connectors, Swing release arms in and ensure locking tabs engage
 Courtesy of TESLA, INC. Courtesy of TESLA, INC.
|
 Courtesy of TESLA, INC. Courtesy of TESLA, INC.
|
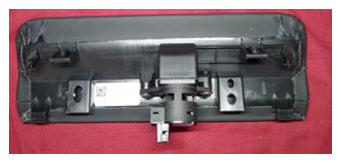
- Install center console HVAC duct
NOTE:
1x brush clip, Slide duct into HVAC assembly and ensure fully seated
 Courtesy of TESLA, INC. Courtesy of TESLA, INC.
|
 Courtesy of TESLA, INC. Courtesy of TESLA, INC.
|
 Courtesy of TESLA, INC. Courtesy of TESLA, INC.
|
- Connect First Responder Loop and LV battery connector
NOTE:
2x connectors, Secure FRL first, Seat LV battery connection and push black connector lock inwards to secure, Engage upper locking tab when fully seated
 Courtesy of TESLA, INC. Courtesy of TESLA, INC.
|
 Courtesy of TESLA, INC. Courtesy of TESLA, INC.
|
- Install rear underhood apron
NOTE:
11x clips, 2x datums
 Courtesy of TESLA, INC. Courtesy of TESLA, INC.
|
 Courtesy of TESLA, INC. Courtesy of TESLA, INC.
|
- Close hood
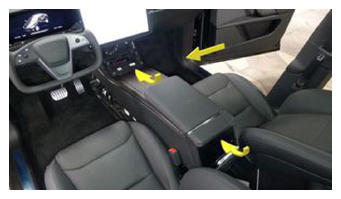
- Install console assembly
NOTE:
Carefully maneuver front of assembly under and into IP carrier and lower rear into place, Recommend assistance if needed
 Courtesy of TESLA, INC. Courtesy of TESLA, INC.
|
 Courtesy of TESLA, INC. Courtesy of TESLA, INC.
|
 Courtesy of TESLA, INC. Courtesy of TESLA, INC.
|
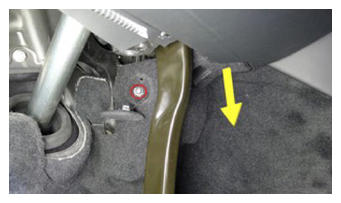
- Secure LH center console lower bracket to IP carrier
NOTE:
1x bolt, 10 mm, 10 N.m
 Courtesy of TESLA, INC. Courtesy of TESLA, INC.
|
- Secure RH center console lower bracket to IP carrier
NOTE:
1x bolt, 10 mm, 10 N.m
 Courtesy of TESLA, INC. Courtesy of TESLA, INC.
|
- Secure center console connectors to body harness
NOTE:
4x connectors, Ensure all connector locks engage
 Courtesy of TESLA, INC. Courtesy of TESLA, INC.
|
- Secure console carrier center bracket
NOTE:
2x bolts, 10 mm, 12 N.m
 Courtesy of TESLA, INC. Courtesy of TESLA, INC.
|
 Courtesy of TESLA, INC. Courtesy of TESLA, INC.
|
- Install RH console side carpet
NOTE:
11x clips, 2x datums
 Courtesy of TESLA, INC. Courtesy of TESLA, INC.
|
 Courtesy of TESLA, INC. Courtesy of TESLA, INC.
|
- Install RH footwell cover
NOTE:
3x magnets, 4x datums, 1x connector
 Courtesy of TESLA, INC. Courtesy of TESLA, INC.
|
 Courtesy of TESLA, INC. Courtesy of TESLA, INC.
|
- Install RH front floor mat
 Courtesy of TESLA, INC. Courtesy of TESLA, INC.
|
- Install LH console side carpet
NOTE:
11x clips, 2x datums
 Courtesy of TESLA, INC. Courtesy of TESLA, INC.
|
 Courtesy of TESLA, INC. Courtesy of TESLA, INC.
|
- Install LH inboard footwell cover
NOTE:
1x cover, 1x clip, 1x datum, 1x screw, 8 mm, 1 N.m, Align datums and footwell vent before installing screw
 Courtesy of TESLA, INC. Courtesy of TESLA, INC.
|
 Courtesy of TESLA, INC. Courtesy of TESLA, INC.
|
 Courtesy of TESLA, INC. Courtesy of TESLA, INC.
|
 Courtesy of TESLA, INC. Courtesy of TESLA, INC.
|
- Install LH outboard footwell cover
NOTE:
2x magnets, 2x datums
 Courtesy of TESLA, INC. Courtesy of TESLA, INC.
|
 Courtesy of TESLA, INC. Courtesy of TESLA, INC.
|
- Install LH front floor mat
 Courtesy of TESLA, INC. Courtesy of TESLA, INC.
|
- Install phone dock connections
NOTE:
3x connectors, 1x clip
 Courtesy of TESLA, INC. Courtesy of TESLA, INC.
|
 Courtesy of TESLA, INC. Courtesy of TESLA, INC.
|
- Install phone dock
NOTE:
2x datums, 4 tabs, Slide datums forward into IP and secure tabs down into center console
 Courtesy of TESLA, INC. Courtesy of TESLA, INC.
|
- Using laptop connect to vehicle with ethernet diag kit and Toolbox 3
- Select "Actions" tab and search for "CAN Redeploy"
- Select "SERVICE CAN REDEPLOY", click "Run", and allow routine to complete
NOTE:
Select "X" at top right of window to close once complete, Routine will state pass but update will continue to run in the background, UI will show update progress
- Move LH front seat forward
- Raise LH front seat backrest
- Move RH front seat forward
- Raise RH front seat backrest
- Secure LH and RH rear console carrier
NOTE:
2x bolts, 10 mm, 12 N.m
 Courtesy of TESLA, INC. Courtesy of TESLA, INC.
|
 Courtesy of TESLA, INC. Courtesy of TESLA, INC.
|
- Install console back panel assembly
NOTE:
1x connector
 Courtesy of TESLA, INC. Courtesy of TESLA, INC.
|
 Courtesy of TESLA, INC. Courtesy of TESLA, INC.
|
- Secure console back panel assembly
NOTE:
6x clips, 7x datums, Engage bottom clips first due to forward facing alignment
 Courtesy of TESLA, INC. Courtesy of TESLA, INC.
|
 Courtesy of TESLA, INC. Courtesy of TESLA, INC.
|
- Move RH front seat to original position
- Move LH front seat to original position
- Calibrate the rear doors.
NOTE:
If the "calibration Needed" message appears on the vehicle touchscreen, touch and hold Calibrate
to calibrate the rear doors.
- Close RH front door
- Re-establish vehicle connection to Toolbox 3
- Select 'Actions/Autodiag' and search for 'RCM Tasks'
- Select 'RCM Airbag and Sensors Service Tasks', click 'Run', and allow routine to complete
NOTE:
Select 'X' at top right of window to close once passed and complete
- Disconnect Toolbox 3 from vehicle and remove laptop and ethernet diag kit
- Secure diagnostic and CAN harnesses to IP service panel
NOTE:
2x clips
 Courtesy of TESLA, INC. Courtesy of TESLA, INC.
|
 Courtesy of TESLA, INC. Courtesy of TESLA, INC.
|
 Courtesy of TESLA, INC. Courtesy of TESLA, INC.
|
- Install IP service panel
NOTE:
4x tabs, 2 datums
 Courtesy of TESLA, INC. Courtesy of TESLA, INC.
|
 Courtesy of TESLA, INC. Courtesy of TESLA, INC.
|
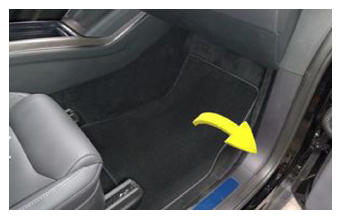
- Raise LH front window
- Close LH front door