- At the alignment rack, verify that the turn and slip plates are locked.
- Align the vehicle to the alignment rack ramps, drive the vehicle onto the alignment rack, and then shift into Park.
- Fully lower the LH front window.
- Set vehicle ride height to "Low": on the touchscreen, touch Controls > Suspension > Low
.
- On the touchscreen, touch Controls > Service > Wheel Configuration
and confirm that the wheel configuration is set correctly.
- Set the steering wheel/yoke straight ahead.
NOTE:
Use the steering wheel/yoke bubble level to confirm that the front wheels are pointing straight forward.
- With the LH front door open, manually latch the LH front door.
NOTE:
Do not close the door with the latch engaged.
- Put wheel chocks at both sides of the LH rear wheel.
- Connect a laptop with Toolbox 3 to the vehicle. See: Toolbox 3 - Connect And Disconnect
.
- Raise the alignment rack to a comfortable working height.
- Install inflation hoses onto all four wheels so that tire pressures can be set automatically.
- Set the tire machine pressures to match those specified for the vehicle.
NOTE:
Refer to the "Tire and Loading Information" label located on the driver side B-pillar.
- Verify chassis height measurement tool (1071271-00-A) is "zeroed" at 51 mm, and adjust if necessary.
 Courtesy of TESLA, INC. Courtesy of TESLA, INC.
|
- Remove the inflation hoses from all four wheel valve stems, and then reinstall the valve stem caps.
- In Toolbox 3, select the Actions
tab and search for "Check Tesla Ride Height Calibration", and select PROC_TAS_X_CHECK-RIDE-HEIGHT-CALIBRATION
.
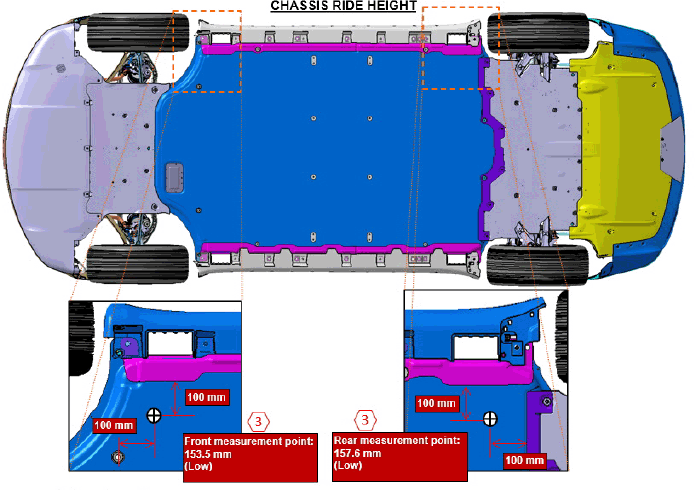
- Measure the vehicle ride height at the 4 designated points, enter the measured ride height values into Toolbox, and then click Run
.
NOTE:
If the routine fails, perform air suspension calibration through Toolbox 3. If calibration fails, find the root cause before continuing this procedure.
 Courtesy of TESLA, INC. Courtesy of TESLA, INC.
|
- Enable Tow mode: on the touchscreen, touch Controls > Service > Towing
.
NOTE:
Apply the brake pedal to enable Tow mode.
- Disconnect the laptop from the vehicle. See Toolbox 3 - Connect And Disconnect
.
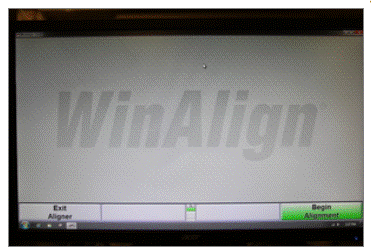
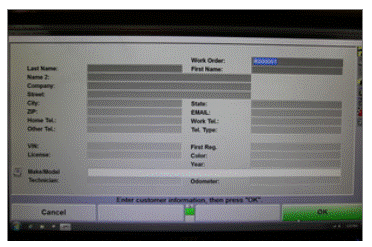
- At the alignment machine, click/touch Begin Alignment
and then enter the Service Visit information into the alignment machine.
 Courtesy of TESLA, INC. Courtesy of TESLA, INC.
|
 Courtesy of TESLA, INC. Courtesy of TESLA, INC.
|
- Check that the front turn plates are centered on the tires. Adjust the turn plate location as required.
 Courtesy of TESLA, INC. Courtesy of TESLA, INC.
|
- Install the alignment heads to the center of the each wheel, and then adjust the side arms as necessary to grip tires securely.
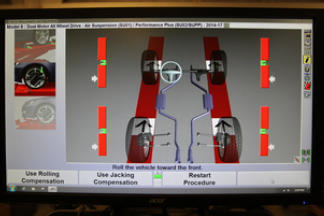
- Perform rolling compensation: remove the wheel chocks from the LH rear tire, move the vehicle forward by slowly rotating the tire so that the front wheels center onto the turn plates, and then install the wheel chocks on either side of the tire.
NOTE:
The turn and slip plates should automatically unlock.
 Courtesy of TESLA, INC. Courtesy of TESLA, INC.
|
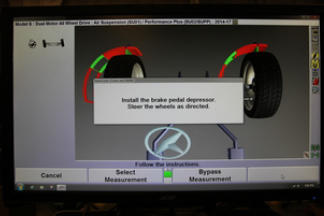
- Install a brake pedal depressor.
- Perform a steering wheel caster sweep, then center and level the steering wheel, and then install the steering wheel lock to keep the steering wheel in position.
 Courtesy of TESLA, INC. Courtesy of TESLA, INC.
|
- Remove the mid aero shield panel. See Panel - Aero Shield - Mid (Remove and Replace)
.
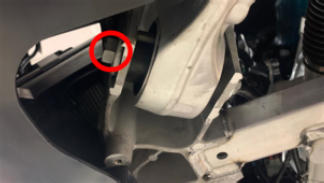
- Perform the rear toe adjustment as necessary:
- Loosen the LH rear outboard jam nut.
- Loosen the LH rear inboard jam nut.
- Adjust the turnbuckle as necessary.
- Tighten the LH rear inboard jam nut.
 70 N.m (51.6 lbs-ft)
- Tighten the LH rear outboard jam nut.
70 N.m (51.6 lbs-ft)
- Repeat step 26 a through e for the RH side of the vehicle.
 Courtesy of TESLA, INC. Courtesy of TESLA, INC.
|
 Courtesy of TESLA, INC. Courtesy of TESLA, INC.
|
- Remove the front aero shield panel. See Panel - Aero Shield - Front (Remove and Replace)
.
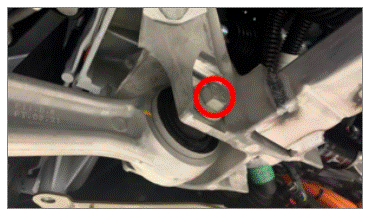
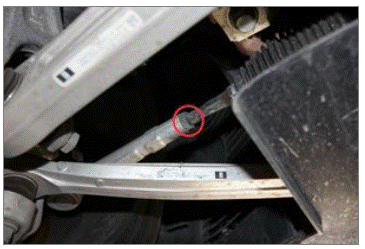
- Perform the front camber adjustment as necessary:
- Loosen the nut at the LH lower aft link to subframe bolt.
- Adjust the bolt head as necessary.
- Tighten the nut at the LH lower aft link to subframe bolt.
130 N.m (95.9 lbs-ft)
- Repeat step 28 a through c for the RH side of the vehicle.
 Courtesy of TESLA, INC. Courtesy of TESLA, INC.
|
 Courtesy of TESLA, INC. Courtesy of TESLA, INC.
|
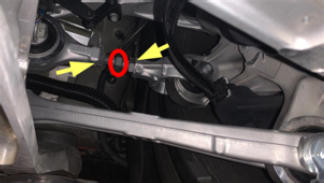
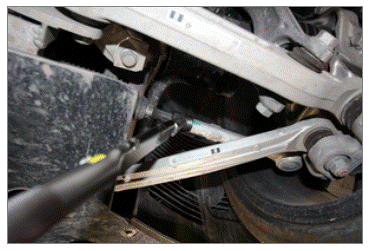
- Perform the front caster adjustment as necessary:
- Loosen the nut at the LH lower fore link to subframe bolt.
- Adjust the bolt head as necessary.
- Tighten the nut at the LH lower fore link to subframe bolt.
130 N.m (95.9 lbs-ft)
- Repeat step 29 a through c for the RH side of the vehicle.
 Courtesy of TESLA, INC. Courtesy of TESLA, INC.
|
 Courtesy of TESLA, INC. Courtesy of TESLA, INC.
|
- Remove the steering wheel lock, perform a caster sweep of the steering wheel, re-center the steering wheel with the level, and then reinstall the steering wheel lock.
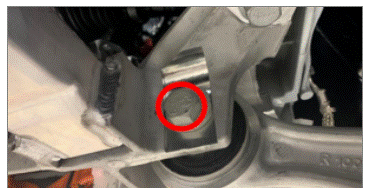
- Perform the front toe adjustment as necessary:
- Loosen the jam nut on the LH inner tie rod.
- Adjust the LH inner tie rod as necessary.
- Tighten the jam nut on the LH inner tie rod.
70 N.m (51.6 lbs-ft)
- Repeat step 31 a through c for the RH side of the vehicle.
 Courtesy of TESLA, INC. Courtesy of TESLA, INC.
|
 Courtesy of TESLA, INC. Courtesy of TESLA, INC.
|
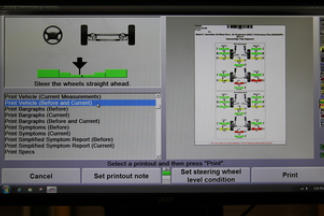
- Print the vehicle alignment summary, including the before and after results.
NOTE:
Repeat the adjustment for any parameter that is not within specification.
 Courtesy of TESLA, INC. Courtesy of TESLA, INC.
|
- Install the mid aero shield panel. See Panel - Aero Shield - Mid (Remove and Replace)
.
- Install the front aero shield panel. See Panel - Aero Shield - Front (Remove and Replace)
.
- Clear the angle offsets through the touchscreen: touch Service Mode > Chassis > Alignment & Tires > Clear Offset > Run.
- Remove the alignment heads from all four wheels.
- Remove the brake pedal depressor, steering wheel level, and steering wheel holder and put the vehicle into Park.
- Remove the wheel chocks at the LH rear wheel.
- Release the LH front door latch by pressing on the interior door switch and pushing the door latch open.
- Touch and hold the Exit Service Mode
button on the touchscreen to exit Service Mode.
- Perform a validation test drive.
NOTE:
Drive at a minimum speed of 40 km/h (25mph), drive in a straight line and check for excessive pull. Verify that the steering wheel is centered when the vehicle is driving straight.
NOTE:
Add correction code 00040100 as a separate activity to the Service Visit.