Ignition Timing
CAUTION:
Some tachometers may not be compatible with ignition system. Consult tachometer manufacturer before connecting tachometer to system. To avoid possible damage to ignitor and/or coil, DO NOT
allow tachometer terminal to become grounded.
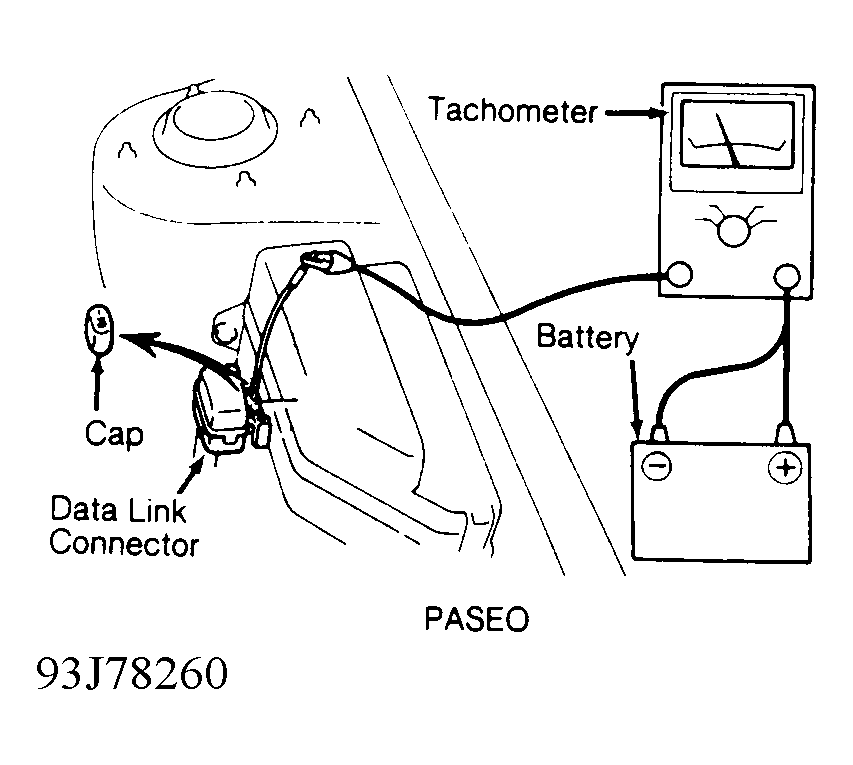
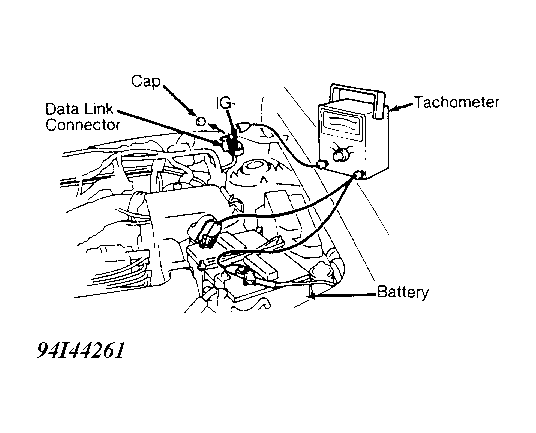
- Warm engine to normal operating temperature. Shut engine off. Connect timing light. Connect tachometer to proper terminals of data link connector. See Fig 1 and Fig 2.
NOTE:
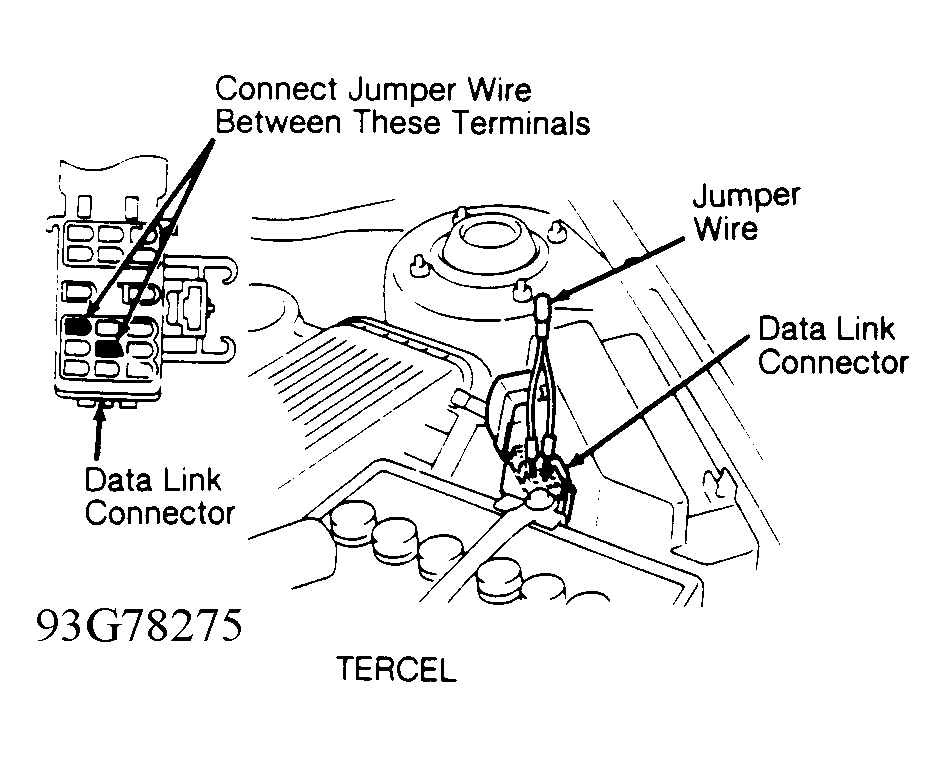
On Tercel models, data link connector may be located in rear corner of engine compartment on the firewall or on side of fuse/relay box, near the battery.
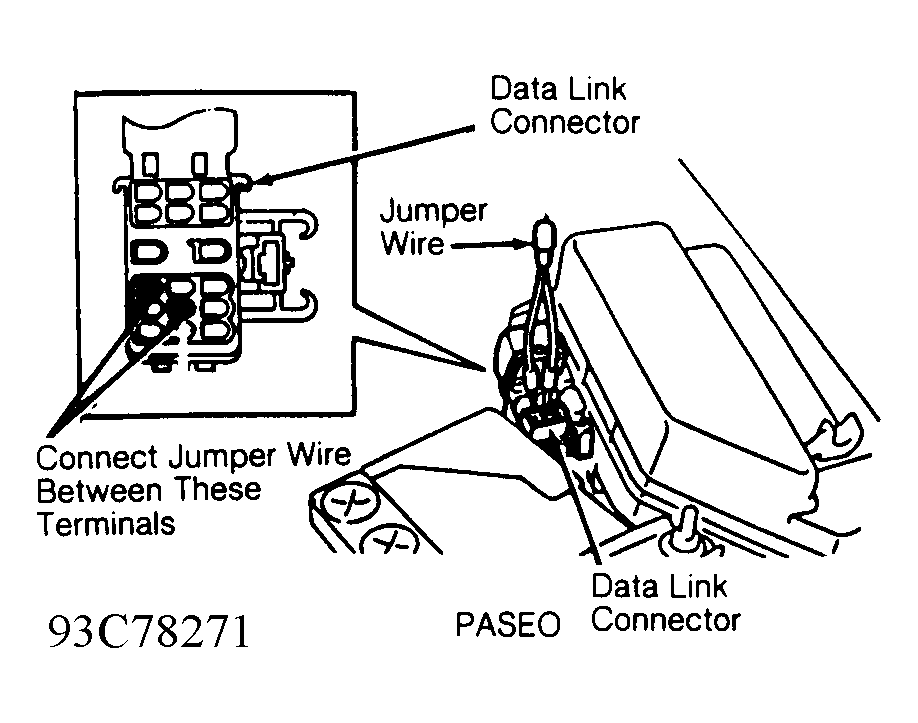
- Install Jumper Wire (SST 09843-18020) between terminals TE1 and E1 of data link connector. On all models except Previa, data link connector is located in engine compartment. On Previa, data link connector is located near emergency brake lever. See Fig 3 and Fig 4.
- On all models, apply parking brake. Start engine. Ensure engine returns to idle.
NOTE:
Timing marks are located on front cover.
- Ensure base timing is within specification with engine at specified RPM with transmission/transaxle in Neutral and all accessories off. See IGNITION TIMING table.
- If ignition timing is incorrect, loosen distributor hold-down bolt or nut. Adjust ignition timing by rotating distributor. Tighten distributor hold-down bolt or nut. Remove jumper wire from data link connector. Ensure advance timing is within specification. See IGNITION TIMING table.
IGNITION TIMING
| Application |
Base Timing |
Advance Timing |
| Paseo |
10 @ 750 |
6-18 @ 750 |
| Tercel |
| A/T |
10 @ 800 |
7-17 @ 800 |
| M/T |
10 @ 750 |
7-17 @ 750 |
 Courtesy of © TOYOTA, LICENSE AGREEMENT TMS1002
 Courtesy of © TOYOTA, LICENSE AGREEMENT TMS1002
 Courtesy of © TOYOTA, LICENSE AGREEMENT TMS1002
 Courtesy of © TOYOTA, LICENSE AGREEMENT TMS1002