Data Link Connector No. 3 Inspection
- If Toyota hand-held tester or scan tool displays UNABLE TO CONNECT TO VEHICLE when hand-held tester or scan tool is connected to Data Link Connector (DLC) No. 3, try hand-held tester or scan tool on another vehicle. If hand-held tester or scan tool operates on another vehicle, go to next step. If hand-held tester or scan tool does not operate on another vehicle, problem is probably with hand-held tester or scan tool.
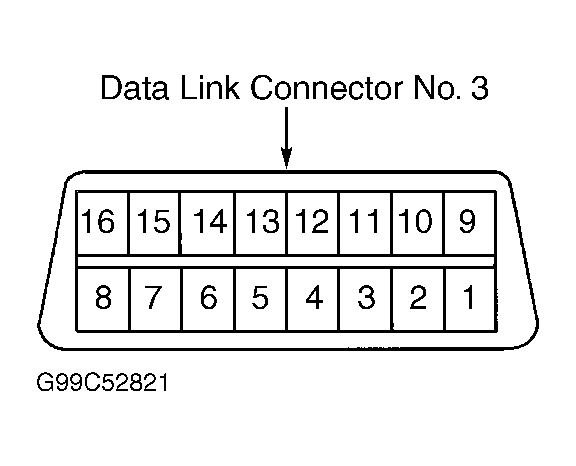
- Check DLC No. 3 for loose or damaged terminals. Ensure DLC No. 3 terminals are in correct position in connector. See WIRING DIAGRAMS article. For full wiring diagram of DLC No. 3, it may be necessary to see DATA LINK CONNECTORS article in WIRING DIAGRAMS. If connector and terminals are okay, go to next step. If connector or terminals are defective, repair as necessary.
- Check voltage and resistance between ground and specified terminal on DLC No. 3. See DATA LINK CONNECTOR NO. 3 VOLTAGE & RESISTANCE SPECIFICATIONS table. See Fig 1. If voltage and resistance readings are not as specified, check wiring circuit. See WIRING DIAGRAMS article.
DATA LINK CONNECTOR NO. 3 VOLTAGE & RESISTANCE SPECIFICATIONS
| Terminal No. (Circuit) |
Specification |
| 4 (Chassis Ground) |
1 Ohm Or Less |
| 5 (Signal Ground) |
1 Ohm Or Less |
| 7 (BUS Communication) |
|
| 16 (Battery Voltage) |
9-14 Volts |
 Courtesy of © TOYOTA, LICENSE AGREEMENT TMS1002