DTC P1456: EVAP Control System
- Ensure fuel filler cap is fully tightened and seal and filler pipe are okay. Replace as necessary. If fuel filler cap and pipe are okay, go to next step.
- Disconnect vacuum hose from EVAP purge control solenoid valve. Connect vacuum pump to disconnected hose. Turn ignition on. Apply vacuum to hose. If EVAP purge control solenoid valve does not hold vacuum, go to next step. If EVAP purge control solenoid valve holds vacuum, go to step 5.
- Turn ignition off. Disconnect EVAP purge control solenoid valve 2-pin connector. Measure continuity between EVAP purge control solenoid valve 2-pin connector terminal No. 1 (Red/Yellow wire) and ground. If continuity is present, go to next step. If continuity is not present, replace EVAP purge control solenoid valve.
- Disconnect PCM 26-pin connector. Measure continuity between EVAP purge control solenoid valve 2-pin connector terminal No. 1 (Red/Yellow wire) and ground. If continuity is present, repair short circuit in Red/Yellow wire between PCM 26-pin connector terminal No. 23 and EVAP purge control solenoid valve connector terminal No. 1. If continuity is not present, replace PCM.
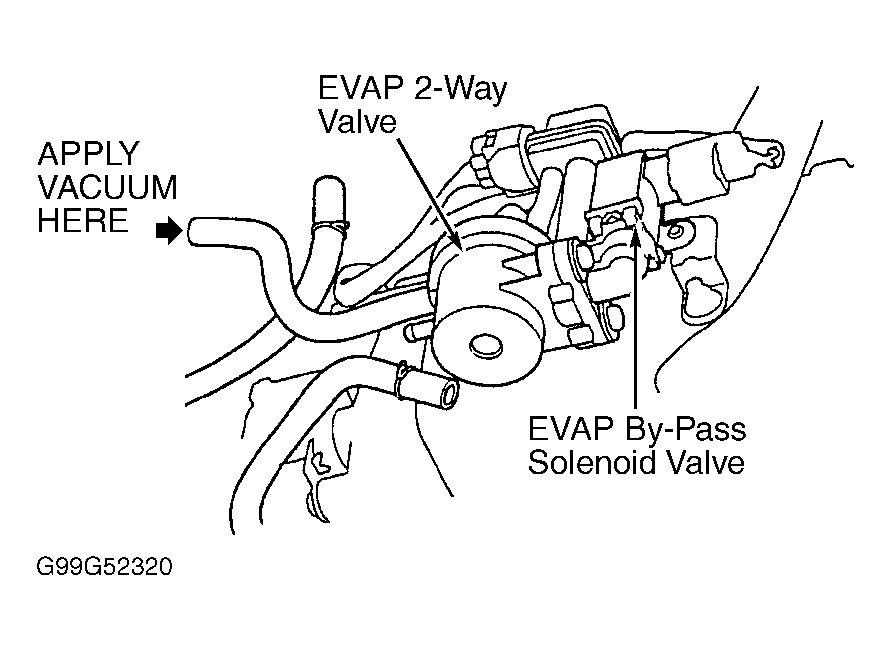
- Disconnect vacuum hose from EVAP 2-way valve. Connect vacuum hose to disconnected hose. See Fig 1. Connect jumper wire between PCM 8-pin connector terminal No. 1 (Pink/Black wire) and ground. Turn ignition on. Apply vacuum to hose. If EVAP 2-way valve holds vacuum, go to next step. If EVAP 2-way valve does not hold vacuum, EVAP 2-way valve is okay. Go to step 8.
 Courtesy of AMERICAN HONDA MOTOR CO., INC.
- Turn ignition off. Disconnect EVAP by-pass solenoid valve 2-pin connector. Measure continuity between EVAP by-pass solenoid valve 2-pin connector terminal No. 2 (Pink/Black wire) and ground. If continuity is present, go to next step. If continuity is not present, repair open circuit in Pink/Black wire between EVAP by-pass solenoid valve and PCM 8-pin connector.
- Turn ignition on. Measure voltage between EVAP by-pass solenoid valve 2-pin connector terminal No. 1 (Black/Yellow wire) and ground. If battery voltage is present, replace EVAP by-pass solenoid valve and "O" rings. If battery voltage is not present, repair open circuit in Black/Yellow wire between EVAP by-pass solenoid valve connector terminal No. 1 and PCM 20-amp fuse.
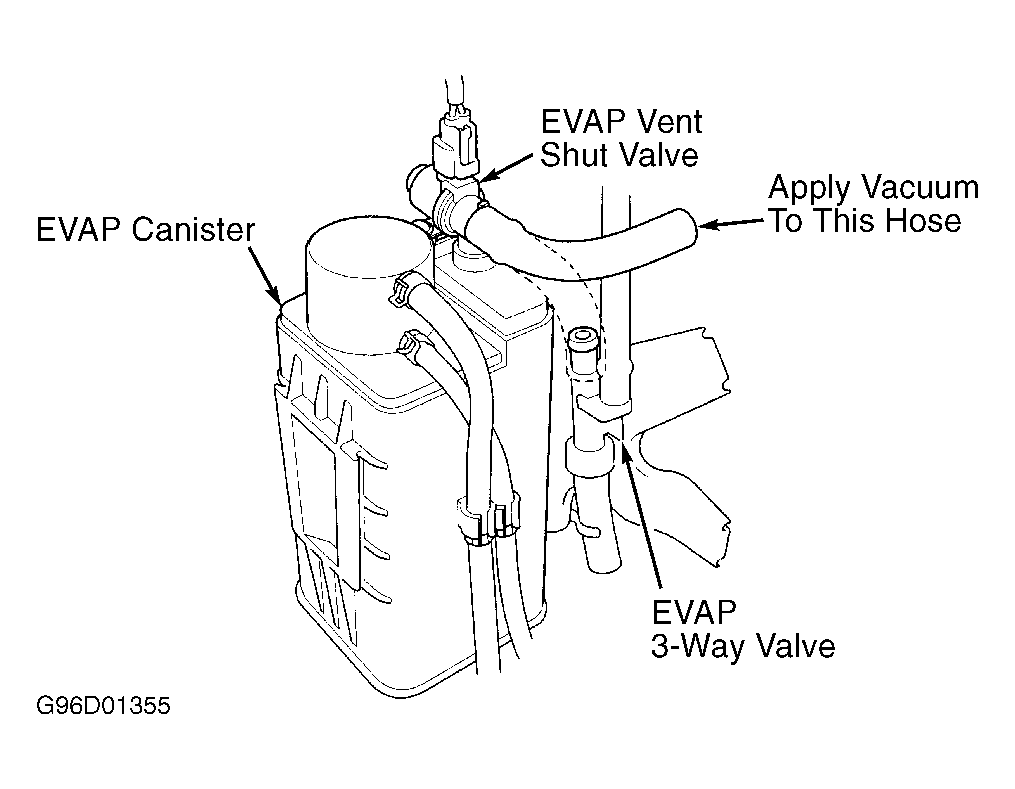
- Turn ignition off. Disconnect vacuum hose from EVAP control canister vent shut valve. Connect vacuum pump to disconnected hose. See Fig 2. Turn ignition on. Apply vacuum to hose. If valve holds vacuum, go to next step. If valve does not hold vacuum, EVAP control canister vent shut valve is okay. Check for a possible vacuum leak at other components. If no vacuum leaks are present, replace PCM.
 Courtesy of AMERICAN HONDA MOTOR CO., INC.
- Turn ignition off. Disconnect EVAP control canister vent shut valve 2-pin connector. Measure continuity between EVAP control canister vent shut valve 2-pin connector terminal No. 2 (Red/White wire) and ground. If continuity is present, go to next step. If continuity is not present, replace EVAP control canister vent shut valve and "O" ring.
- Disconnect PCM 8-pin connector. Measure continuity between EVAP control canister vent shut valve 2-pin connector terminal No. 2 (Red/White wire) and ground. If continuity is present, repair short circuit in Red/White wire between PCM and EVAP control canister vent shut valve. If continuity is not present, replace PCM.