Compressor Clutch: Service and Repair
Air Conditioning Clutch Assembly Replacement
Removal Procedure
1. Raise and suitably support the vehicle. Refer to Lifting and Jacking the Vehicle Service and Repair.
2. Remove the drive belt. Refer to Drive Belt Replacement Service and Repair.
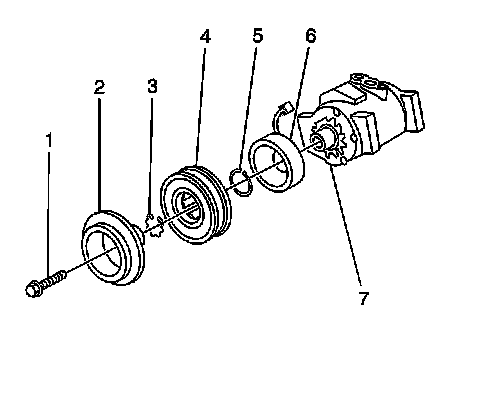
3. Remove the clutch plate retaining bolt (1).
4. Remove the clutch plate assembly (2).
5. Remove the clutch hub/bearing snap ring (3).
6. Remove the clutch hub/bearing assembly (4).
7. Remove clutch coil harness retainer.
8. Remove the snap ring (5) from the clutch coil (6).
9. Remove the clutch coil (6) from the A/C compressor (7).
Installation Procedure
1. Install the clutch coil (6) to the A/C compressor (7).
2. Install the snap ring (5) to the clutch coil (6).
3. Install clutch coil harness retainer.
4. Install the clutch hub/bearing assembly (4).
5. Install the clutch hub/bearing snap ring (3).
6. Place a small amount of oil on the thinnest air gap shim and place it inside the clutch plate.
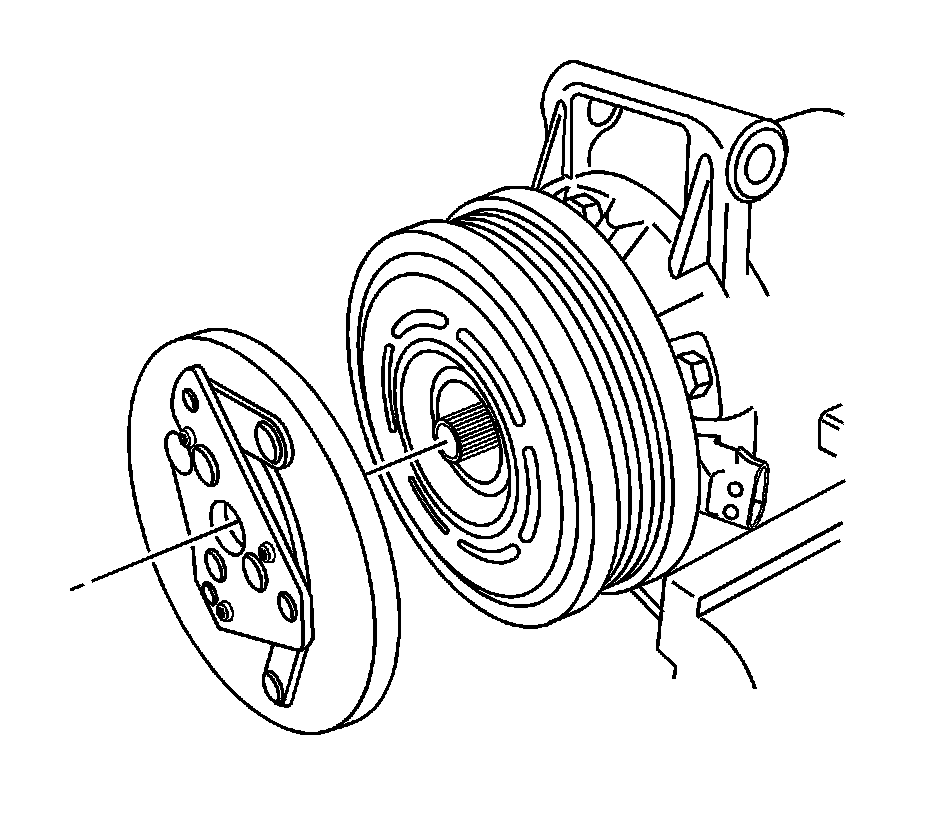
7. Install the clutch plate assembly.
Note:
Ensure the drive plate does not drag against the pulley when the pulley is rotated.
8. Measure the air gap between the pulley and the drive plate. Adjust the shims to achieve a 0.35-0.65 mm (0.014-0.026 in) air gap.
Caution:
Refer to Fastener Caution Fastener Caution.
9. Install the clutch plate retaining bolt.
Tighten the bolt to 18 Nm (13 lb ft).
10. Install the drive belt. Refer to Drive Belt Replacement Service and Repair.
11. Lower the vehicle.