Installation Procedure
- Human Machine Interface Control Module Bracket (1)» Install
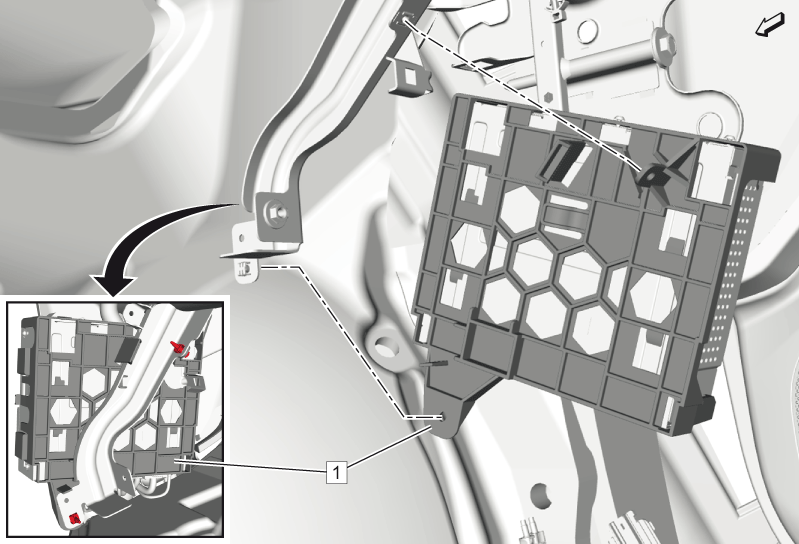 Courtesy of GENERAL MOTORS COMPANY
- Human Machine Interface Control Module Bracket Bolt (1) @ Human Machine Interface Control Module Bracket (2)» Install and tighten 2.5 N.m (22 lb in)
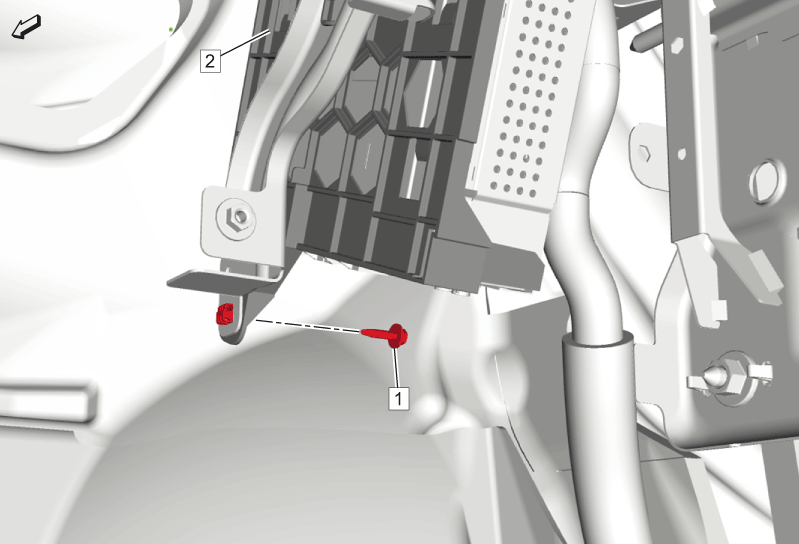 Courtesy of GENERAL MOTORS COMPANY
- Human Machine Interface Control Module Bracket Bolt (1) @ Human Machine Interface Control Module Bracket (2)» Install and tighten 2.5 N.m (22 lb in)
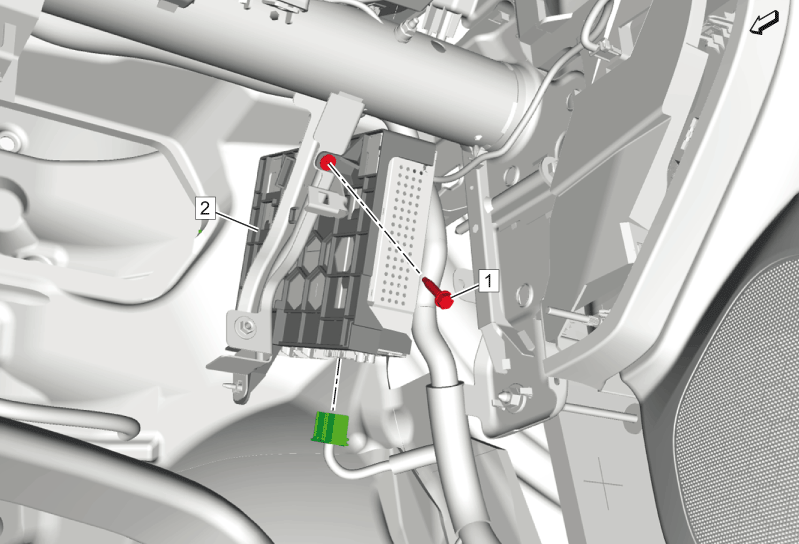 Courtesy of GENERAL MOTORS COMPANY
- Connect the electrical connector.
- Instrument Panel Compartment (2)» Install
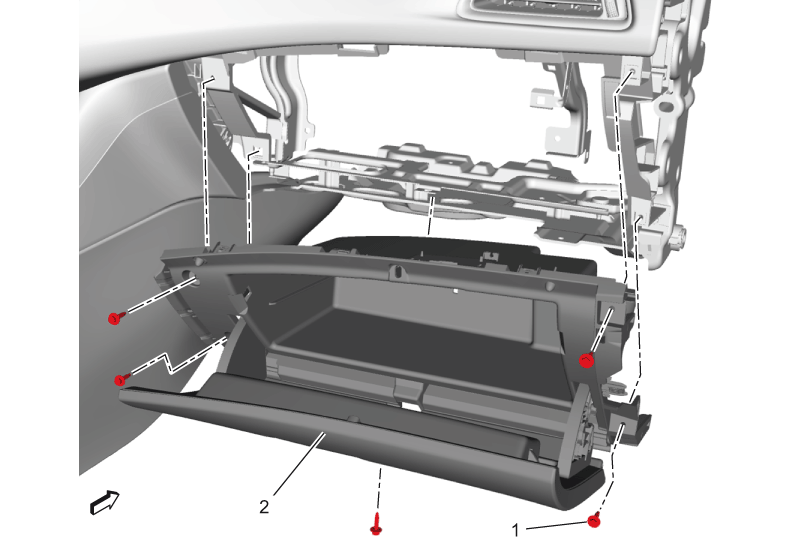 Courtesy of GENERAL MOTORS COMPANY
- Connect the electrical connector.
- Install the 5 instrument panel compartment bolt (1) and tighten to 2.5 N.m (22 lb in).
- Instrument Panel Outer Trim Cover - Right (2)» Install
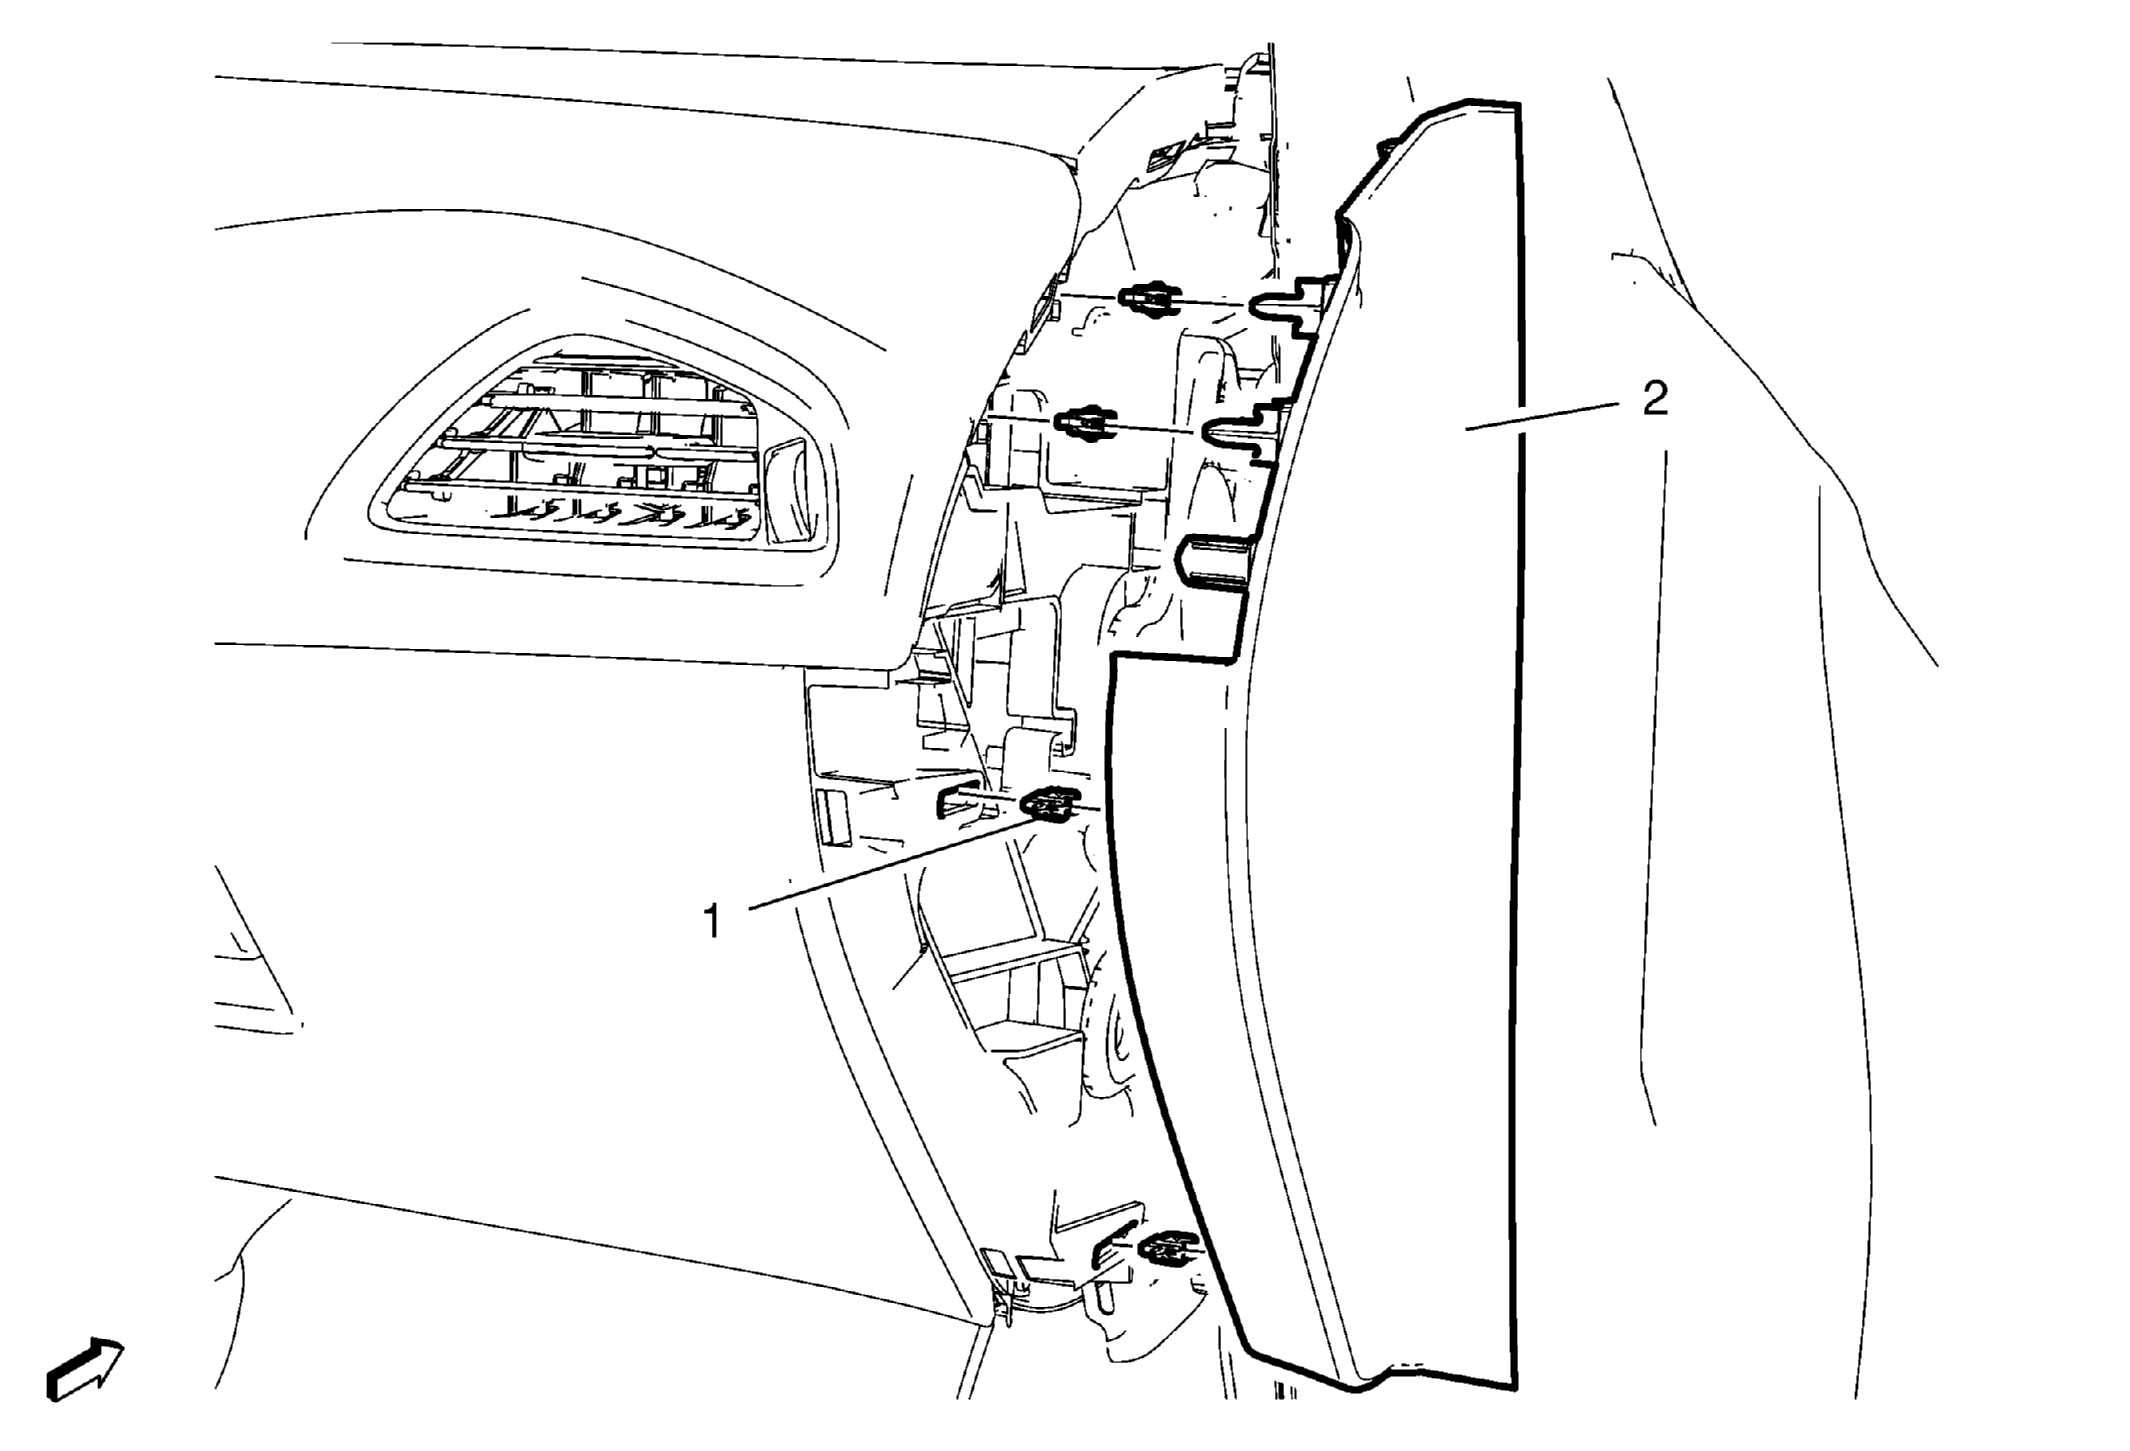 Courtesy of GENERAL MOTORS COMPANY
- Instrument Panel Lower Airbag - Passenger Side (2)» Install
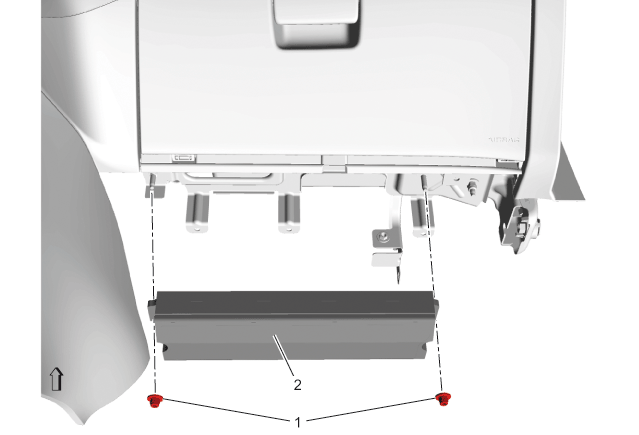 Courtesy of GENERAL MOTORS COMPANY
- Connect the electrical connector.
- Instrument Panel Lower Airbag Nut (1)» Install and tighten 9 N.m (80 lb in)
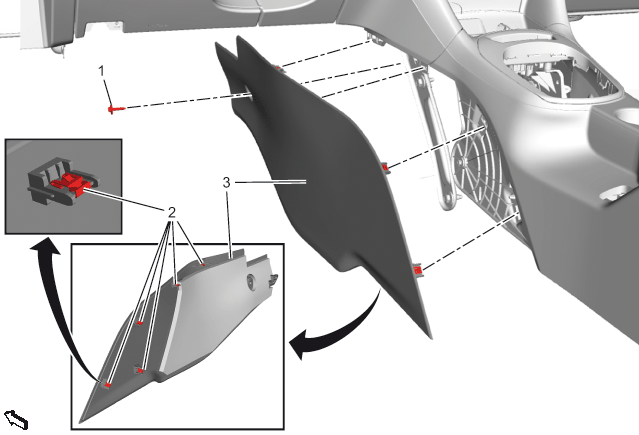
- Instrument Panel Lower Trim Panel Insulator (3)» Install
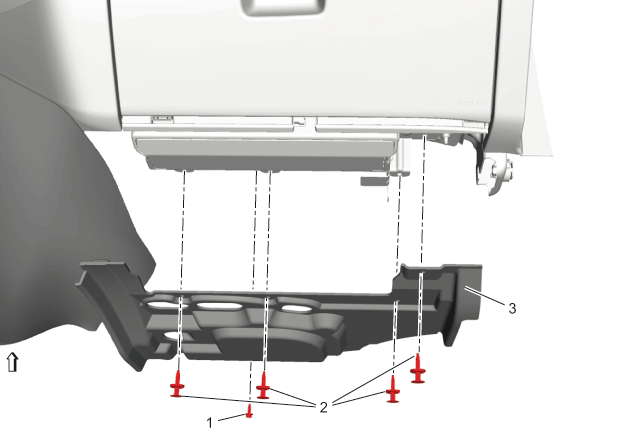 Courtesy of GENERAL MOTORS COMPANY
- Instrument Panel Lower Trim Panel Insulator Retainer (2)» Install [4x]
- Instrument Panel Lower Trim Panel Insulator Bolt (1)» Install and tighten 2.5 N.m (22 lb in)
- Install the left and right instrument panel fuse block access cover frame (1).
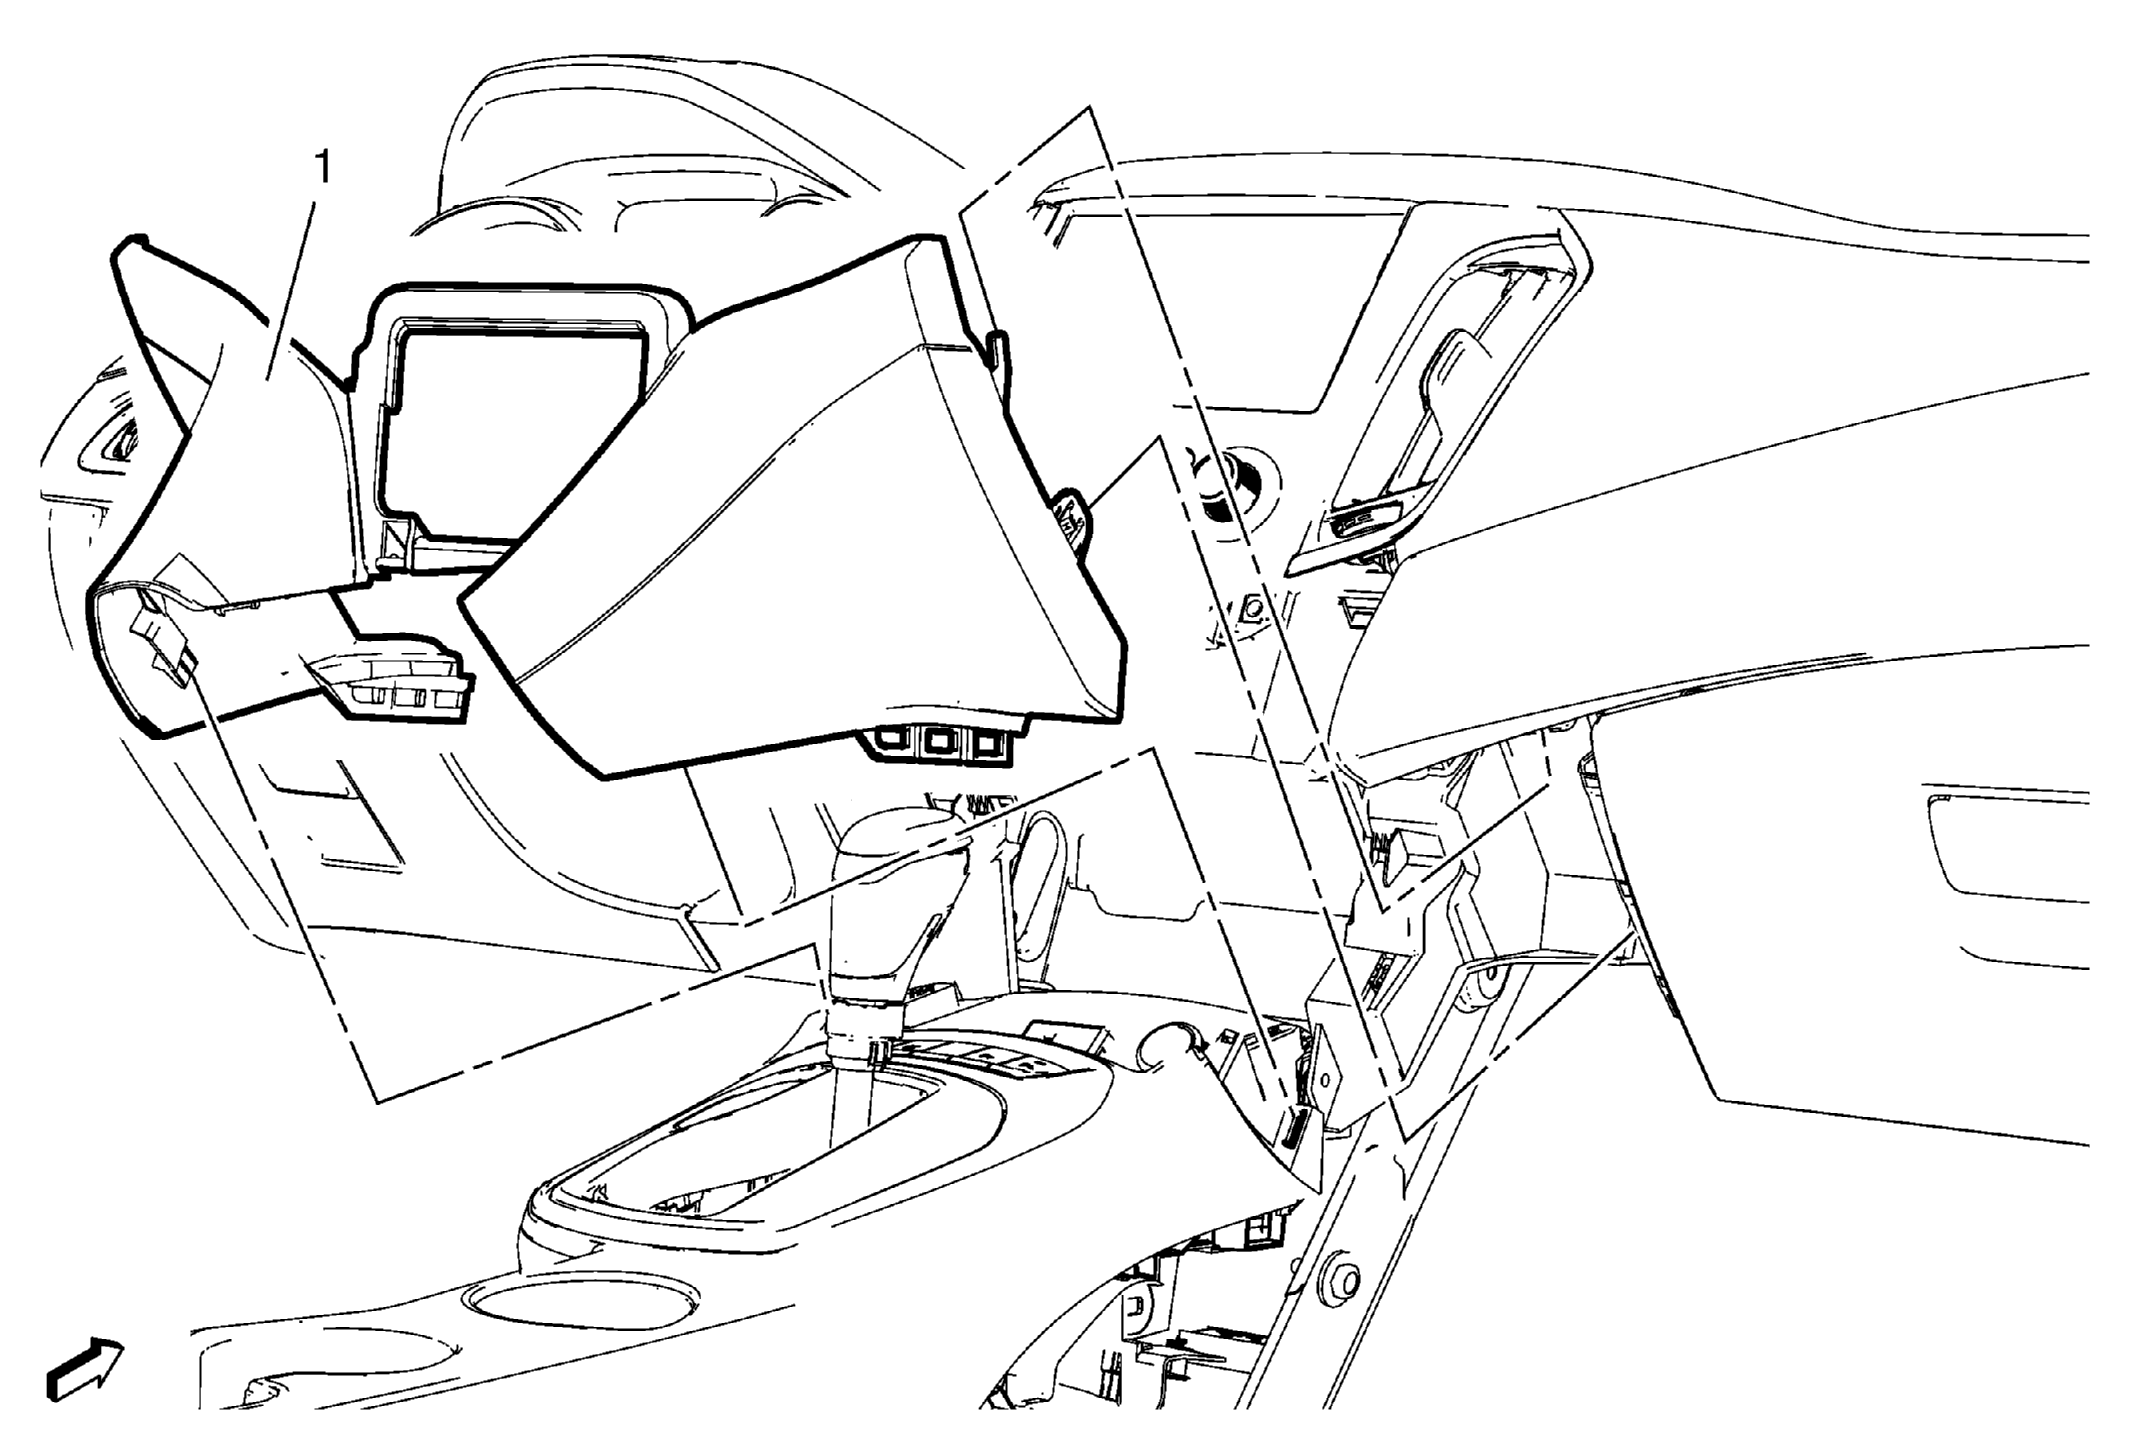 Courtesy of GENERAL MOTORS COMPANY
- Install the left and right front floor console extension panel (3).
 Courtesy of GENERAL MOTORS COMPANY
- Front Floor Console Extension Panel Retainer (2)» Install [5x]
- Front Floor Console Extension Panel Fastener (1)» Install and tighten 2.5 N.m (22 lb in)
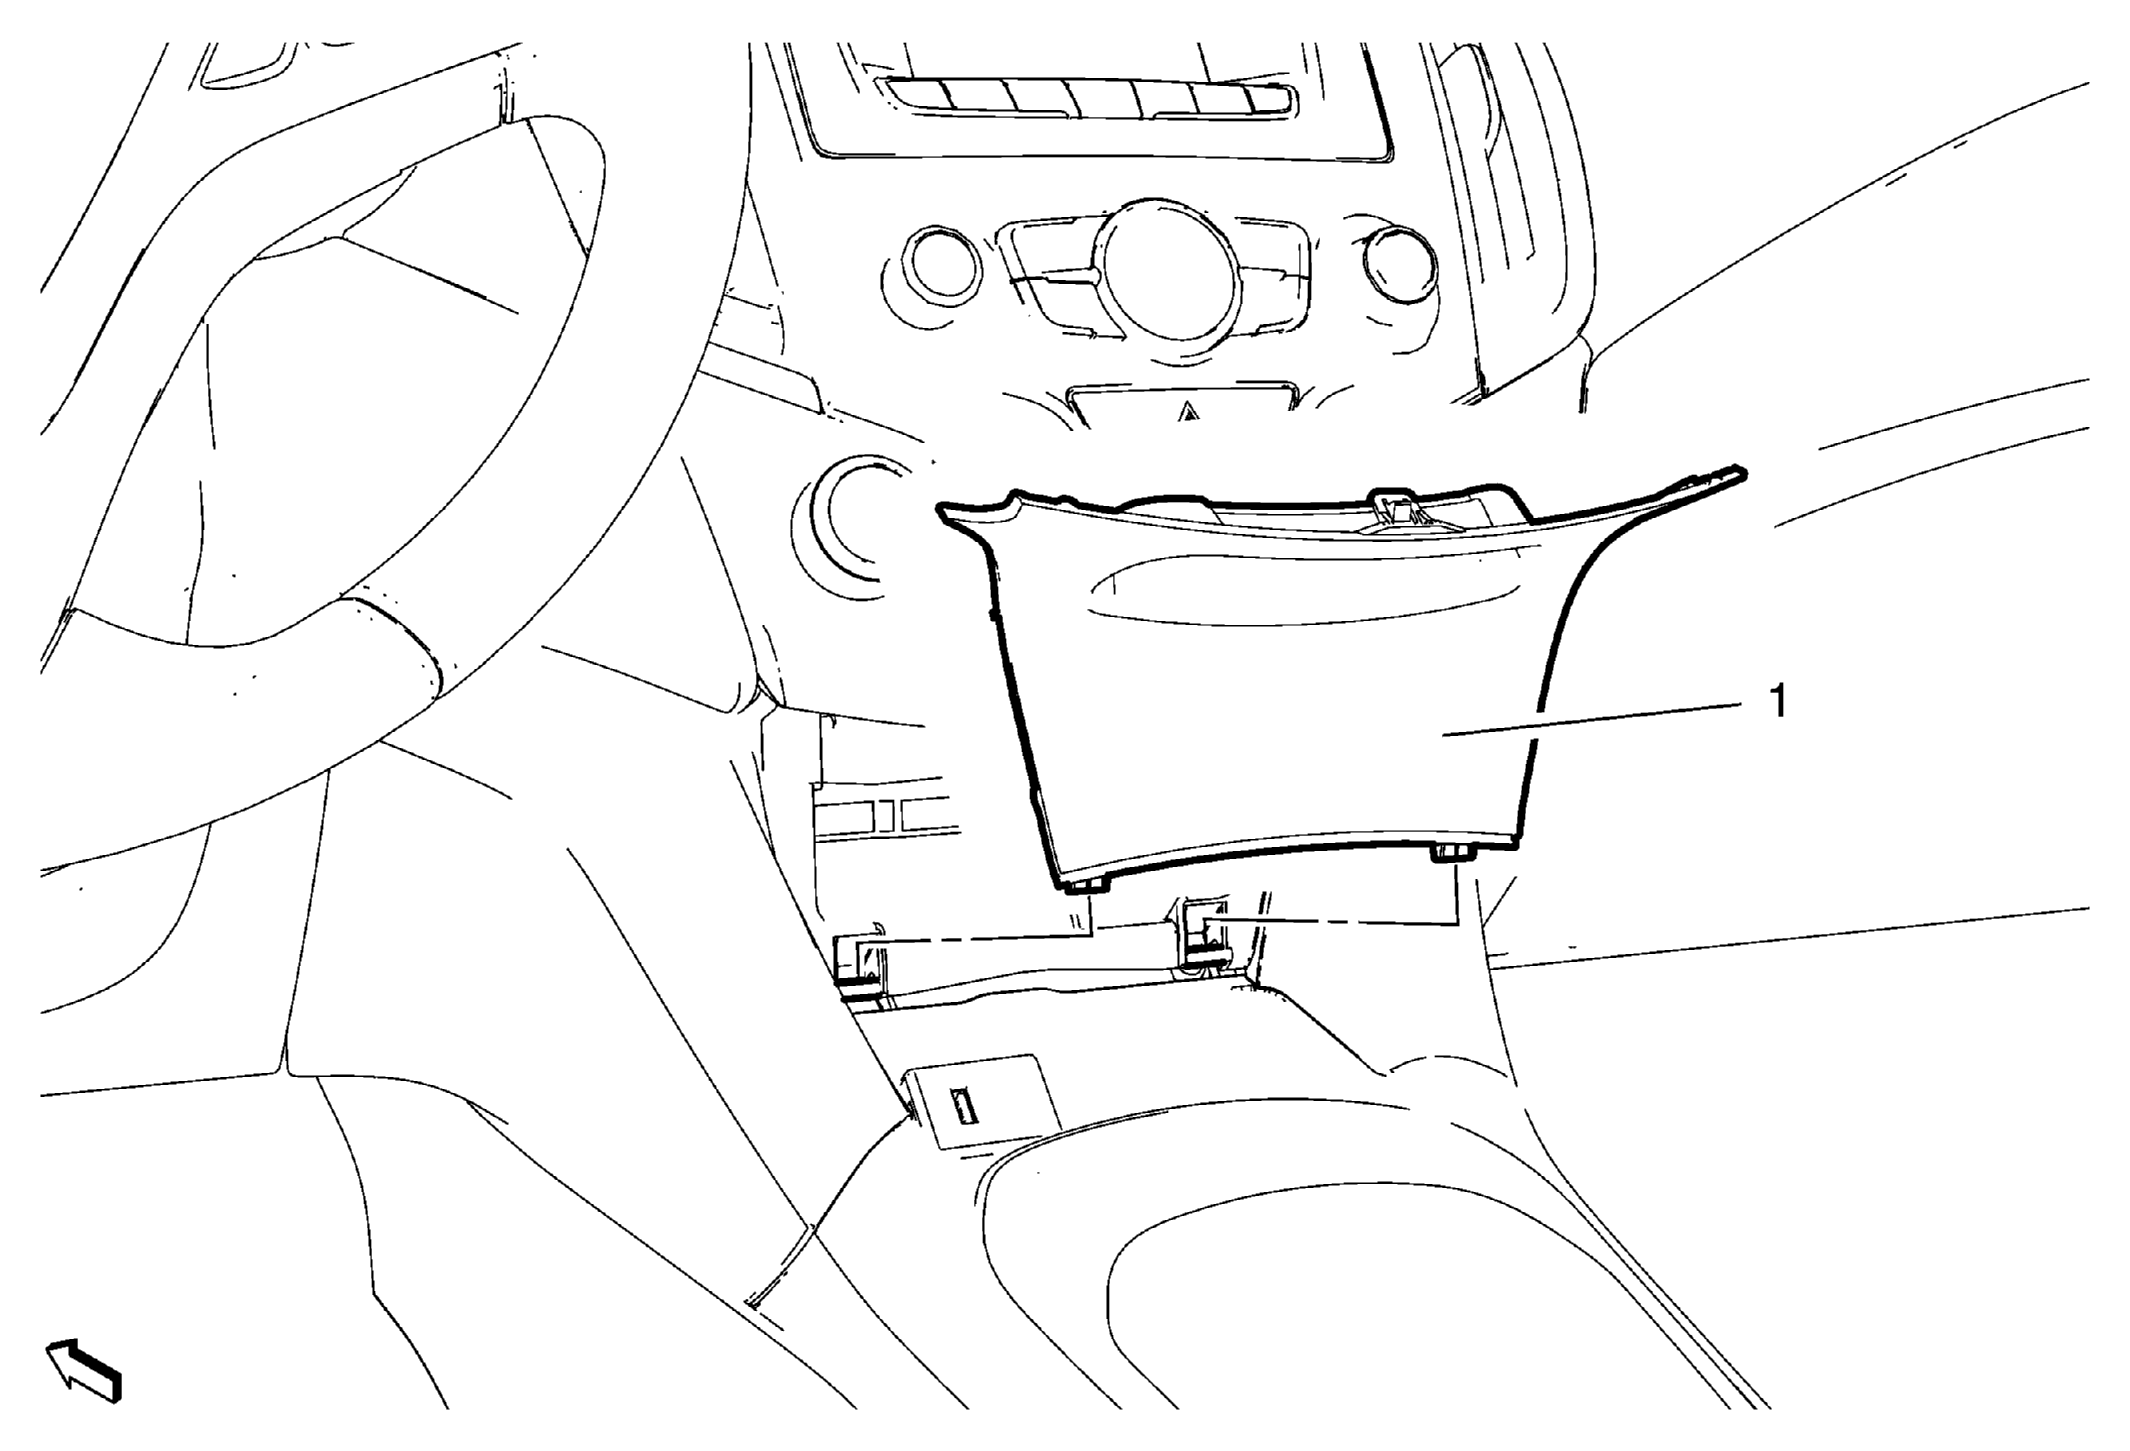
- Instrument Panel Fuse Block Access Hole Cover (1) Install
 Courtesy of GENERAL MOTORS COMPANY