Installation Procedure
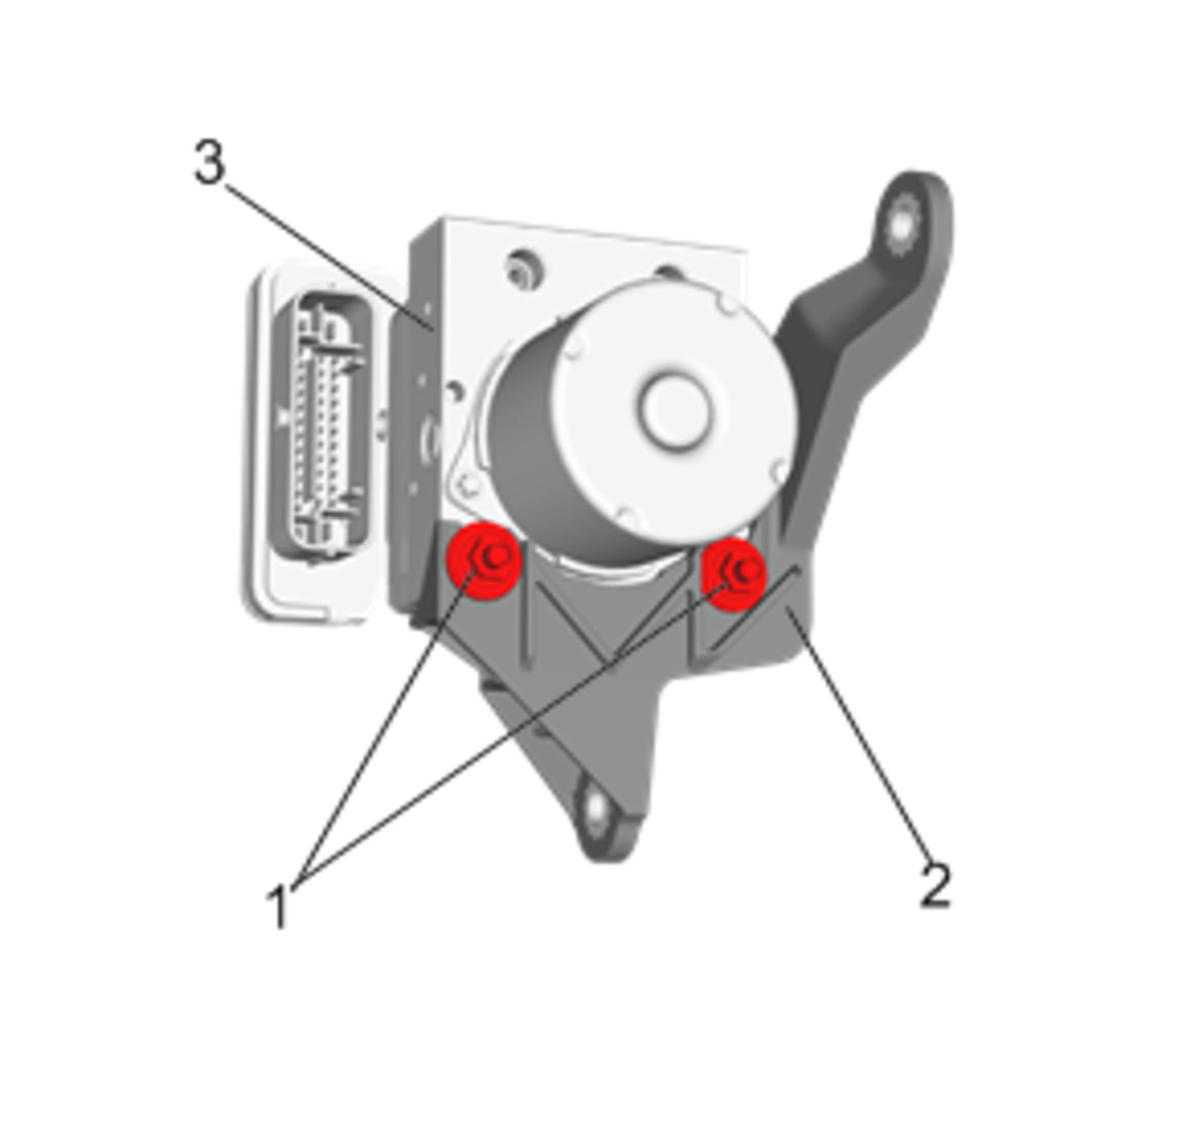
- Install the EBCM/BPMV assembly (3) to the BPMV bracket (2).
 Courtesy of GENERAL MOTORS COMPANY
- Install the BPMV insulator nuts (1) which retain EBCM/BPMV assembly to BPMV bracket and tighten to 8 N.m (71 lb in).
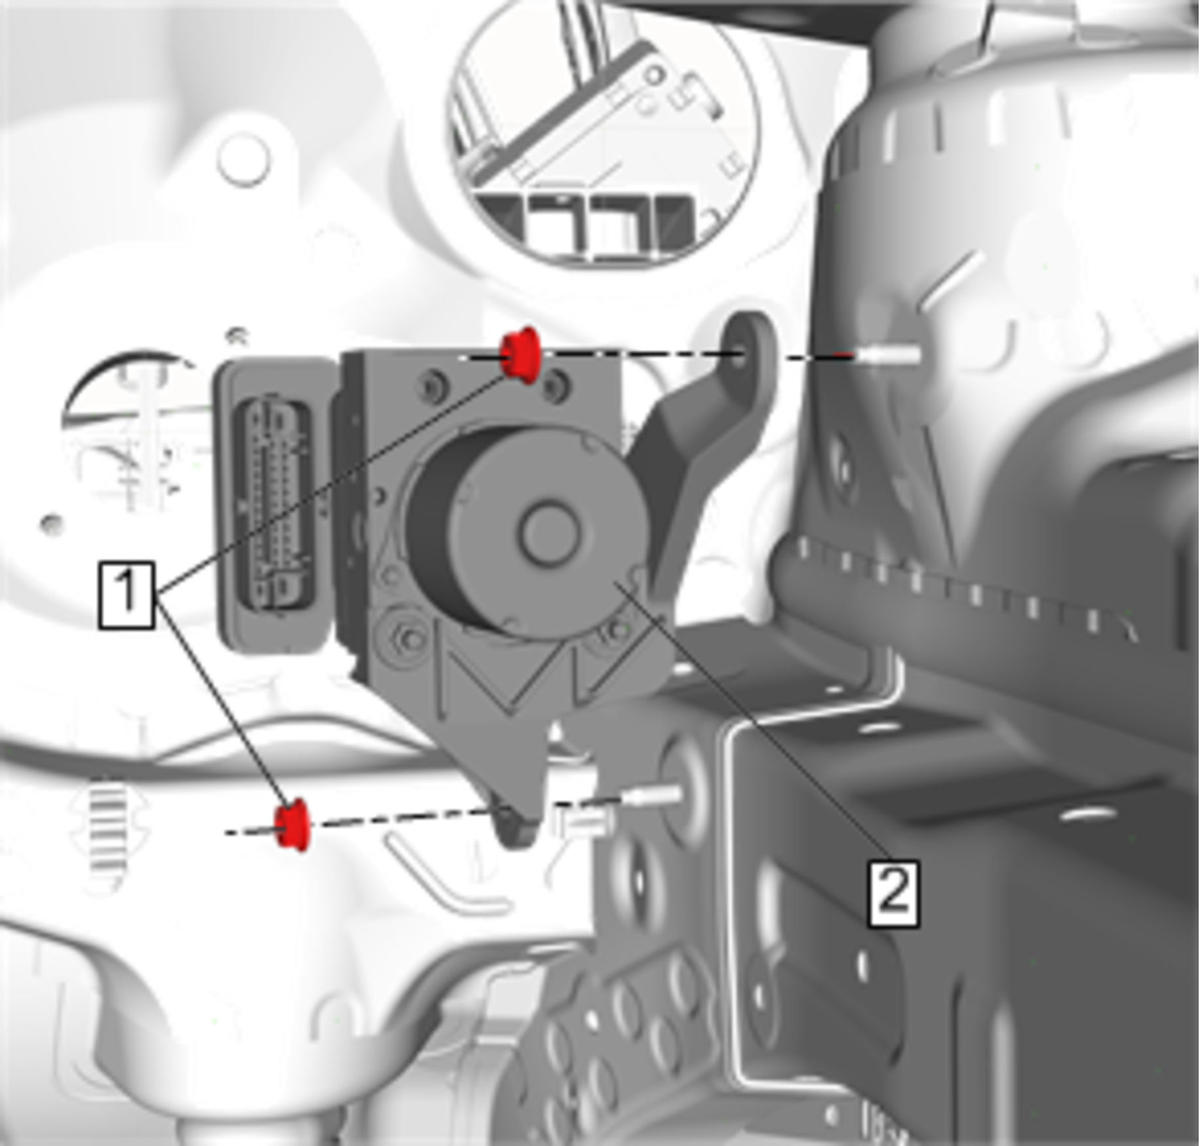
- Install the EBCM/BPMV and bracket assembly (2) to the vehicle.
 Courtesy of GENERAL MOTORS COMPANY
- Install the BPMV bracket nuts (1) and tighten to 22 N.m (16 lb ft).
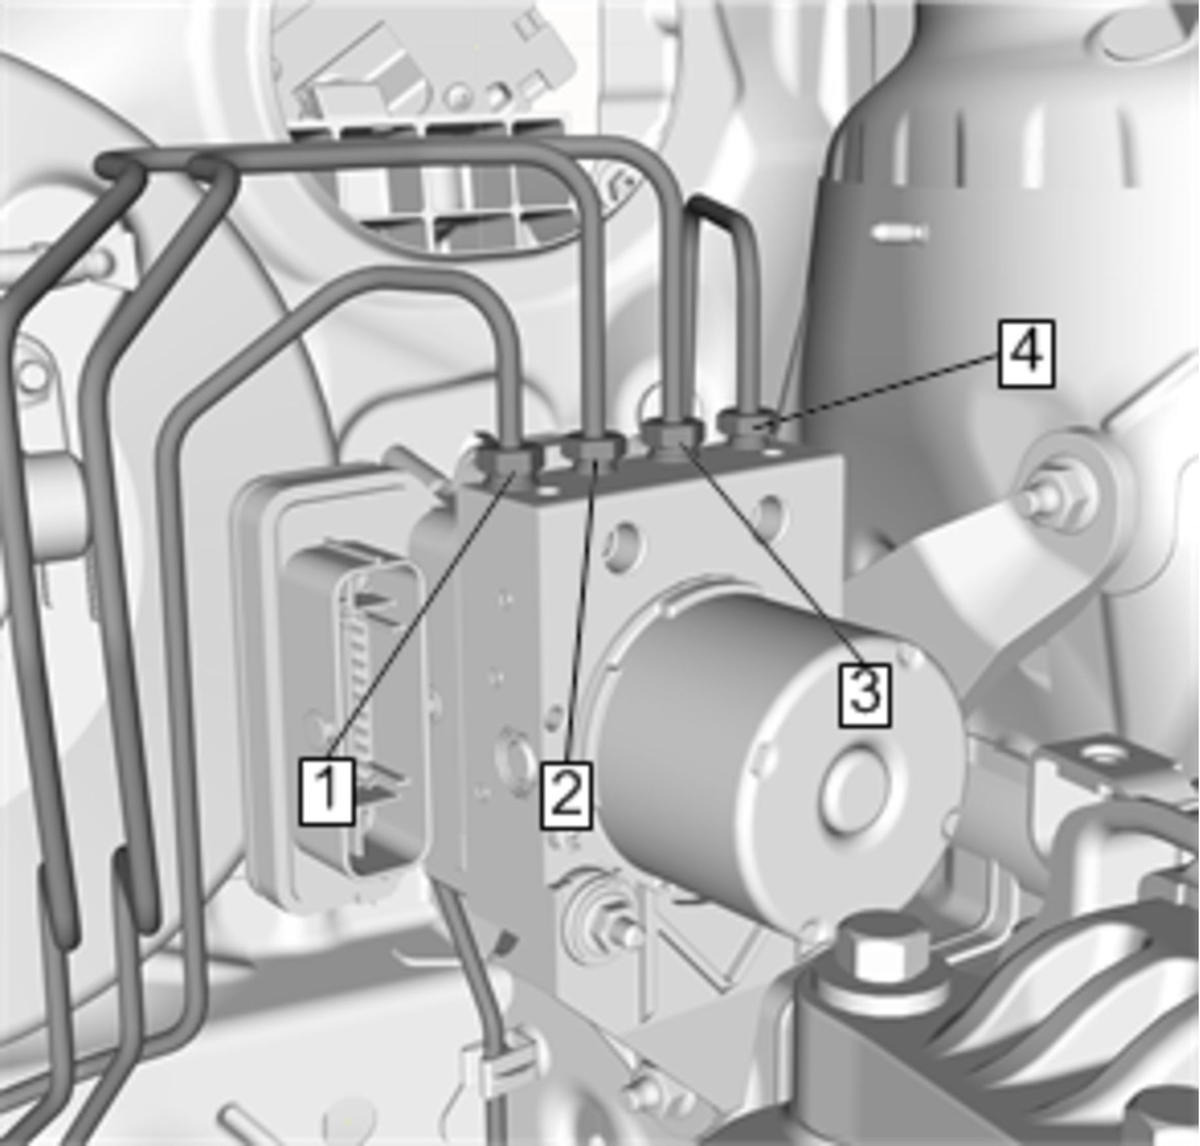
- Connect the LF brake pipe fitting (4) to the BPMV and tighten to 18 N.m (13 lb ft).
 Courtesy of GENERAL MOTORS COMPANY
- Connect the RR brake pipe fitting (3) to the BPMV and tighten to 18 N.m (13 lb ft).
- Connect the LR brake pipe fitting (2) to the BPMV and tighten to 18 N.m (13 lb ft).
- Connect the RF brake pipe fitting (1) to the BPMV and tighten to 18 N.m (13 lb ft).
- Connect the master cylinder primary brake pipe fitting (2) to the BPMV and tighten to 18 N.m (13 lb ft).
 Courtesy of GENERAL MOTORS COMPANY
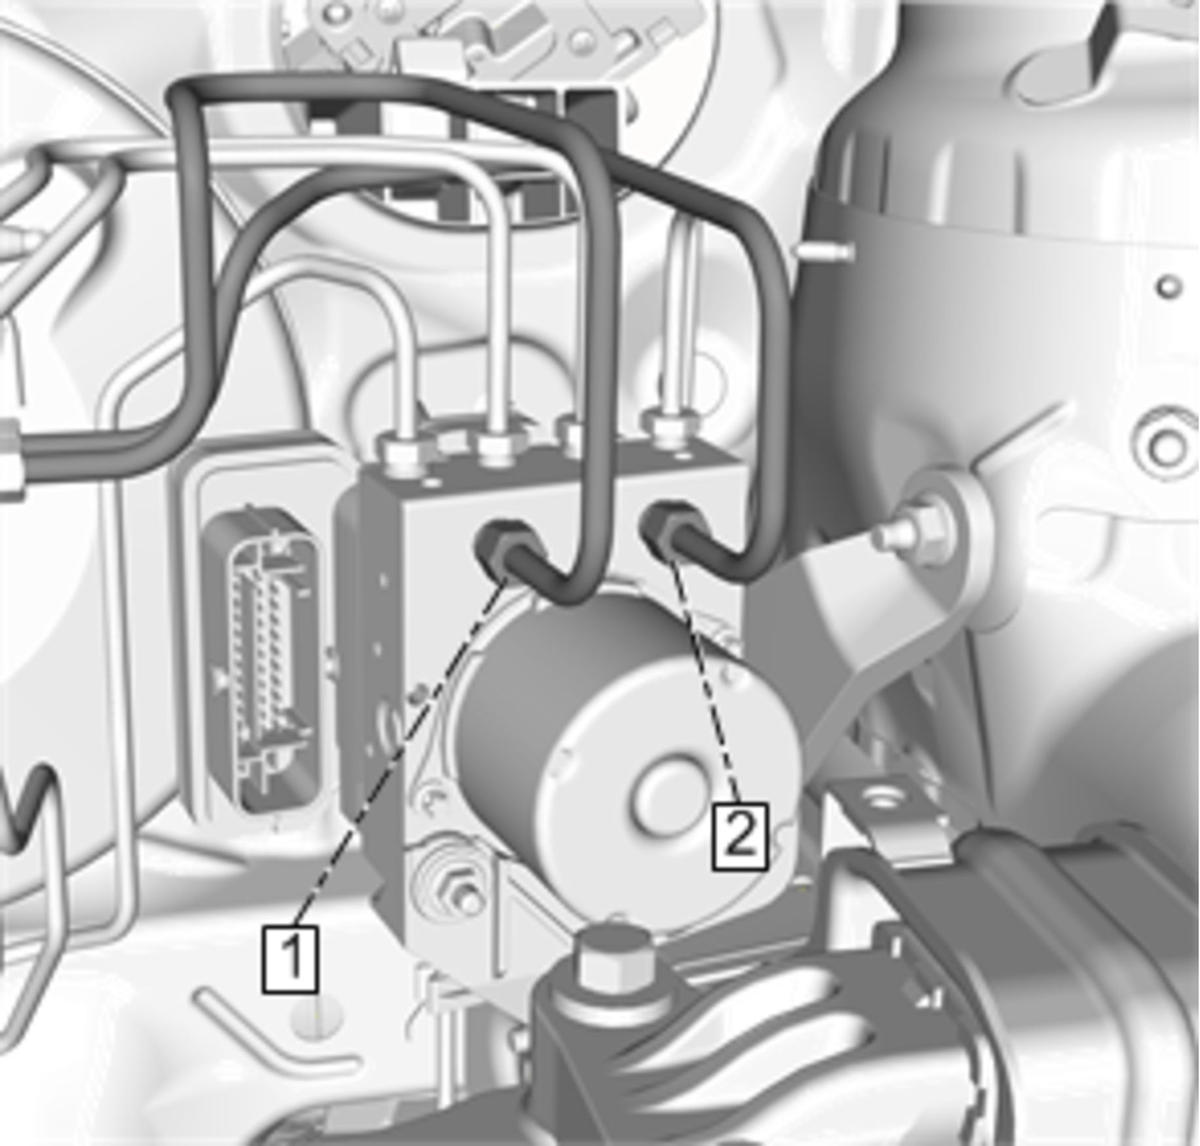
- Connect the master cylinder secondary brake pipe fitting (1) to the BPMV and tighten to 18 N.m (13 lb ft).
- Connect the EBCM electrical connector to the EBCM.
- Install the battery tray. Refer to Battery Tray Replacement (without Engine Block Heater)Battery Tray Replacement (with Engine Block Heater)
.
- Install the engine control module. Refer to Engine Control Module Replacement
.
- Install the battery. Refer to Battery Replacement
.
- Program the EBCM. Refer to Control Module References
- Bleed the hydraulic brake system. Refer to Hydraulic Brake System Bleeding (Manual)Hydraulic Brake System Bleeding (Pressure)
.
- Observe the brake pedal feel after performing the diagnostic system check. If the pedal now feels spongy, air may have been in the secondary hydraulic circuit of the brake modulator which may have been introduced into the primary circuit. If the pedal feels spongy, perform the Antilock Brake System Automated Bleed Procedure. Refer to Antilock Brake System Automated Bleed .