Steering Wheel & Steering Column: Column: Installation
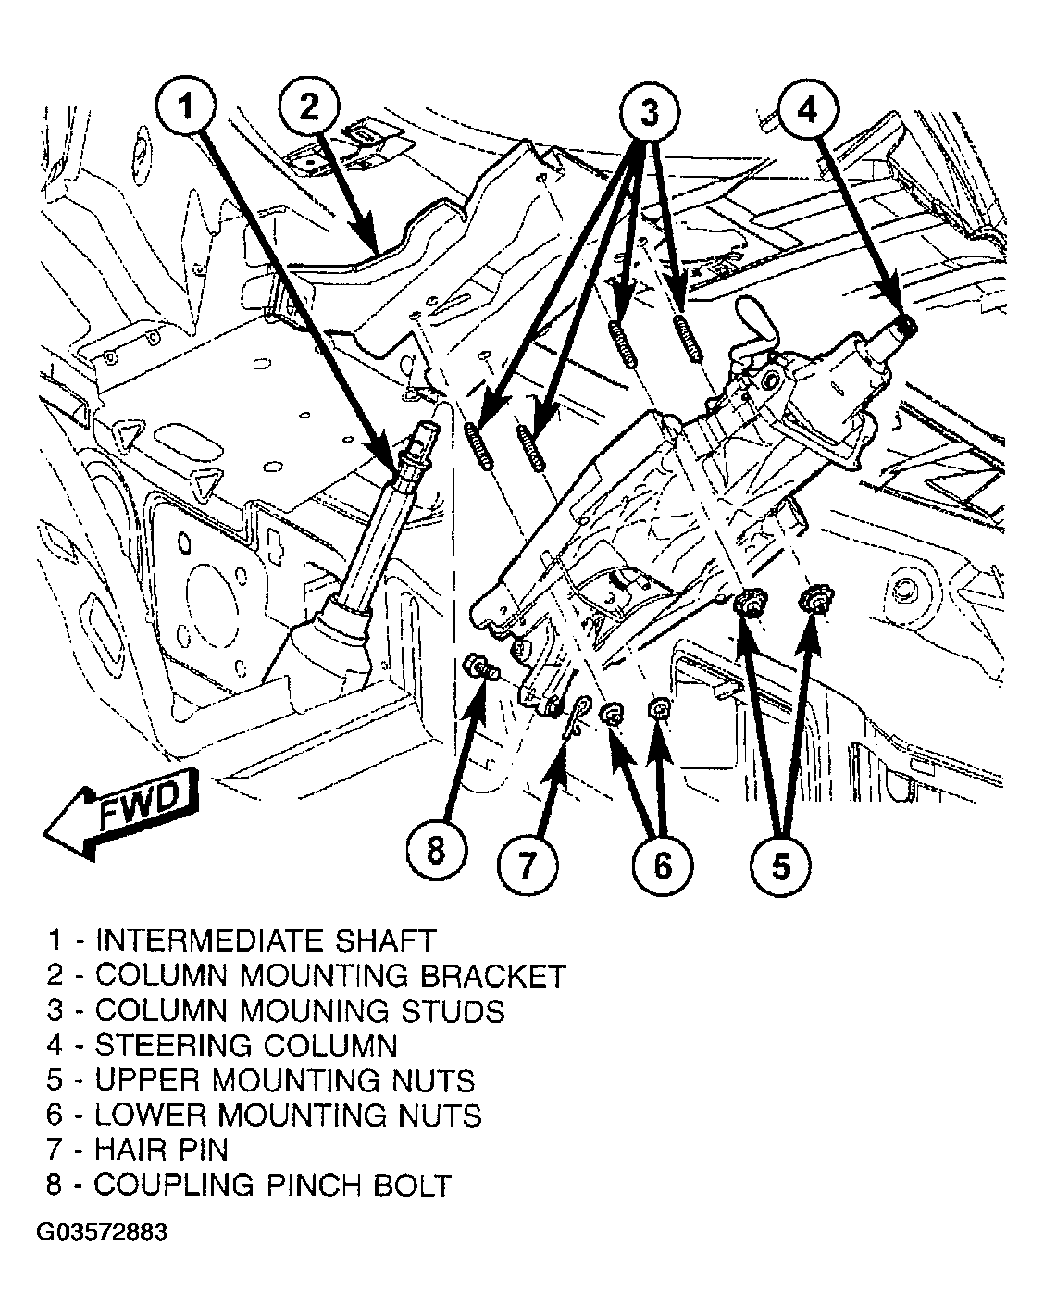
- Place steering column over mounting studs and install four nuts fastening column to dash (Fig 2
). Tighten nuts to 12 N.m (105 in. lbs.) torque.
- Connect steering column coupling to intermediate shaft (Fig 2
). To do so:
- Match intermediate shaft to coupling pinch loop.
 Courtesy of DAIMLERCHRYSLER CORP.
 Courtesy of DAIMLERCHRYSLER CORP.
- Install coupling pinch bolt. Tighten to 28 N.m (21 ft. lbs.) torque.
- Install hair pin at end of pinch bolt.
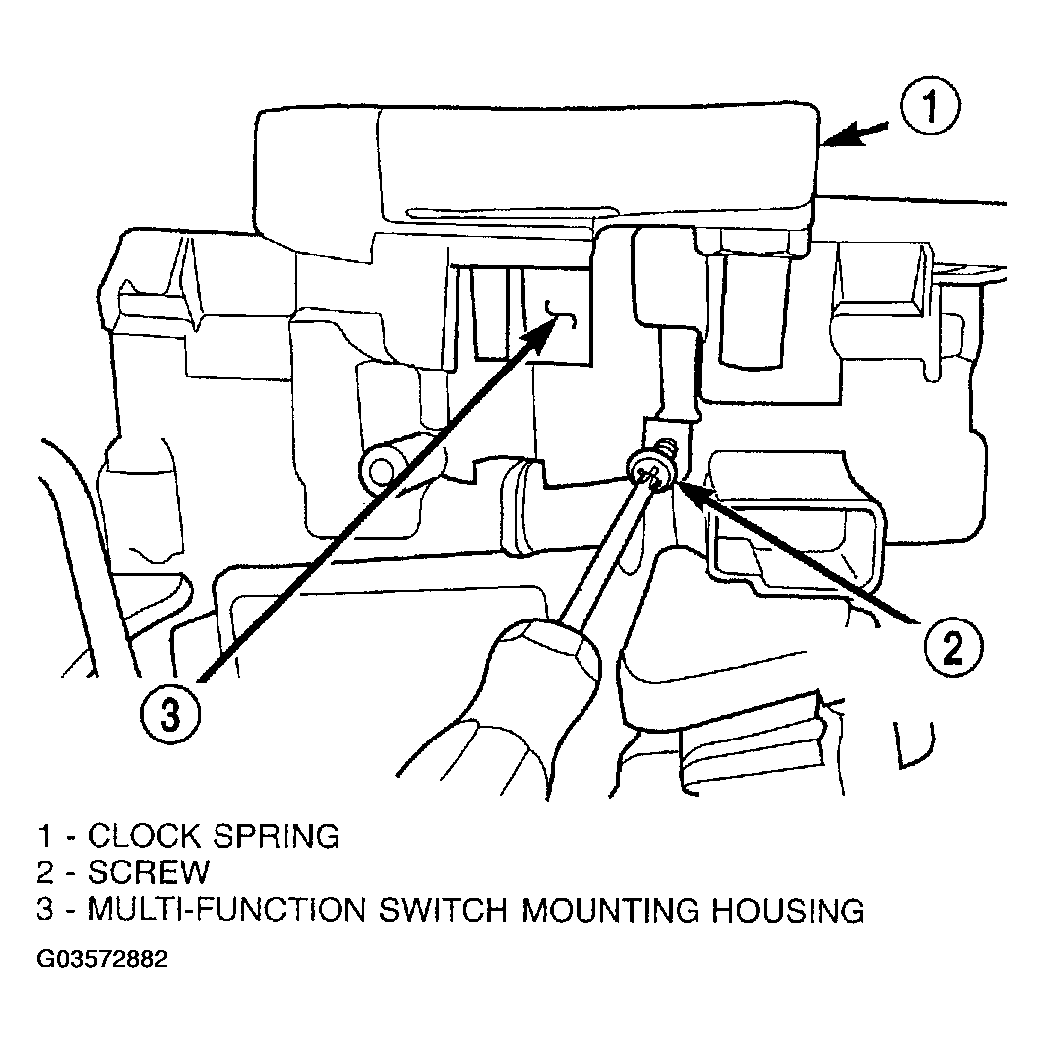
- Slide multi-function switch mounting housing onto column and install mounting screw. Tighten screw to 1.9 N.m (17 in. lbs.) torque.
- Install column wiring harness routing clip into left side of column (Figure
).
- Install lower and upper shrouds around column (Figure
):
- Snap shrouds together at locking tab locations on both sides.
- Install center mounting screw securing lower shroud to column. Tighten screw to 2 N.m (18 in. lbs.) torque.
- Install two outer mounting screws securing lower shroud to upper shroud. Tighten screws to 2 N.m (18 in. lbs.) torque.
- Inspect shroud mating surfaces for excessive gaps and adjust as necessary.
- Install knee blocker airbag and all components necessary to access. Refer to AIR BAG RESTRAINT SYSTEMS
.
- Match splines on steering wheel hub with that on steering shaft and slide steering wheel onto column shaft.
- Install damper on steering wheel (Figure
).
- Install steering wheel retaining bolt (Figure
). Tighten bolt to. 61 N.m (45 ft. lbs.) torque.
- Connect speed control wiring connector at clockspring (Figure
).
- Connect two airbag squib connectors and horn connector to driver airbag (Figure
).
- Place driver airbag on steering wheel and install mounting screws (Figure
). Tighten screws to 10 N.m (90 in. lbs.) torque.
- Connect battery negative (-) cable to battery post following special Diagnosis And Testing procedure. (Refer to
DIAGNOSTICS
)
- Check operation of all steering column mounted components.
- Road test vehicle to ensure operation of steering.