Installation Procedure
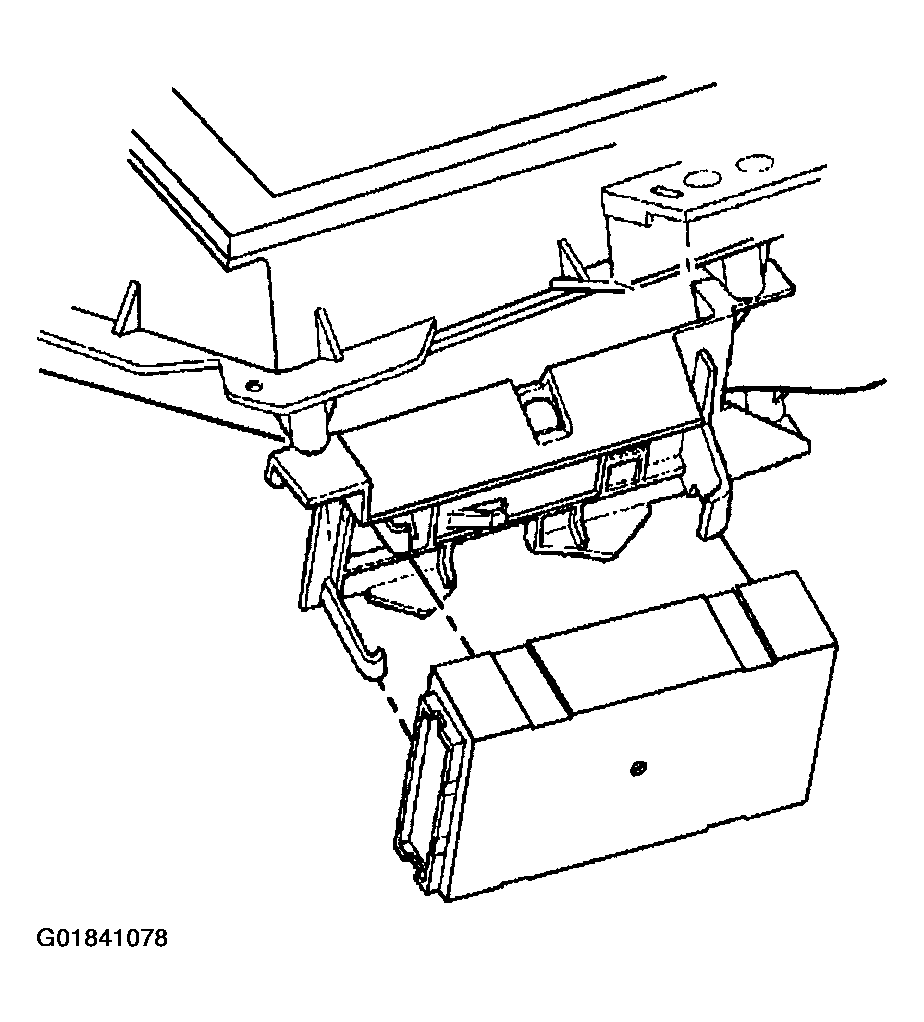
- Install the body control module to the bracket at an angle under the wide hook retainer, with the label facing away from the bracket.
 Courtesy of GENERAL MOTORS CORP.
- Apply pressure on the left side of the body control module in order to move the module toward the mounting bracket base. Snap the module into place.
- Ensure that the module is fully seated. Ensure that both snap retainers are holding the module.
- Connect the electrical connectors to the body control module. Be sure to connect the brown connector last.
- Install the lower instrument panel sound insulator to the vehicle. Refer to CLOSEOUT/INSULATOR PANEL REPLACEMENT - IP LOW
in INSTRUMENT PANEL, GAGES & CONSOLE article.
- Install the left instrument panel sound insulator to the vehicle. Refer to CLOSEOUT/INSULATOR PANEL REPLACEMENT - LEFT
in INSTRUMENT PANEL, GAGES & CONSOLE article.
- Use the following components in order to program the body control module with the proper calibrations:
- The Techline Terminal
- The scan tool
- Perform the BCM Programming. Refer to BODY CONTROL MODULE (BCM) PROGRAMMING/RPO CONFIGURATION .
- Clear the diagnostic trouble codes (DTCs).