Minor Compressor Repair Procedures
Remove or DisconnectTools Required:
J 38874 Drive Plate Holding Tool and Puller
J 8433 Heavy Duty Pulley Puller
J 38424 Pulley Puller Adapter
J 33025 Clutch Coil Puller Legs
1. Battery negative (-) cable.
2. Compressor from vehicle.
^ Mount compressor into vise.
^ Install a J 38874 drive plate holding tool to the drive plate.
Removing Drive Plate Retaining Bolt:
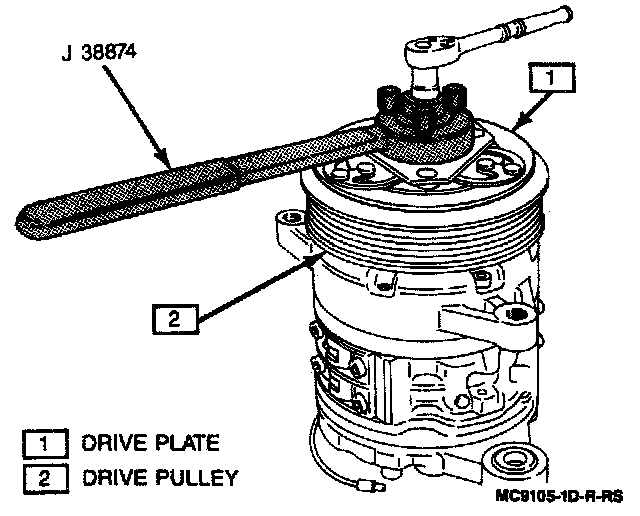
3. Drive plate retaining bolt. Use the J 38874 drive plate holding tool to hold the drive plate to ease retaining bolt removal.
Removing Drive Plate:
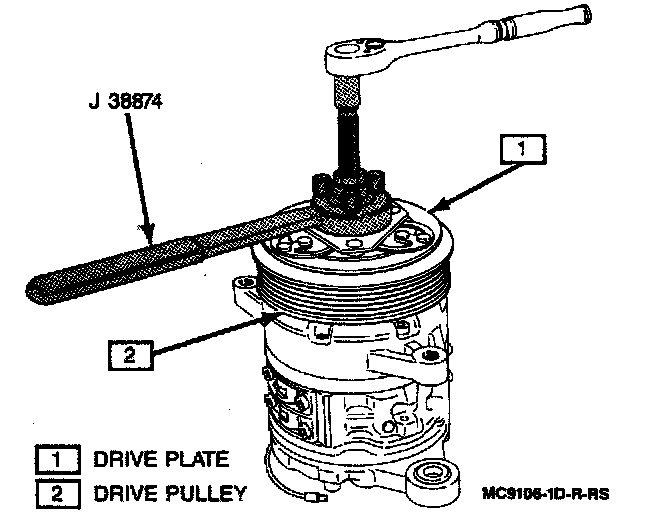
^ Install the drive plate puller to the J 38874 drive plate holding tool and remove the drive plate.
4. Drive plate shim(s).
Removing Snap Ring:
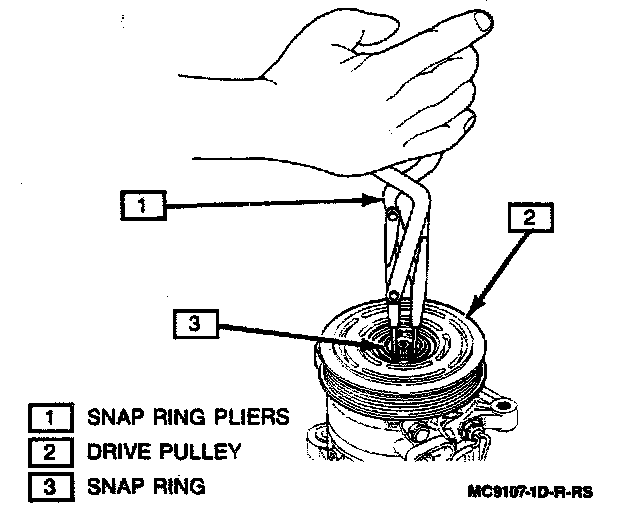
5. Snap ring retaining drive pulley.
Removing Drive Pulley:
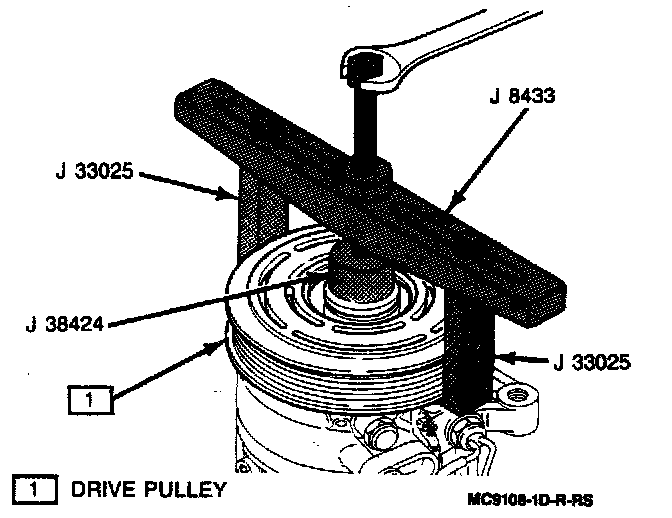
^ Using a J 8433 heavy duty pulley puller, J 33025 clutch coil puller legs and a J 38424 pulley puller adapter, remove drive pulley.
Removing Lead Wire Retaining Clip:
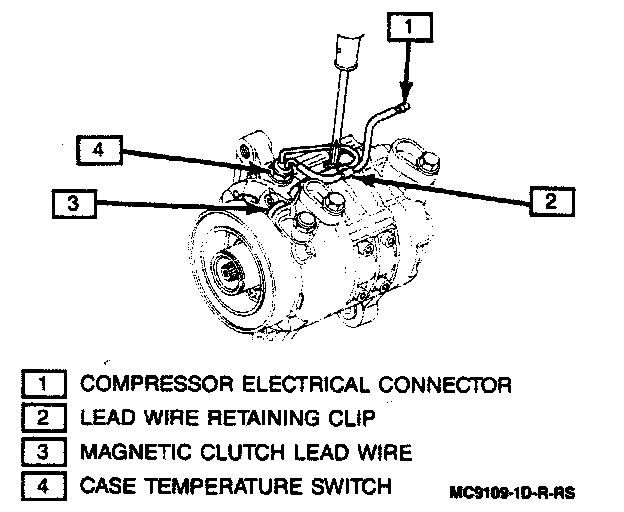
6. Lead wire retaining clip.
7. Magnetic clutch electrical connector.
Removing Field Coil:
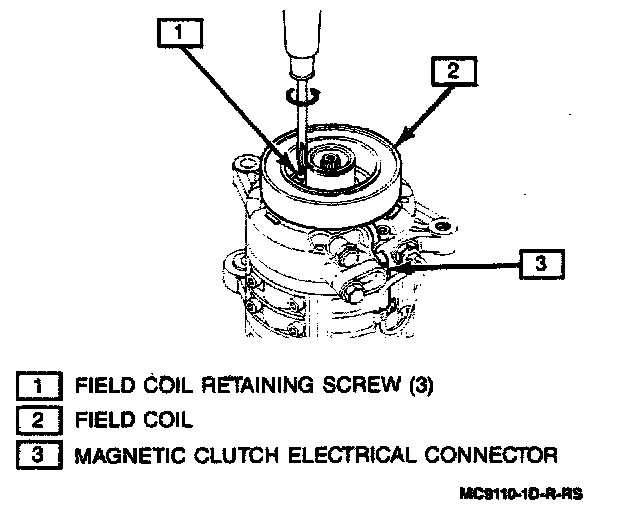
8. Three screws and field coil from compressor.
Inspect
^ Drive plate frictional surface for signs of damage due to excessive heat. If the drive plate is damaged, replace the entire magnetic clutch assembly.
^ Drive pulley frictional surface for excessive grooving due to slippage. If the drive pulley is damaged, replace the entire magnetic clutch assembly.
^ Field coil for cracked insulation ora loose connection. If the field coil is damaged, replace the entire magnetic clutch assembly.
Clean
^ Drive pulley frictional surface before installation.
Install or Connect
Tools Required:
J 38873 Drive Pulley Installer
J 38874 Drive Plate Holding Tool and Puller
Installing Field Coil:
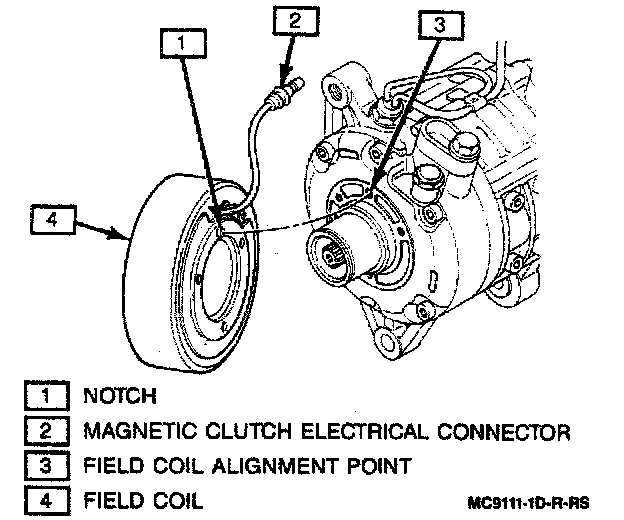
1. Field coil to compressor. Align the notch on the field coil to the compressor.
2. Three screws securing field coil.
Tighten
^ Field coil retaining screws to 5 N.m (44 lb. in.).
3. Magnetic clutch electrical connector.
4. Lead wire retaining clip.
Installing Drive Pulley:
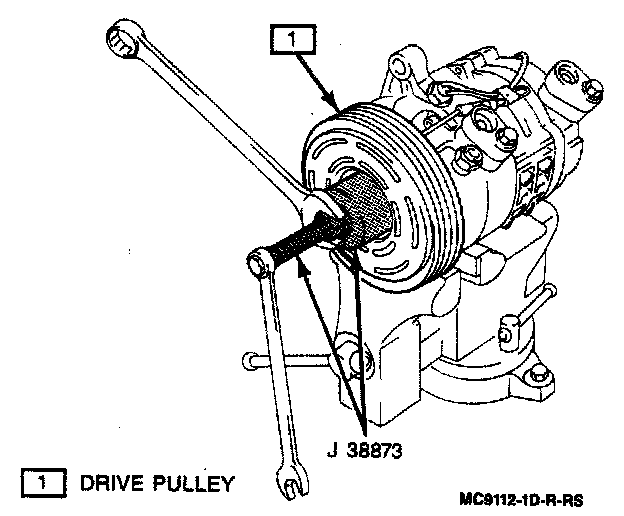
5. Drive pulley using a J 38873 drive pulley installer.
6. Snap ring securing drive pulley.
7. Drive plate shim(s).
Installing Drive Plate:
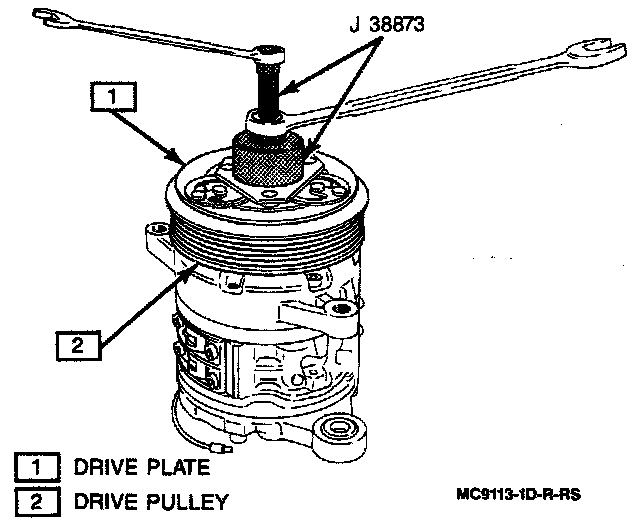
8. Drive plate to drive pulley using the J 38873 drive pulley installer.
NOTICE: Make sure that the drive plate splines are properly aligned with the compressor drive shaft before drawing drive plate onto shaft.
^ Install a J 38874 drive plate holding tool to the drive pulley.
Installing Drive Plate Retaining Bolt:
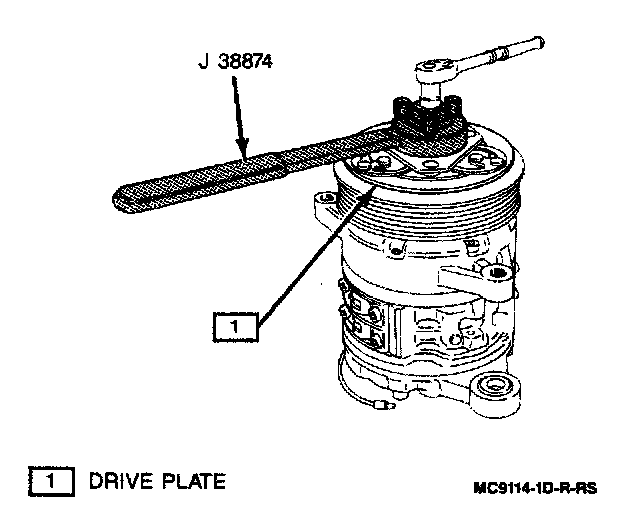
9. Drive plate retaining bolt. Use the J 38874 drive plate holding tool to hold the drive plate stationary.
Tighten
^ Drive plate retaining bolt to 14 N.m (10 lb. ft.).
Inspect
^ Drive pulley for proper rotation.
Measure
Tool Required:
J 26900-8 Thickness Gage
Measuring Drive Plate Clearance:
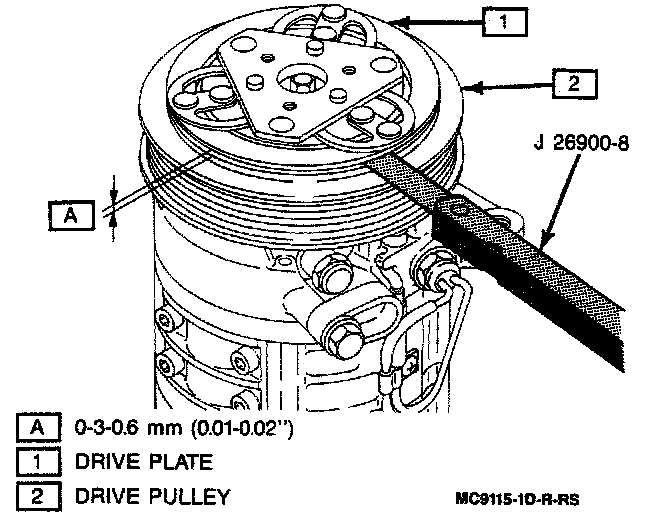
^ Drive plate-to-drive pulley clearance using a J 26900-8 thickness gage. Standard clearance is 0.3 to 0.6 mm (0.01 to 0.02-inch). If clearance is less than 0.3 mm (0.01-inch), install adjusting shims as required to bring clearance into specification. Shims are available in 0.1 mm (0.0039-inch), 0.3 mm (0.01-inch) and 0.5 mm (0.0197-inch) sizes.
10. Compressor to vehicle.
11. Battery negative (-) cable.