Transfer Assembly Installation
- Clean the areas where the transfer assembly contacts the transmission with solvent or carburetor cleaner, and dry with compressed air. Then apply ATF to the contact areas. When installing the transfer assembly, be sure not to allow dust or other foreign particles to enter the transmission.
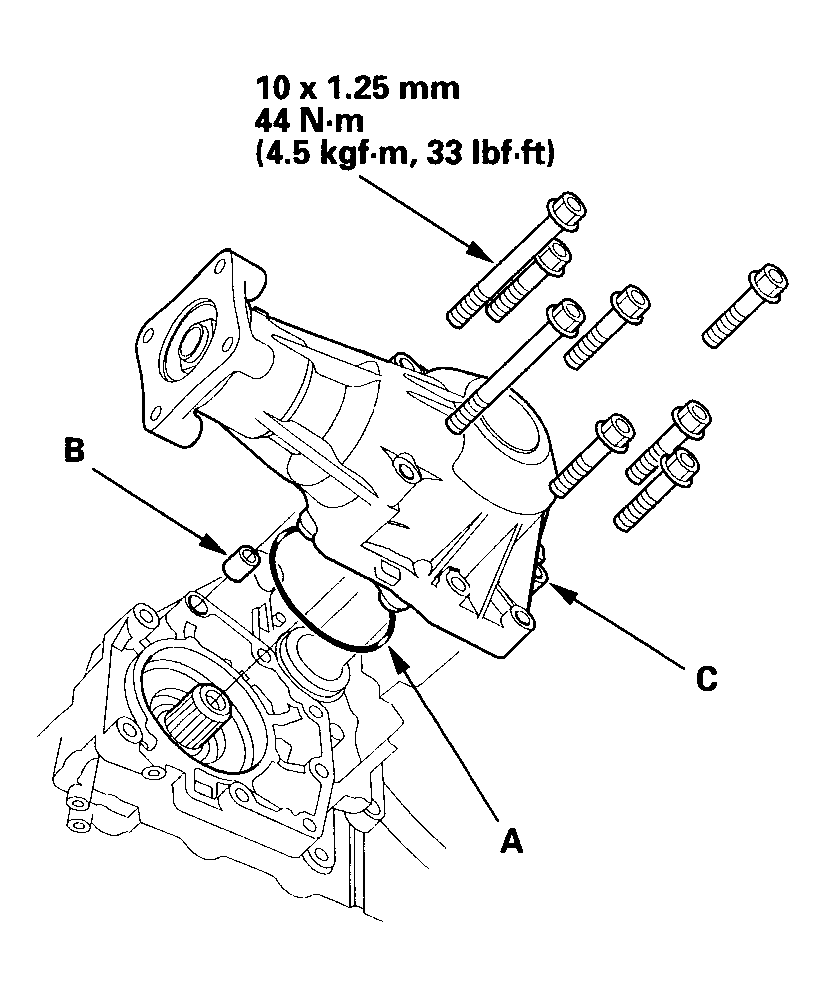
- Install the new O-ring (A) on the transfer cover.
 Courtesy of AMERICAN HONDA MOTOR CO., INC.
- Install the dowel pin (B) in the transfer assembly (C), then install the transfer assembly.
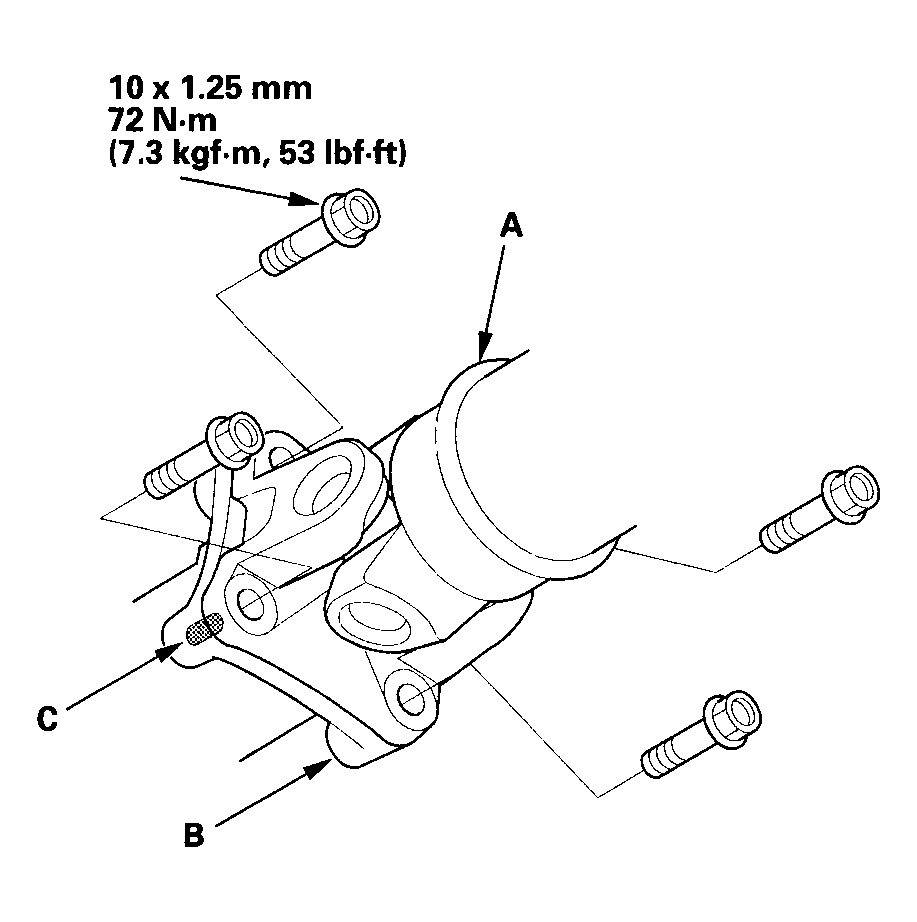
- Install the propeller shaft (A) to the transfer companion flange (B) by aligning the reference mark (C).
 Courtesy of AMERICAN HONDA MOTOR CO., INC.
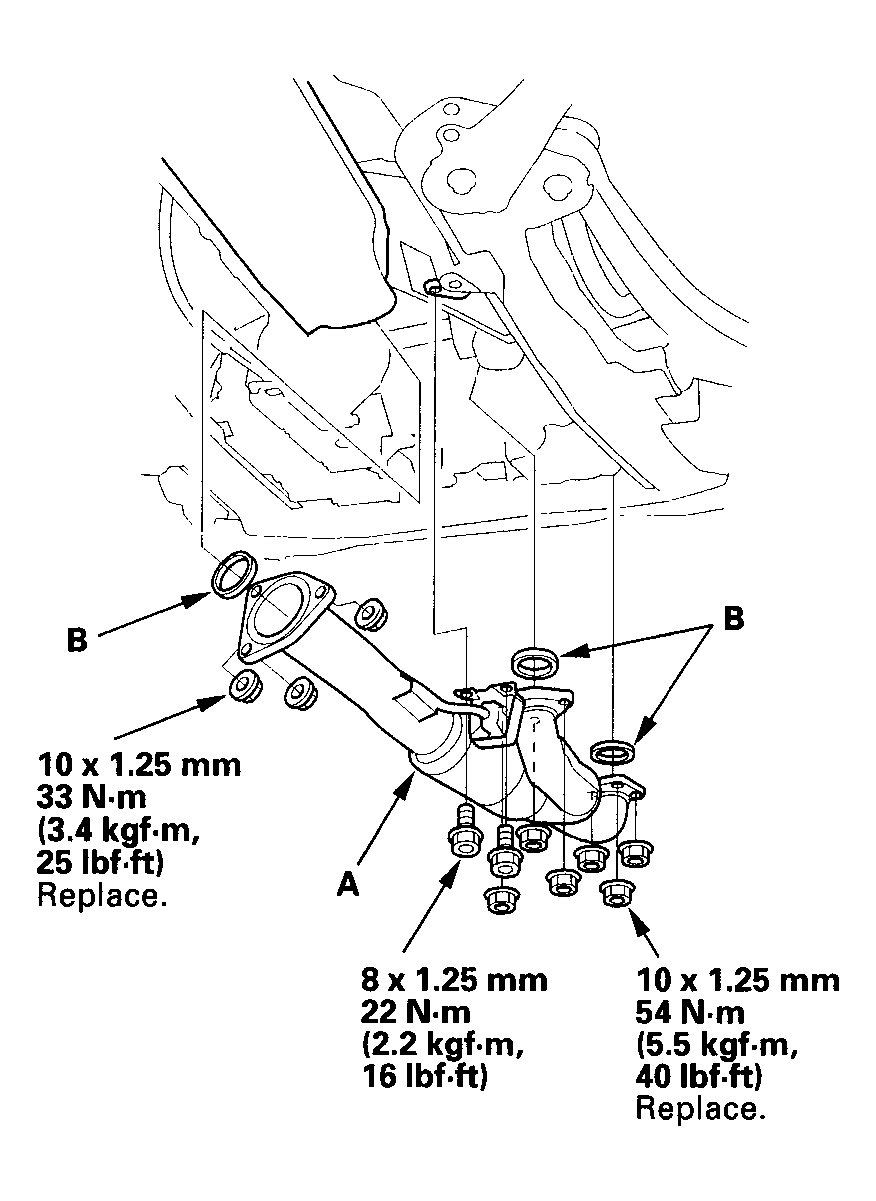
- Install the exhaust pipe (A) with the new gaskets (B).
 Courtesy of AMERICAN HONDA MOTOR CO., INC.
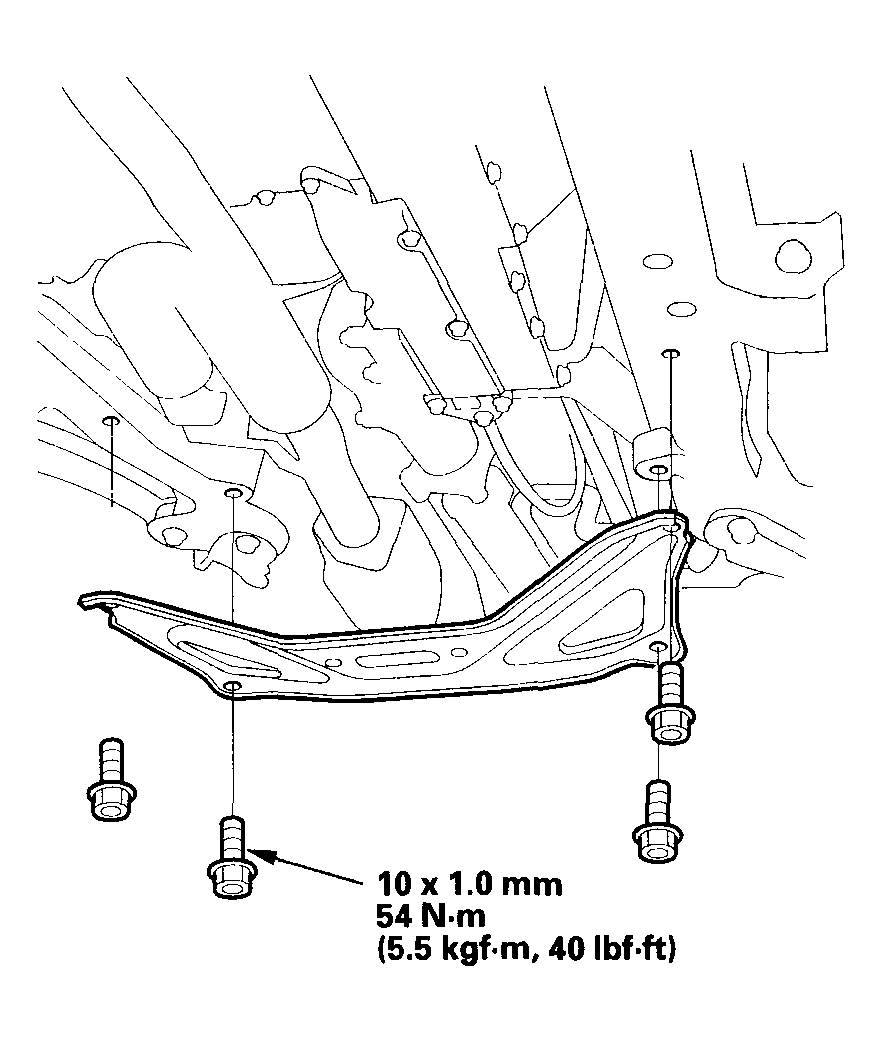
- Install the front subframe stiffener.
 Courtesy of AMERICAN HONDA MOTOR CO., INC.
- Refill the transmission with ATF (see step 5
).
- Start the engine, and run it to normal operating temperature (the radiator fan comes on). Turn the engine OFF, and check the fluid level (see ATF LEVEL CHECK
).