Lower Control Arm
 Courtesy of CHRYSLER LLC
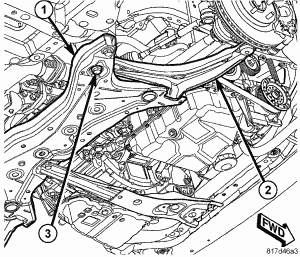
- Place the lower control arm (2) into the front suspension crossmember (1).
- Insert the rear bolt (3) up through the crossmember (1) and lower control arm (2).
 Courtesy of CHRYSLER LLC
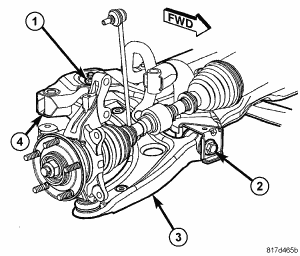
- Install, but do not fully tighten, the nut (1) on the rear bolt attaching the lower control arm (3) to the crossmember (4).
- Install, but do not fully tighten, the front bolt (2) attaching the lower control arm to the crossmember.
- With no weight or obstruction on the lower control arm, tighten the lower control arm rear mounting bolt nut (1) to 183 N.m (135 ft. lbs.).
- With no weight or obstruction on the lower control arm, tighten the lower control arm front pivot bolt (2) to 183 N.m (135 ft. lbs.).
 Courtesy of CHRYSLER LLC
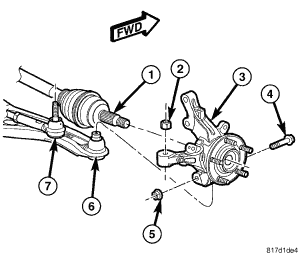
- Install the ball joint (6) stud into the knuckle (3), aligning the bolt hole in the knuckle boss with the groove formed in the side of the ball joint stud.
- Install a NEW ball joint stud pinch bolt (4) and nut (5). Tighten the nut to 82 N.m (60 ft. lbs.).
 Courtesy of CHRYSLER LLC
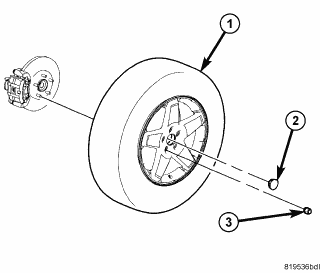
- Install the tire and wheel assembly (1). Refer to INSTALLATION
. Install and tighten the wheel mounting nuts (3) to 135 N.m (100 ft. lbs.).
- Lower the vehicle.
- Perform wheel alignment as necessary. See STANDARD PROCEDURE .