September 30: LEMON manuals is back up on a temporary server! Slowness is possible
Left Front
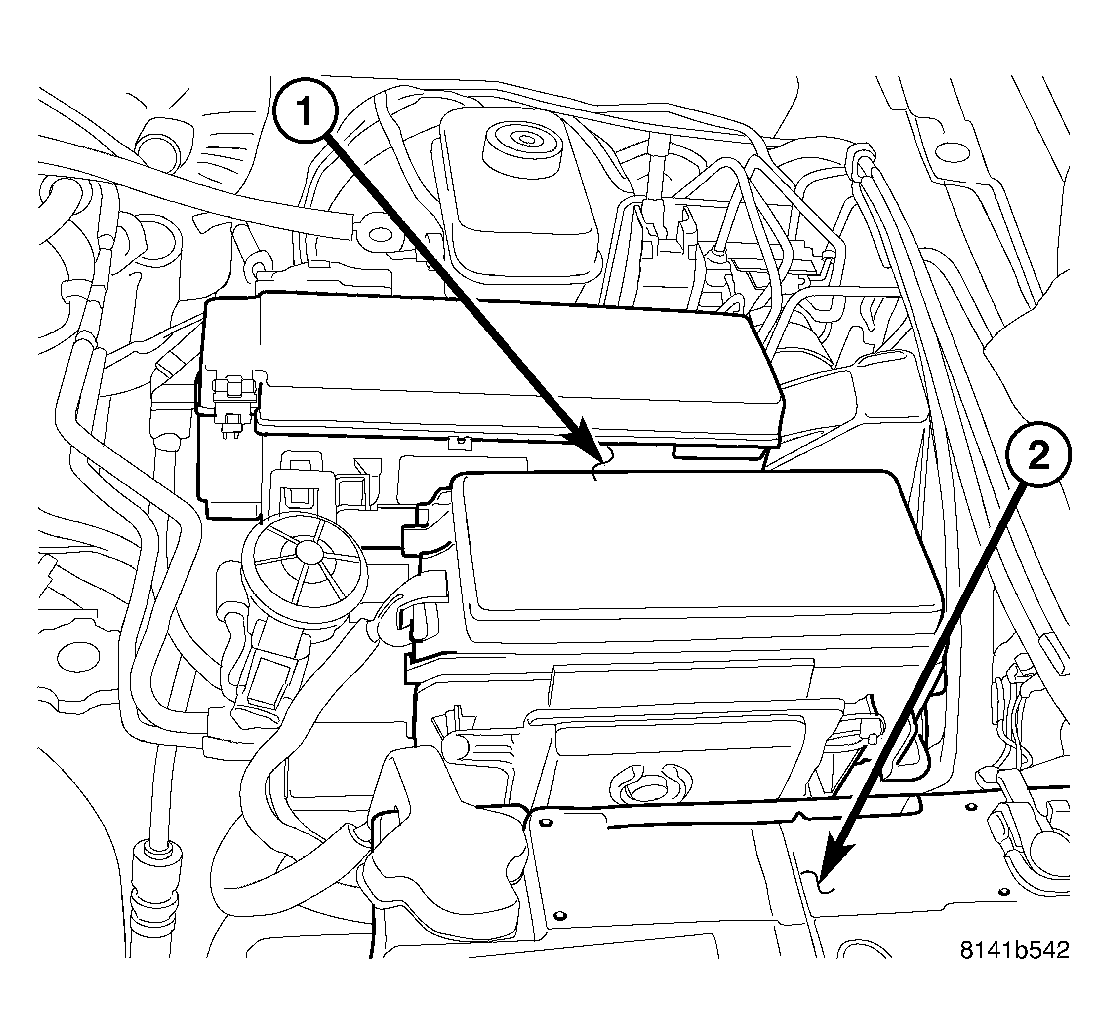 Courtesy of CHRYSLER LLC
| 1 - POWER DISTRIBUTION CENTER |
| 2 - BATTERY |
- Remove the air box cover and air intake hose.
- Remove the 3 PDC bracket nuts (1).
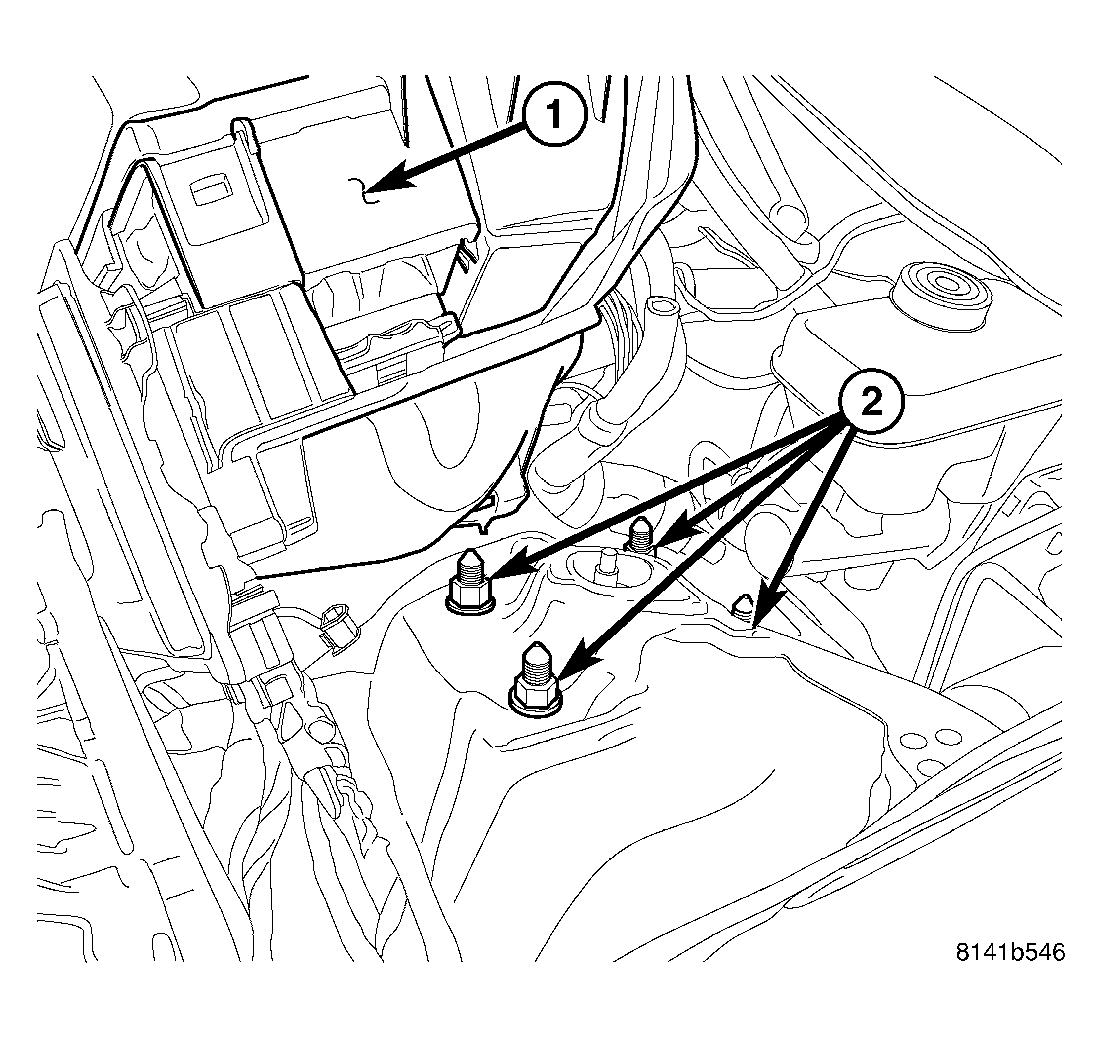 Courtesy of CHRYSLER LLC
| 1 - PDC |
| 2 - UPPER MOUNTING NUTS |
- Move the PDC (1) off to the side to access the four upper shock mount nuts (2).
- Remove the four upper shock mount nuts (2).
- Raise and support the vehicle.
- Remove the tire.
- Remove the two brake caliper adapter bolts.
- Support the brake caliper adapter and caliper. Do not allow the caliper to hang by the brake hose.
- Remove the disc brake rotor.
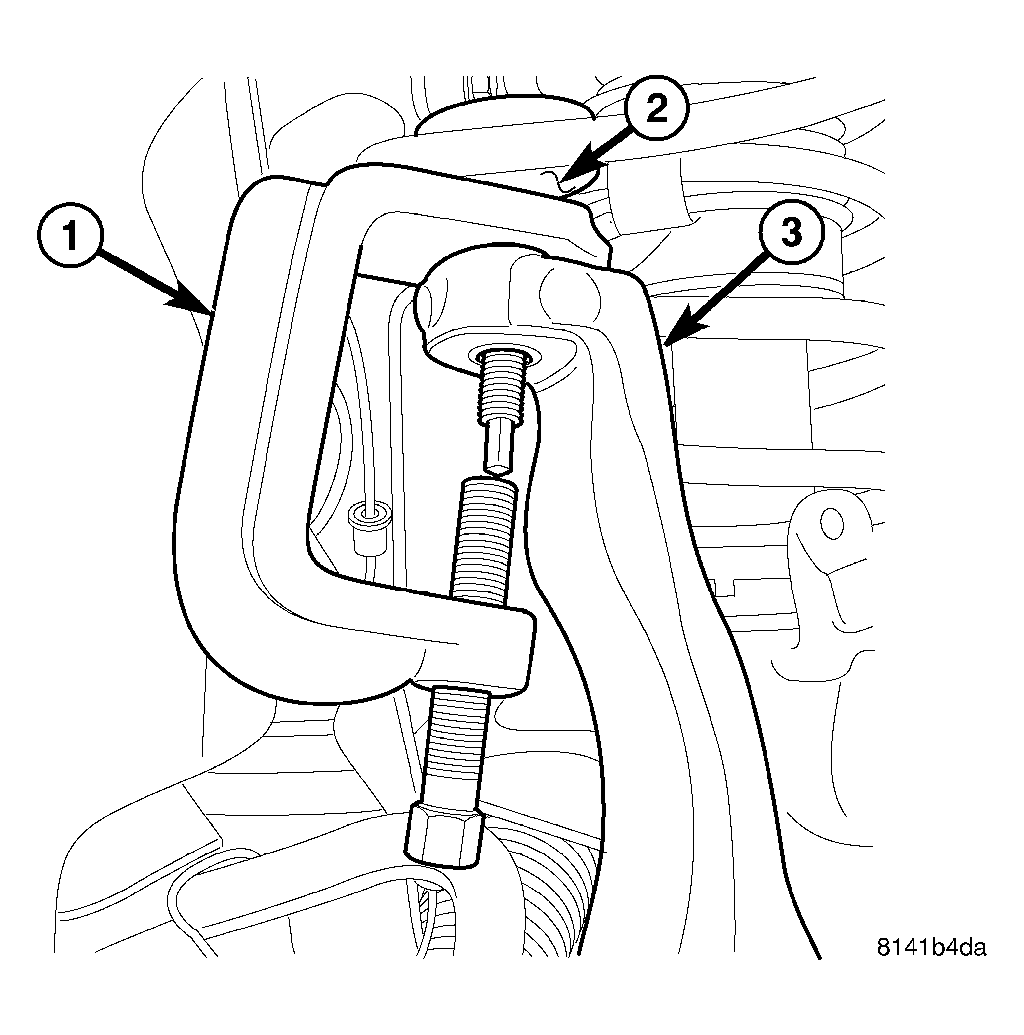 Courtesy of CHRYSLER LLC
- Remove the upper ball joint nut.
- Separate the upper ball joint (2) from the knuckle (3) using special tool 8677 (1).
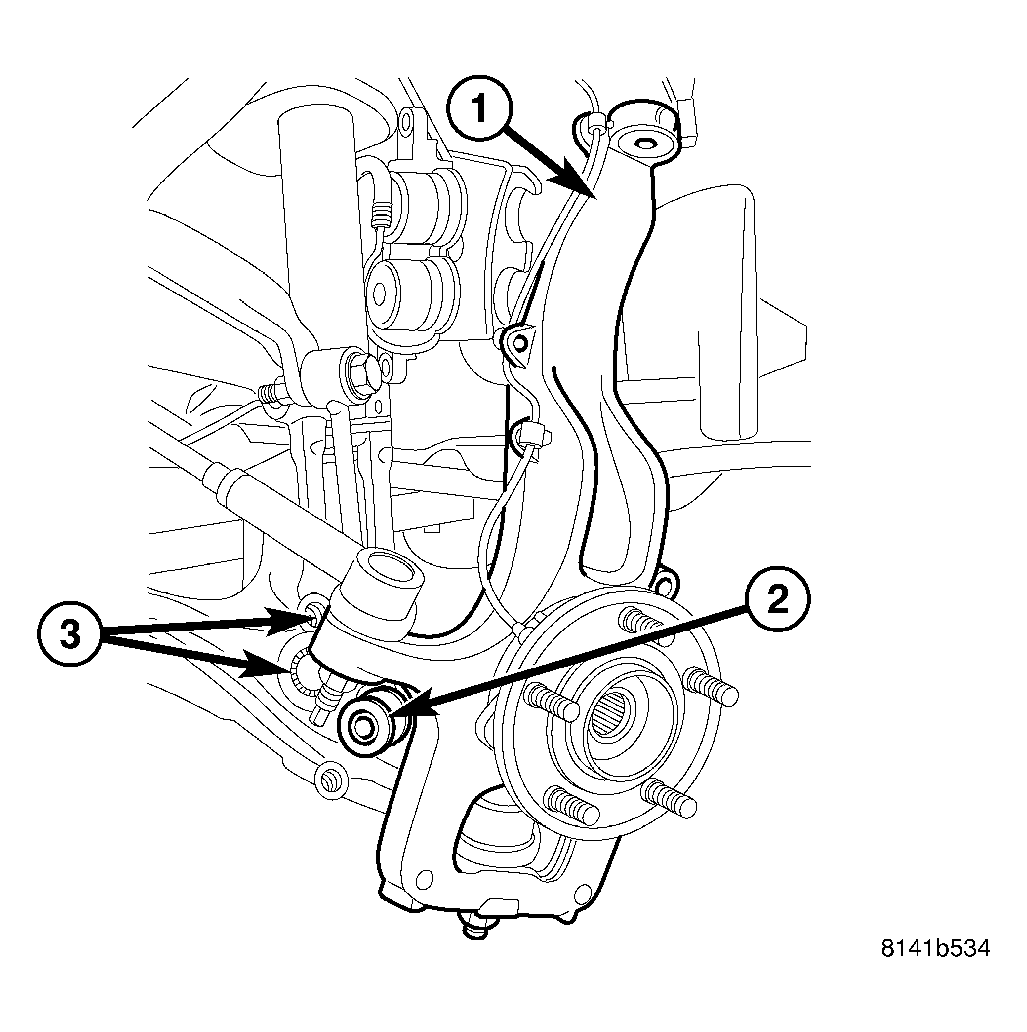 Courtesy of CHRYSLER LLC
| 1 - KNUCKLE |
| 2 - CLEVIS BRACKET AND BUSHING |
| 3 - STABILIZER LINK |
- Remove the lower clevis bolt (3) at the lower control arm.
- Remove the lower stabilizer bolt (2) at the lower control arm.
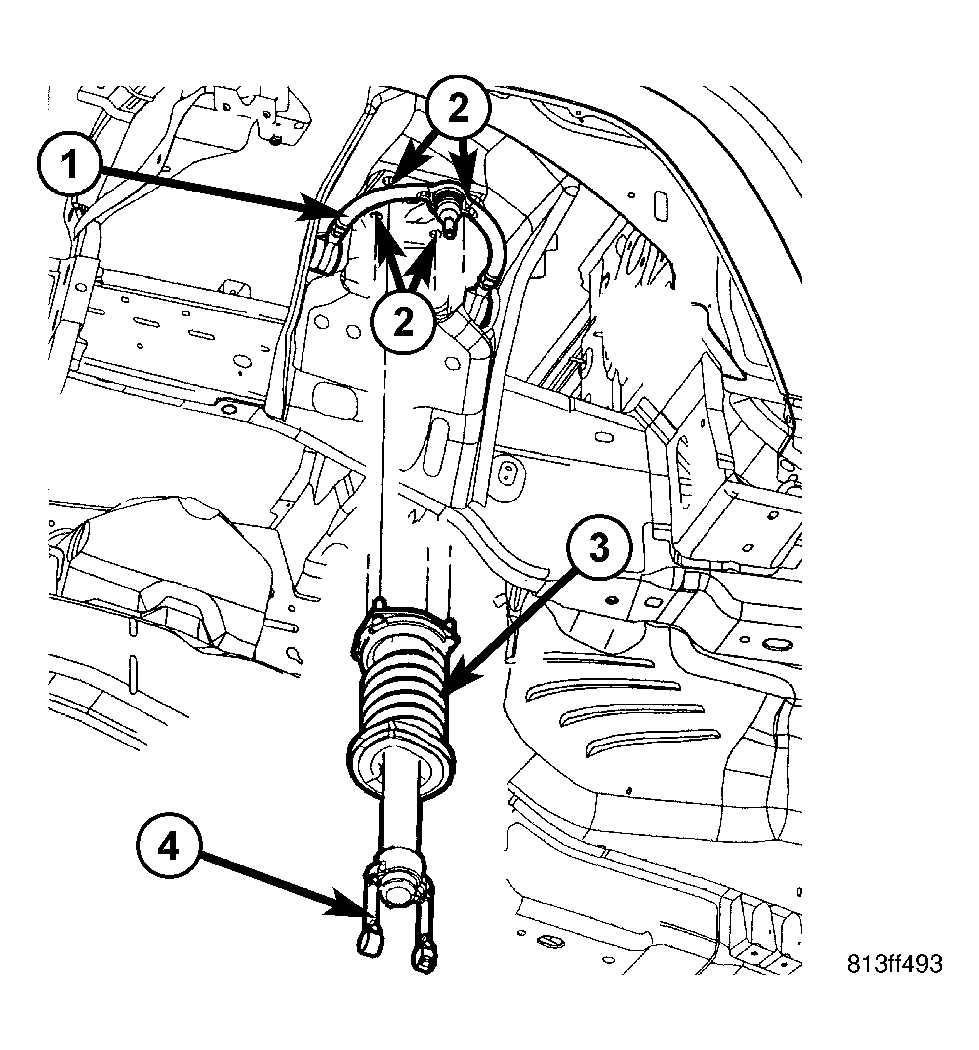 Courtesy of CHRYSLER LLC
| 1 - UPPER CONTROL ARM |
| 2 - MOUNTING HOLES |
| 3 - SHOCK ASSEMBLY |
| 4 - CLEVIS BRACKET |
- Remove the shock (3) from the vehicle.
- Remove the spring if necessary. See REMOVAL .