Test Procedure
- Turn ignition off. Disconnect vacuum supply hose from PCSV. Start engine. Plug vacuum hose and check for vacuum. If vacuum is felt, go to next step. If vacuum is not felt, repair or replace vacuum hose or intake vacuum port as necessary and go to step 9.
- Turn ignition off. Connect vacuum pump to PCSV nipple, apply vacuum and ensure PCSV holds vacuum. Disconnect PCSV 2-pin harness connector. Connect a fused jumper wire between battery voltage and PCSV connector terminal No. 2 (component side). With another fused jumper wire connected to PCSV connector terminal No. 1 (component side), apply ground by touching jumper wire on/off to ground. A clicking sound should be heard and vacuum should bleed off at this time. Repeat this procedure 4 or 5 times to ensure PCSV reliability. If valve is okay, go to next step. If valve is faulty, temporarily install a known-good PCSV and check for proper operation. If problem is corrected, replace valve and go to step 9.
- Thoroughly check PCSV harness connector terminals for loose, bent, corroded, contaminated, deteriorated or damaged connector terminals. If connector terminals are okay, go to next step. If connector terminals are faulty, repair or replace as necessary and go to step 9.
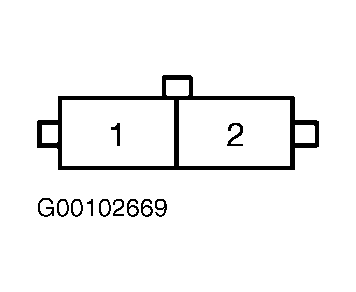
- With PCSV 2-pin harness connector disconnected. See Fig 1. Turn ignition on. Measure voltage between ground and PCSV harness connector terminal No. 2 (Pink wire). Voltage should be battery voltage. If voltage is as specified, go to step 6. If voltage is not as specified, go to next step.
- Turn ignition off. Check EGR fuse (15 amp), located in engine compartment fuse/relay box. Check Main relay operation. See FUEL PUMP & MAIN RELAYS (OPTIMA & MAGENTIS (CANADIAN) 2.7L)
under RELAYS & SOLENOIDS in SYSTEM & COMPONENT TESTING article. Also if necessary check Main relay circuits. See OPTIMA & MAGENTIS (CANADIAN)
in WIRING DIAGRAMS article. If EGR fuse, Main relay and Main relay circuits are okay, go to next step. If EGR fuse, Main relay or Main relay circuits are faulty, repair or replace as necessary, and go to step 9.
- Measure resistance between PCSV connector terminal No. 1 and 2 (component side). Resistance should be 24-28 ohms at 68°F (20°C). If resistance is as specified, go to next step. If resistance is not as specified, temporarily install a known-good PCSV and check for proper operation. If problem is corrected, replace valve and go to step 9.
- Disconnect ECM harness connector "M". See Figure. Thoroughly check for loose, bent or corroded terminals. Measure resistance between PCSV connector terminal No. 1 (Green/White wire) and ECM connector terminals M42. Resistance should be below one ohm. If resistance is as specified, go to next step. If resistance is not as specified, repair open circuit as necessary and go to step 9.
- With PCSV and ECM harness connectors disconnected. Measure resistance between ground and PCSV harness connector terminals No. 1 (Green/White wire). Also measure resistance between PCSV solenoid valve connector terminals No. 1 (Green/White wire) and No. 2 (Pink wire). All resistances should be infinite. If resistances are as specified, temporarily install a Known-good PCSV and check for proper operation. If problem is corrected, replace PCSV and go to next step. If any resistance is not as specified, repair short circuit as necessary and go to next step.
- After repair, return vehicle to original condition. Clear codes using Hi-Scan Pro/Kia Data Pro Scan tool or equivalent. Verify repairs by driving vehicle and monitoring for pending codes. If DTC is set during test drive, follow appropriate DTC test procedure.
 Courtesy of KIA MOTORS AMERICA, INC.