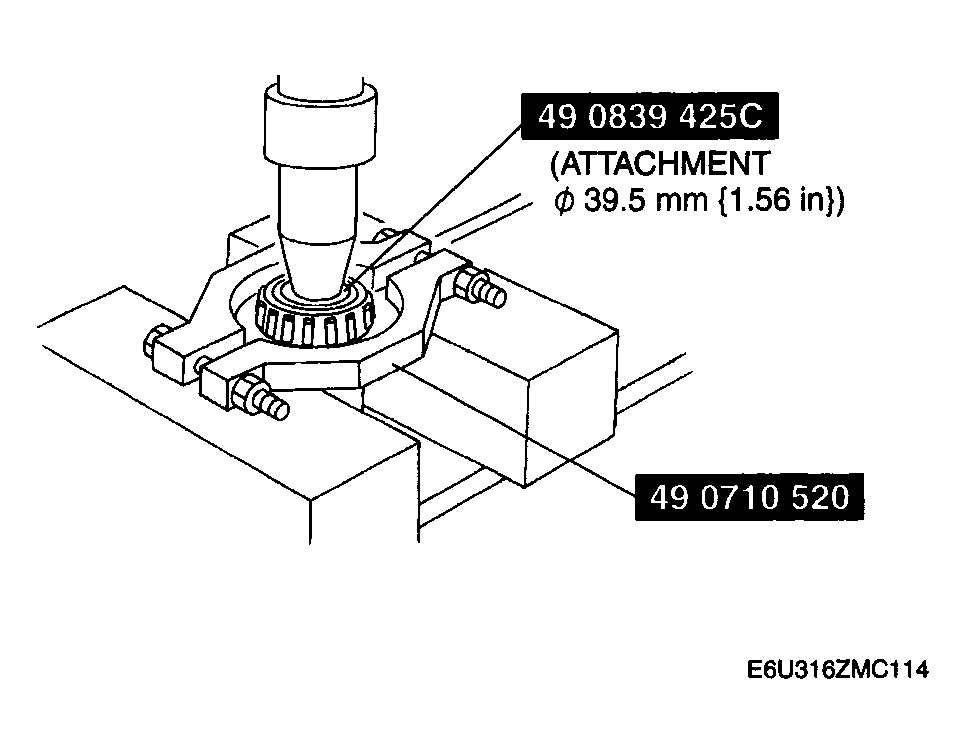
Front Carrier Component Disassembling Procedure
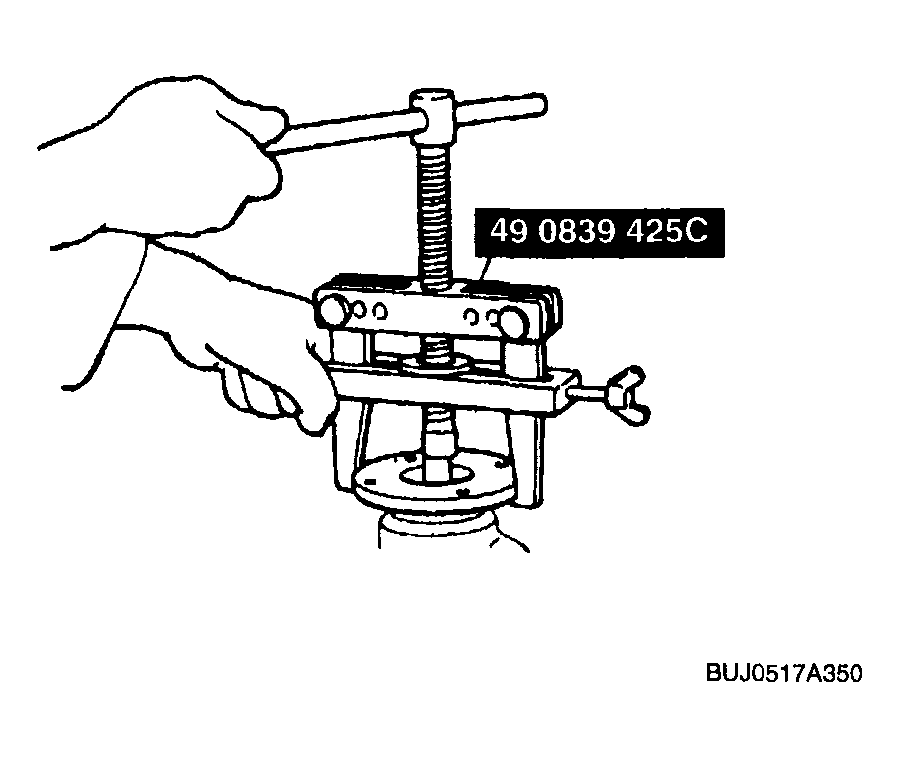
- Install the front carrier component to the SST
.
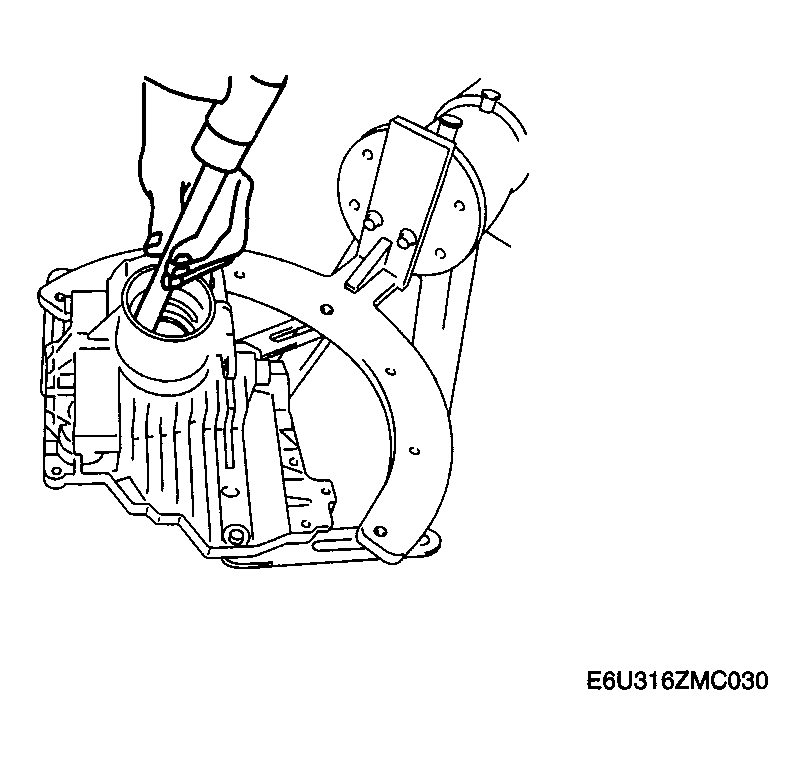
- Remove the oil strainer.
- Remove the oil pipe.
- Remove the side cover.
 Courtesy of MAZDA MOTORS CORP.
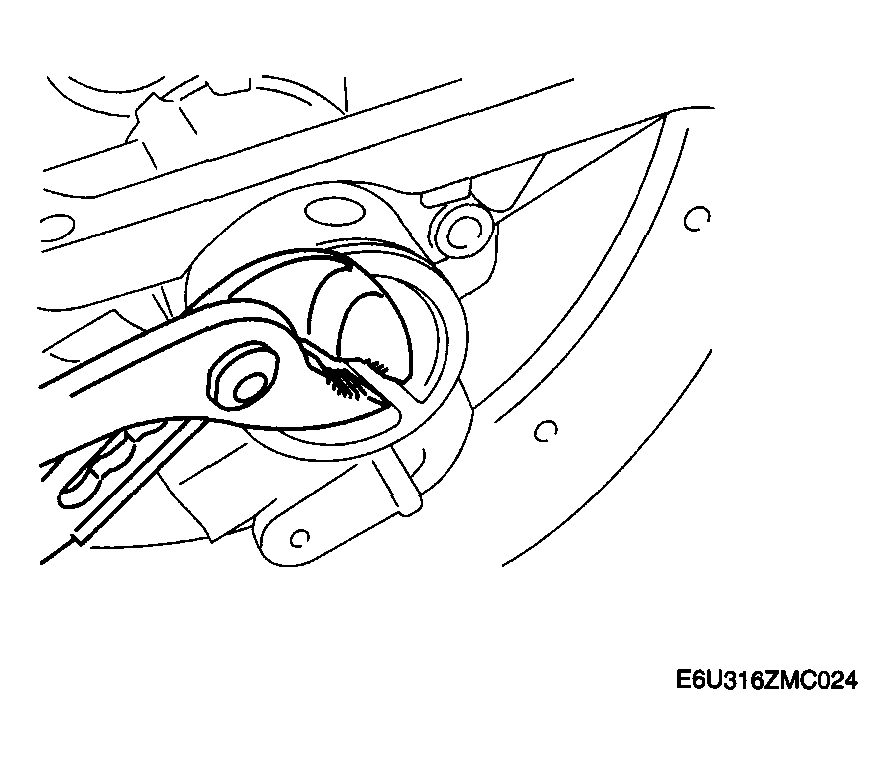
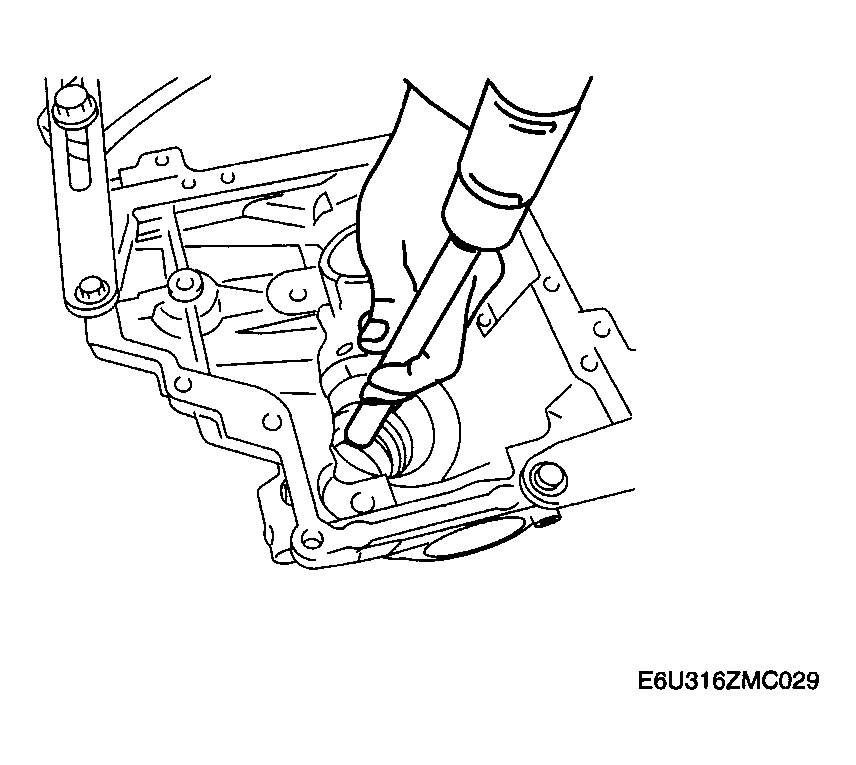
- Remove the oil pump by turning it using pliers as shown in the figure.
- If the oil pump shaft remains in the gear shaft side, remove the oil pump shaft.
 Courtesy of MAZDA MOTORS CORP.
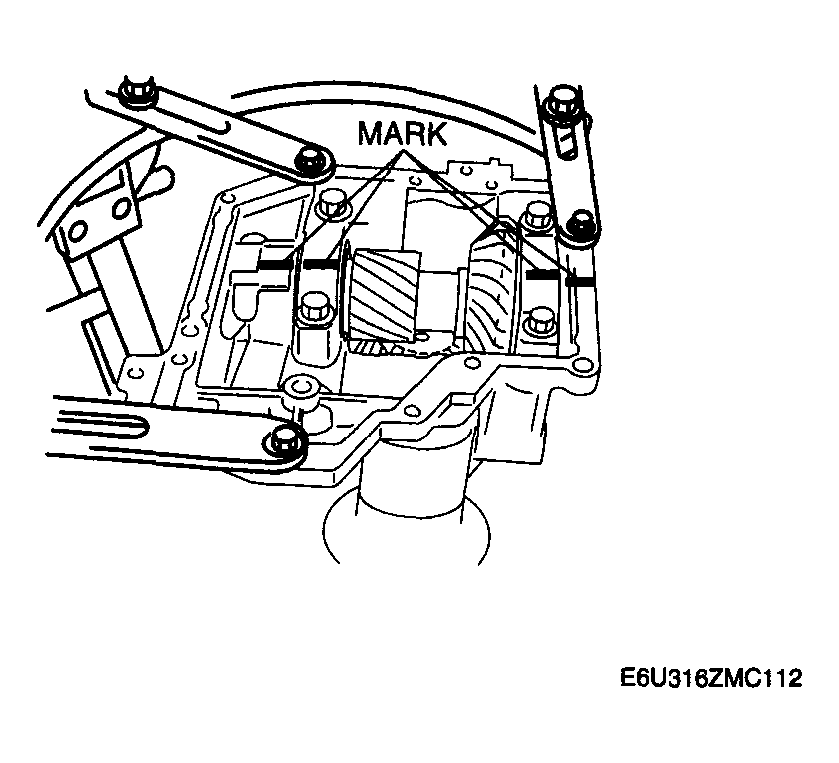
- Make alignment marks on the bearing caps and front carrier.
- Remove the bearing caps.
 Courtesy of MAZDA MOTORS CORP.
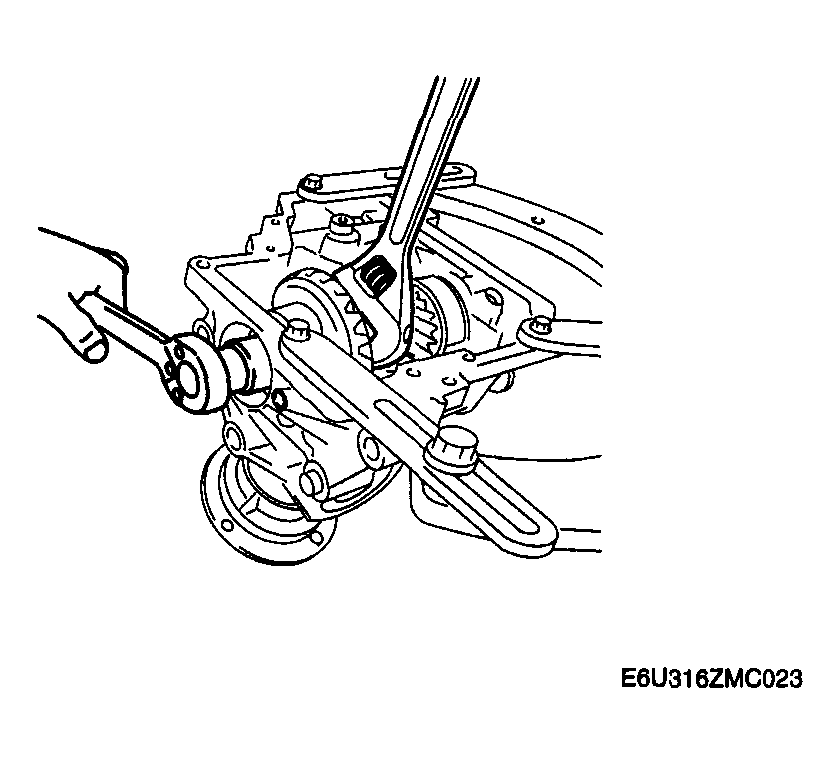
- Using a suitable wrench, secure the ring gear shaft, and remove the ring gear lock bolt.
 Courtesy of MAZDA MOTORS CORP.
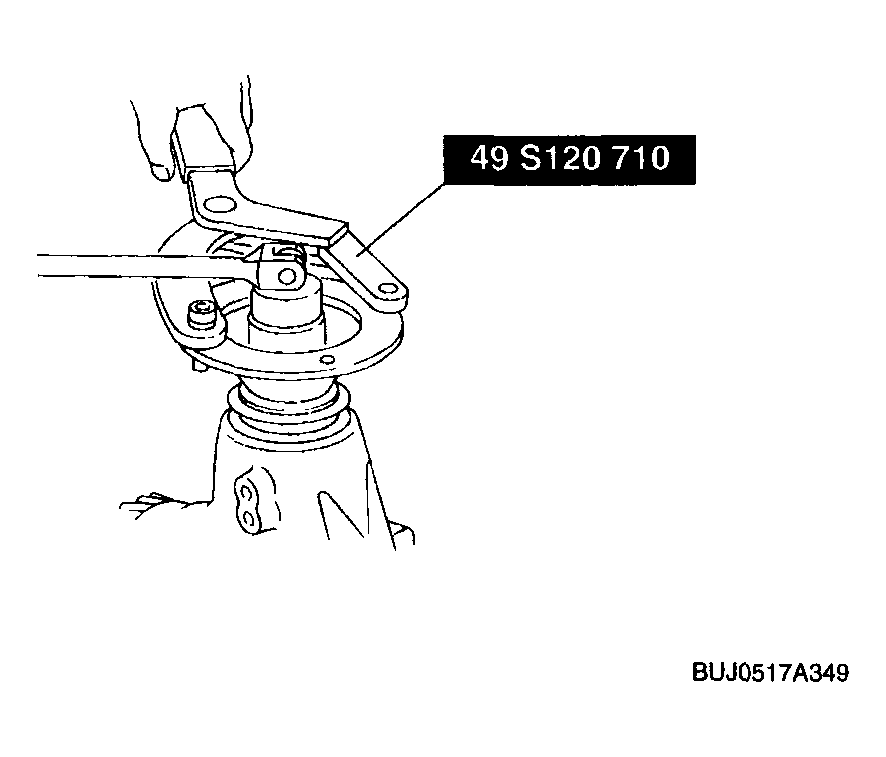
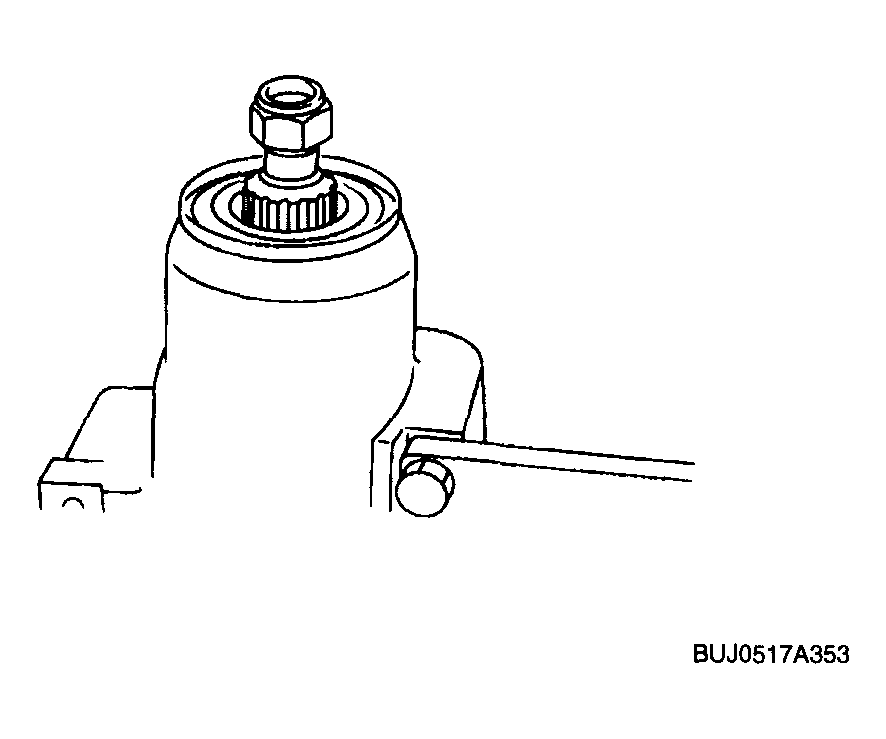
- Using the SST
, secure the companion flange, and remove the locknut and washer.
 Courtesy of MAZDA MOTORS CORP.
- Using the SST
, remove the companion flange.
 Courtesy of MAZDA MOTORS CORP.
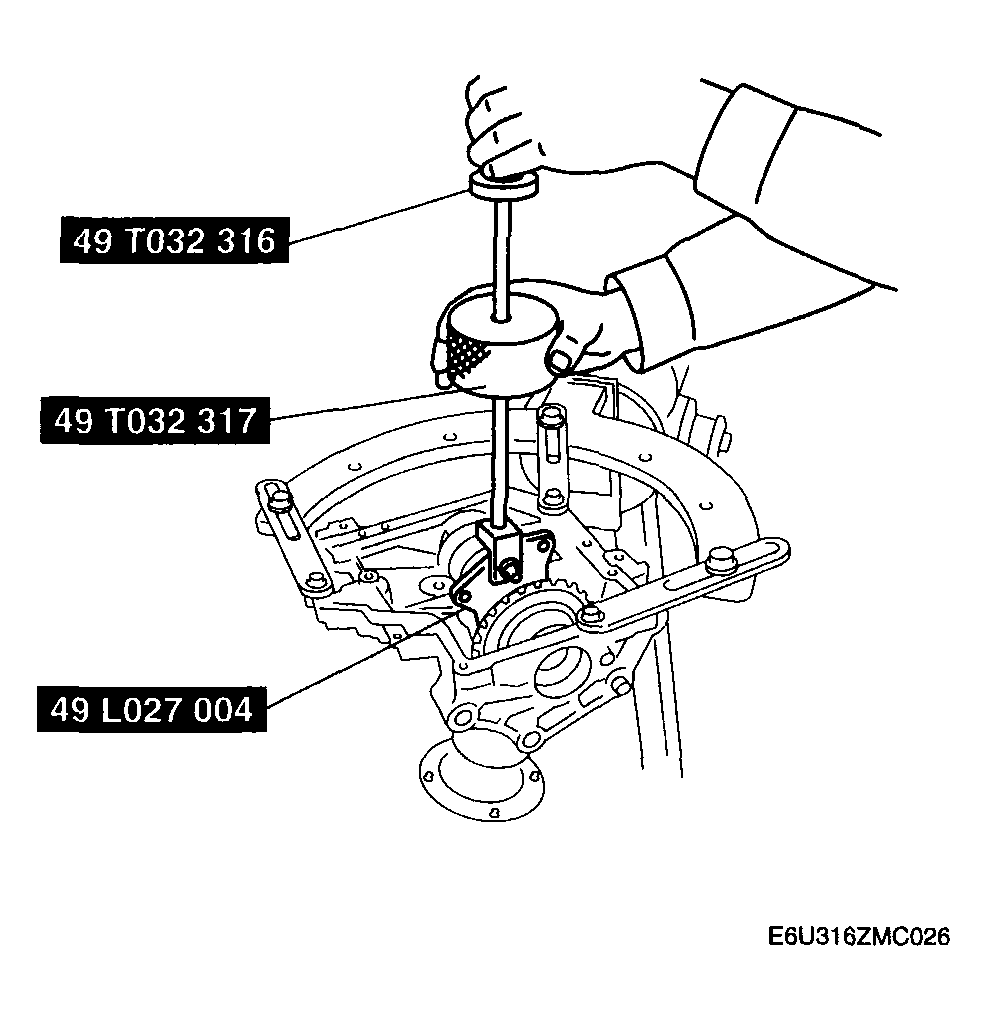
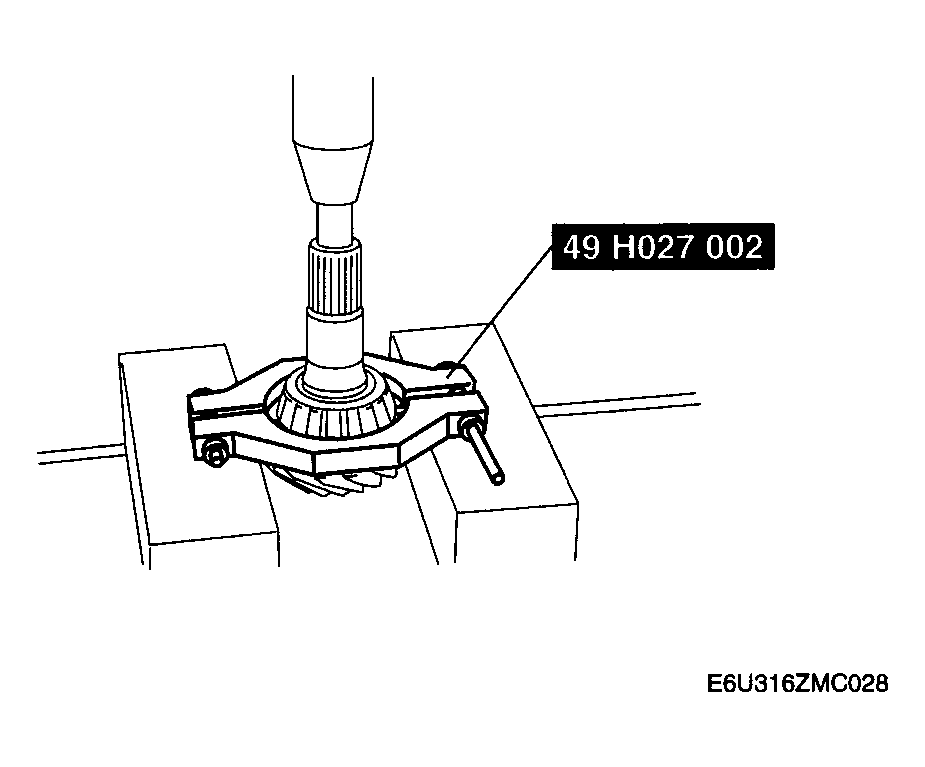
- Using the SSTs
, remove the ring gear component.
- Remove the adjustment shims and spacer.
 Courtesy of MAZDA MOTORS CORP.
- Install an appropriate nut to the drive pinion to prevent the thread from being damaged.
- Lightly tap the drive pinion using a copper hammer and remove the drive pinion gear.
 Courtesy of MAZDA MOTORS CORP.
- Using a flathead screwdriver, remove the oil seal.
- Remove the bearing (rear) and distance piece.
 Courtesy of MAZDA MOTORS CORP.
- Using the SST
, remove the bearing (front).
- Remove the spacer.
 Courtesy of MAZDA MOTORS CORP.
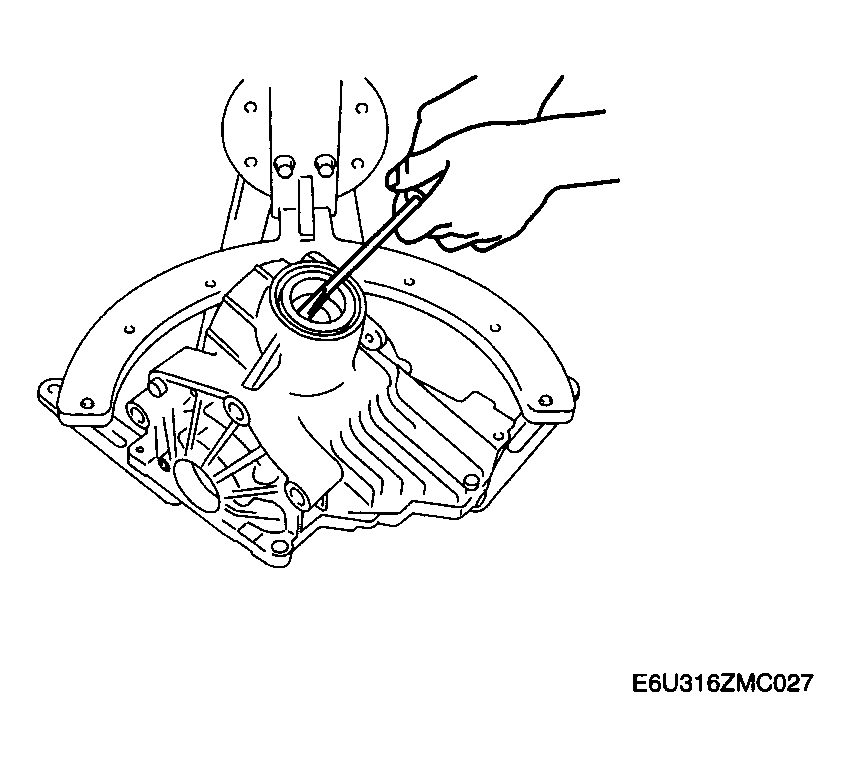
- Attach the brass stick to the notch, tap the race end lightly and evenly, then remove the bearing outer races.
 Courtesy of MAZDA MOTORS CORP.
 Courtesy of MAZDA MOTORS CORP.
- Using the SSTs
, remove the bearing (side) (opposite ring gear side).
 Courtesy of MAZDA MOTORS CORP.
- Using a SST
, remove the bearing (side) (ring gear side) together with ring gear.
 Courtesy of MAZDA MOTORS CORP.