Pcm Removal/Installation
- Remove the battery cover. (See
BATTERY REMOVAL/INSTALLATION [L3 WITH TC]
).
- Disconnect the negative battery cable.
- Remove the battery and battery tray. (See
BATTERY REMOVAL/INSTALLATION [L3 WITH TC]
).
- Remove the following items: (See
BATTERY REMOVAL/INSTALLATION [L3 WITH TC]
).
- Disconnect the PCM connector.
- Remove the battery tray and PCM component. (See
BATTERY REMOVAL/INSTALLATION [L3 WITH TC]
).
- Remove in the order indicated in the table.
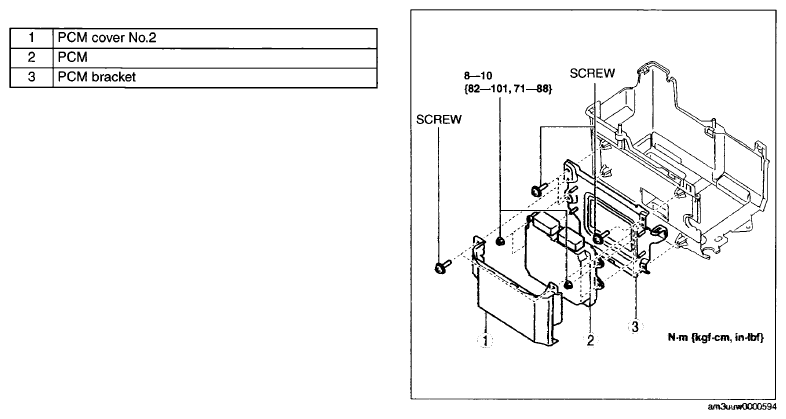 Courtesy of MAZDA MOTORS CORP.
- Install in the reverse order of removal.
CAUTION:
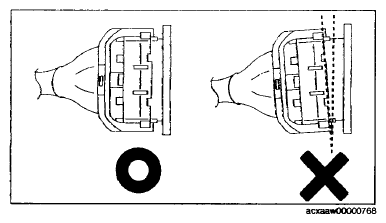
- If the PCM connector is connected incorrectly it could be damaged. When connecting the PCM connector, connect it using the following procedure.
- If the PCM connector is inserted at an angle and the lever is moved, the connector could be damaged. Verify that the PCM connector is inserted straight.
 Courtesy of MAZDA MOTORS CORP.
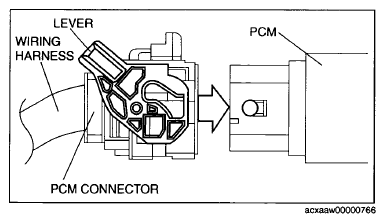
- Verify that the PCM connector lever is tilted towards the wiring harness side as shown in the figure.
- Insert the PCM connector straight until it contacts the PCM and verify that the lever reverts upward naturally.
 Courtesy of MAZDA MOTORS CORP.
- Push the lever until a click is heard.
- When replacing the PCM on the vehicles, perform the following: